How to Make the Background Transparent in Illustrator

Share
What you'll need
Interests
Series
By default, Illustrator creates a solid white artboard in the background. This is helpful when creating artwork so you can see better, but you might not want it there when it’s time to save the file. This guide will cover what you need to do in order to have a transparent background in Illustrator.
1 – Start a new file in Illustrator

Start a new file in Illustrator by clicking Create new… on the main menu. Alternatively, you can open an existing file to edit in a transparent background. You can drag and drop the file onto the workspace or use the File > Open menu.
2 – Enable transparent background
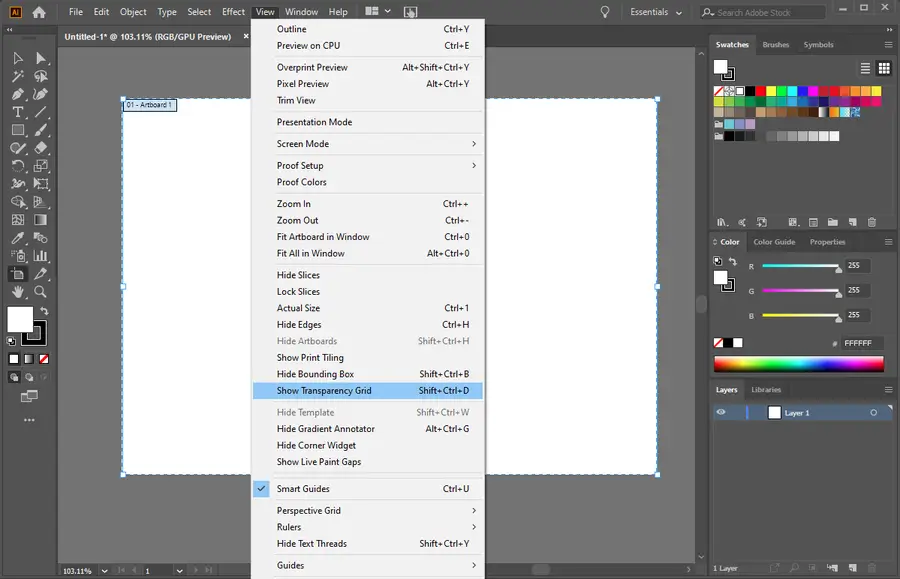
To remove the default white artboard, enable the transparency grid. You can find this setting under the View tab at the top. Select Show Transparency Grid.
You will know it’s working when the background appears as a white and gray grid.
3 – Create an image
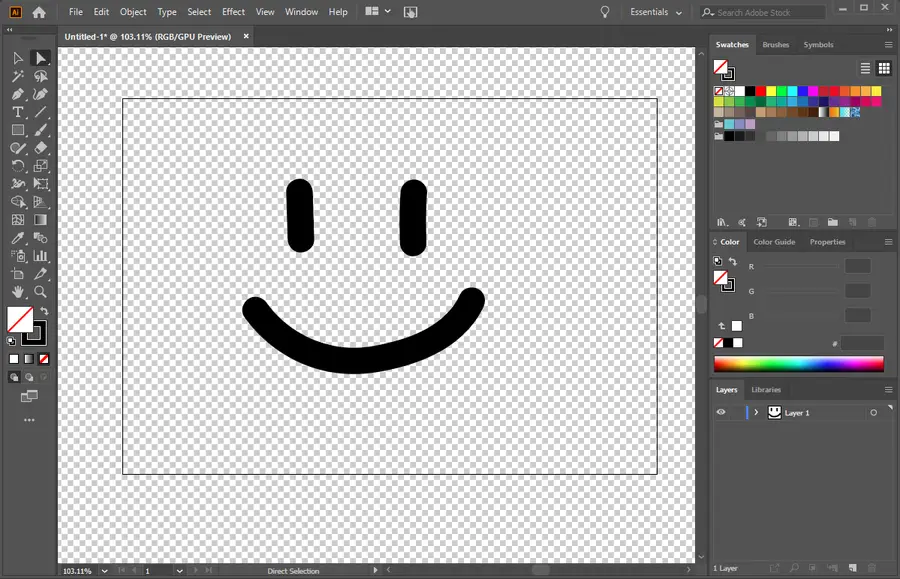
Now that you have a transparent background, you can create a design. The final result will have a transparent background if saved to an appropriate file type.
If you are editing an existing AI file, the transparent background should be visible where the artboard previously was.
4 – Save the file
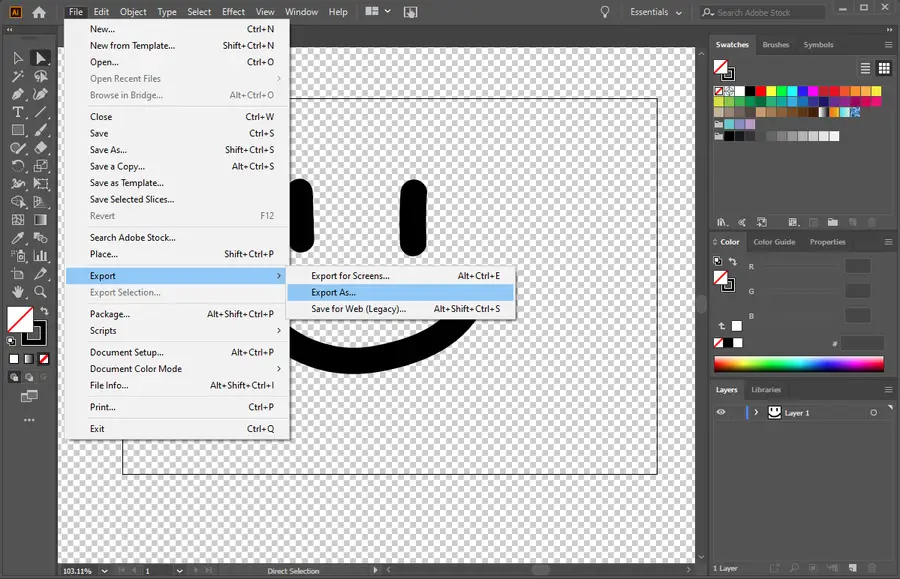
When your design is complete, save the changes with an appropriate file type so the transparency stays in the final product. You can save the image using the File > Export As… menu.
There are several file types that retain transparency. A few used by Illustrator are:
- PNG
- SVG
- TIFF
If you need to create something that scales, like a logo or graphic, then you’ll want to make sure you use vectors. If you’re a developer, then we can even show you how to optimize the SVG file to make it smaller.


