How to make a Raspberry Pi calendar

Share
What you'll need
Interests

Posted in these interests:

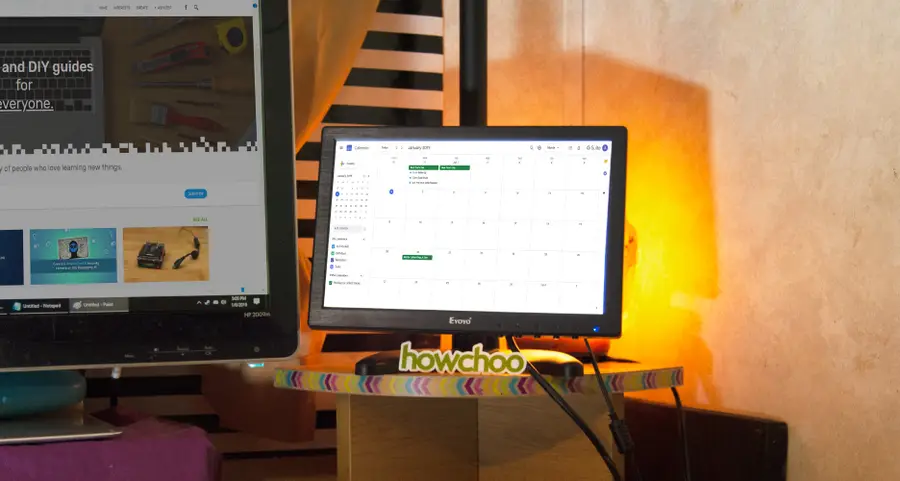
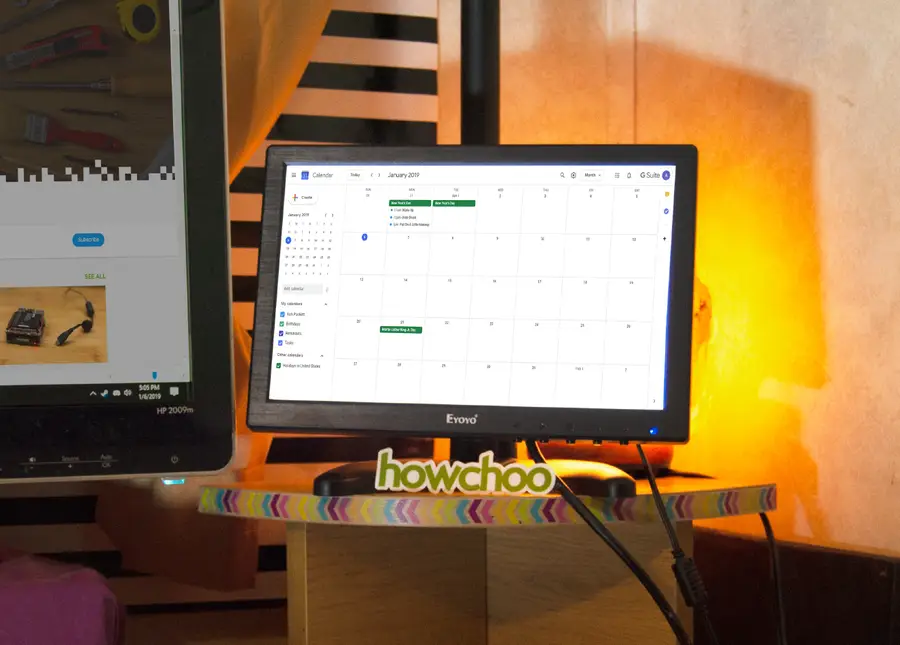
You’ll never need to buy another calendar again. This is a Raspberry Pi calendar that can sit on your desk, nightstand, or even be mounted on the wall. The Pi is synced with Google Calendar—making it easy to update from any device, display events for your family, and see changes in real time! Want to update your calendar? Just use your phone!
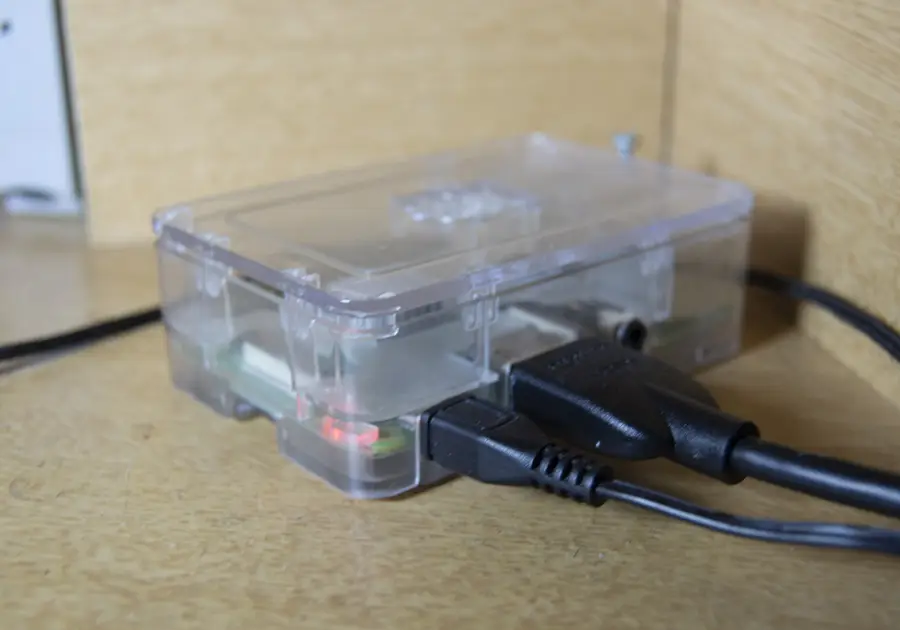
We only need a few things to get started. You’ll need a Raspberry Pi, I’m using a Raspberry Pi 3 B+ model. As far as a display is concerned, you can use any screen you like. I have a small Eyoyo screen that connects using HDMI. It comes with a small stand, making it a perfect desktop calendar. However, you could easily go one step further and use a wall mounted display.
1 – Install and update Raspberry Pi OS
We’ll need a fresh OS to get started. I’ll be using Raspberry Pi OS (formerly Raspbian). If you’d like to join me, visit our guide on how to install and update Raspberry Pi OS.

How to Install Raspberry Pi OS on Your Raspberry Pi
Get the new official Raspberry Pi OS on your Pi.
2 – Connect the screen and turn on the Pi
Once you have Raspberry Pi OS installed, it’s time to plug in our peripherals. Connect the screen to the Pi and plug in the power adapter.
3 – Adjust the first time boot settings
When the Pi first boots, Raspberry Pi OS will prompt you through a setup process. It typically guides you through creating a password, defining a timezone, and connecting to the internet. Once you have completed this phase, you’ll be presented with a desktop. It’s highly recommended to change the Raspberry Pi host name.

You may need to enable SSH. If so, open the start menu, highlight Preferences, and choose Raspberry Pi Configuration. Under the Interfaces tab, enable SSH and select OK. Restart the Raspberry Pi.
4 – Configure Chromium for your Google Calendar
Launch the chromium browser and access https://calendar.google.com. Log into your Google account and save the authentication information in Chromium. This will ensure your account is logged in each time the browser is launched.
5 – Create a custom bootup script
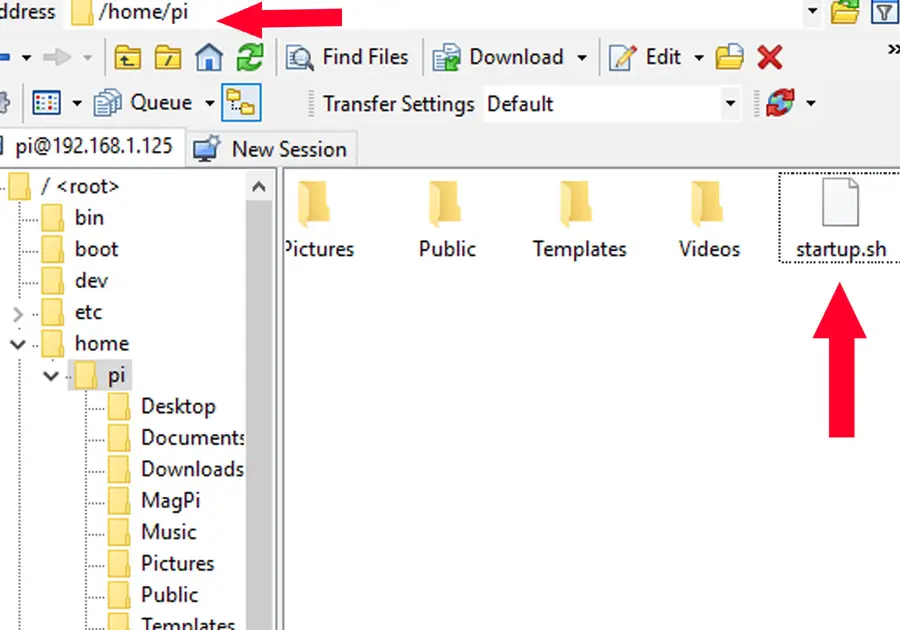
Next, we’ll tell the Pi to open Chromium to the Google Calendar page every time it’s powered on. To accomplish this, we will create a startup script that launches everything for us.
Create the startup script
You can use any text editor you like, I’ll be using Notepad++. Create a file with the following script.
Note: Chromium has trouble rendering the Calendar properly, this is resolved by running Chromium with a different user agent. You don’t need to do anything extra for this, I included the user agent information in the script below. Feel free to experiment with other user agents.
chromium-browser https://calendar.google.com --user-agent="Mozilla/5.0 (Windows; U; Windows NT 6.1; rv:2.2) Gecko/20110201" --disable-infobars --disable-session-crashed-bubble --kiosk &Enter a filename like startup and save it with a .shfile extension. Drop the file in the /home/pi/ directory.
Edit the autostart file
Now we need to tell the Pi to use our new script when it turns on. We’ll do this by editing the autostart file. Connect to the Pi using a terminal, like PuTTY, and run the following command.
sudo nano ~/.config/lxsession/LXDE-pi/autostartAt the bottom of the file, include the following string. Be sure to replace startup.sh with the filename you chose.
@sh /home/pi/startup.shSave the file using ctrl+x, press y, then enter.
6 – Disable sleep mode

The Pi will disable the screen display automatically. It’s rather difficult to check a calendar that isn’t there, so we’ll need to turn it off entirely. To do this, connect to the pi using a terminal, like PuTTY, and run the following command.
sudo nano ~/.config/lxsession/LXDE-pi/autostartAt the bottom of the file, include the following.
@xset s 0 0
@xset s noblank
@xset s noexpose
@xset dpms 0 0 0
Save the file using ctrl+x, press y, then enter.
7 – Auto-hide the taskbar
We will need to hide our taskbar so it doesn’t interfere with our display. Right click an empty place on the task bar and choose Panel Settings. Under the Advanced tab, select the option to Minimize panel when not in use.
8 – Hide the cursor on boot
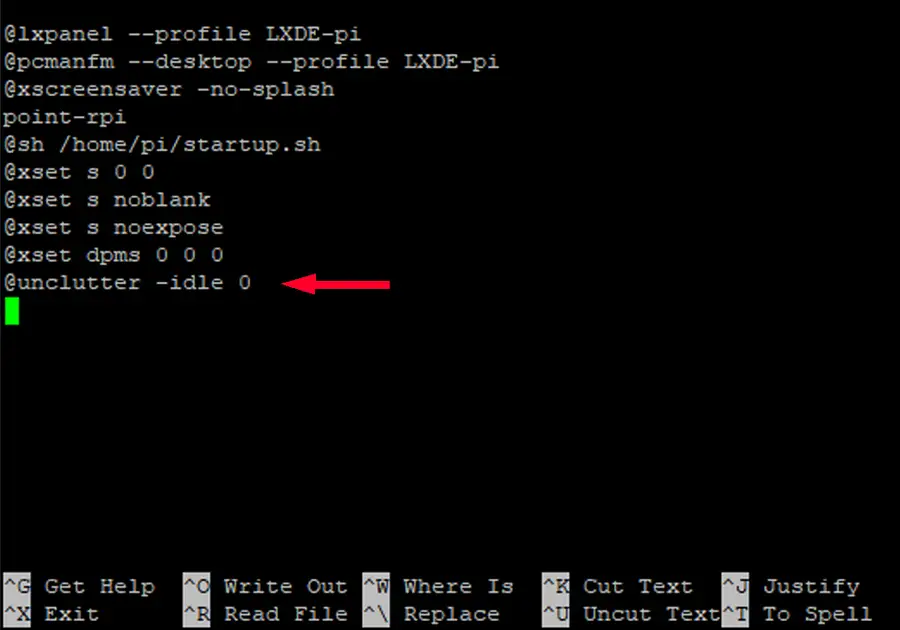
We’ll use a program called unclutter to hide our cursor. Install it using the following command.
sudo apt-get install unclutterNext we’ll need to update our autostart file. Access it again using the following command.
sudo nano ~/.config/lxsession/LXDE-pi/autostartAt the bottom of the file, include this string.
@unclutter -idle 0Save the file using ctrl+x, press y, then enter.
9 – Mark your calendar—it’s done!
Restart the Raspberry Pi for a final test of your work. If everything works, the calendar should launch in full screen with no errors and a hidden cursor.
Congratulations! You’ve created your own automated Raspberry Pi calendar. Now it’s time to set it up and enjoy your new device. Good work!


