How to Remove a Background in Illustrator
Share
What you'll need
Interests
Posted in these interests:


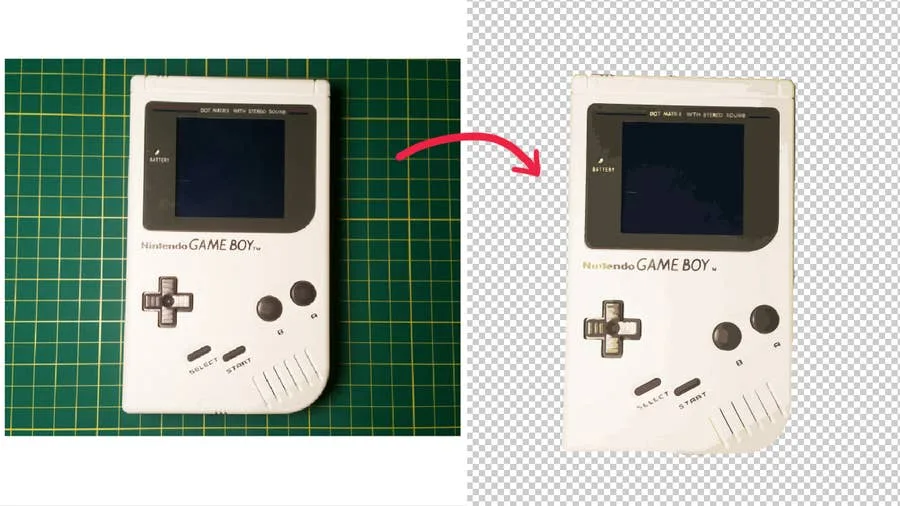
Adobe Illustrator has a few tools available that allow users to remove the background from their work. This process makes it possible to create artwork with transparent areas anywhere they want. In guide this, I’ll go over the easiest ways to do this, as there are more complex processes don’t always apply to general use cases.
I’ll provide a simple example as we go along, but be aware that’s possible to create more complex images with a little bit of patience and familiarity with Illustrator.
1 – Enable transparency
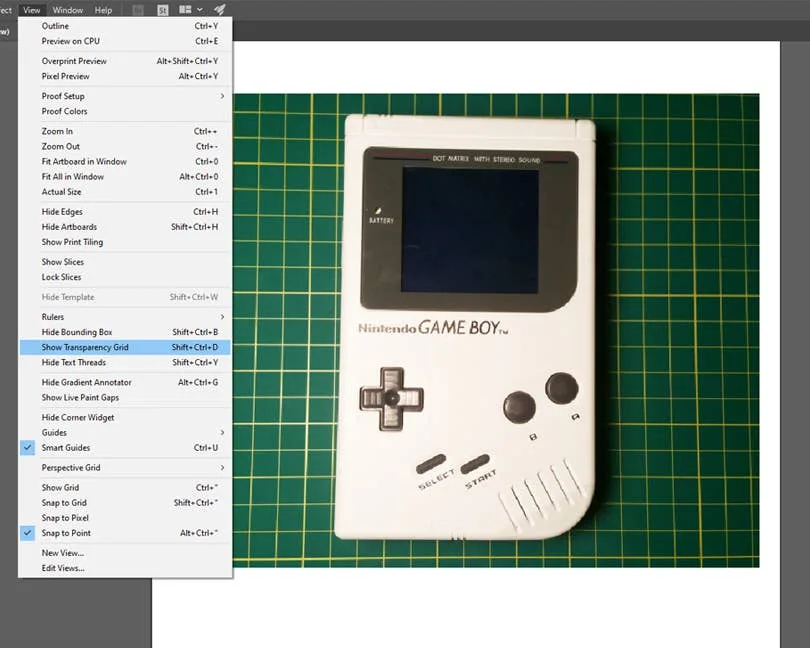
You’ll first need to ensure the image you’re working with is a vector. If it’s a picture, you can turn it into a vector by going to the top menu and choosing Window > File Trace.
Next, we need to enable transparency in order to delete the background, otherwise it defaults to a plain white background. To do this, go to the top menu and navigate to View > Show Transparency Grid. The Shift + Ctrl/Command + D keyboard shortcut will also enable transparency.
2 – Select the background
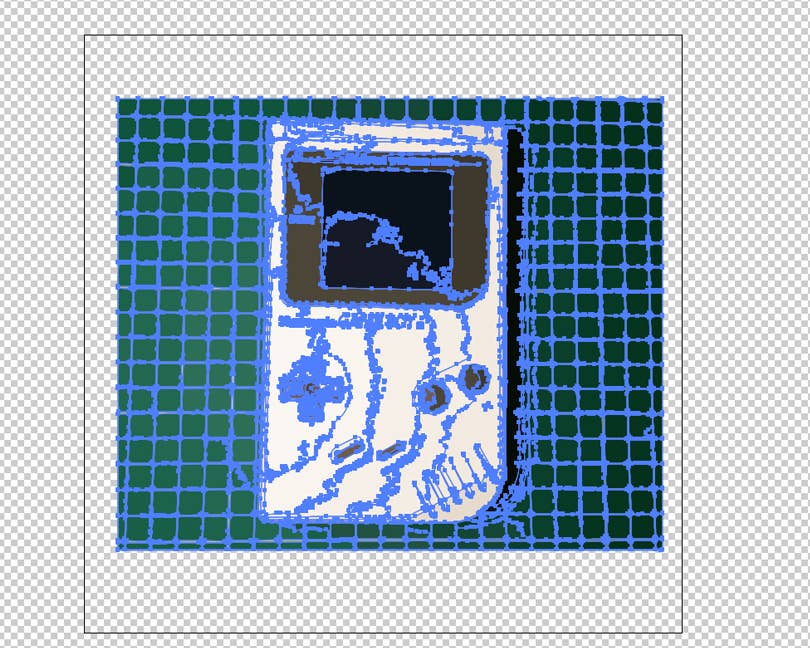
Select the image and go to Object > Expand from the top menu to show all of the points in your vector image. Select only the points that pertain to the background you want to remove.
3 – Delete the background
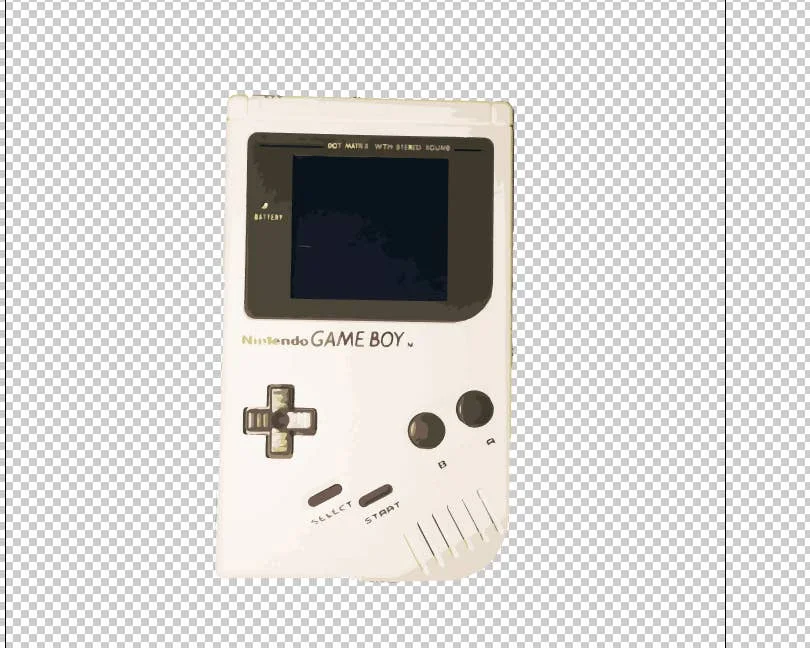
Once you’ve selected the background, press Delete on your keyboard. This will remove anything that was selected and replace it with transparency.
Now that your background is removed, you can save and export the image or continue your work in Illustrator.
4 – Alternative method: us a clipping mask
Alternatively, you can use a clipping mask to remove the background. You will need to enable transparency from step one and then follow our guide on how to use a Clipping Mask in Illustrator to make the background transparent.

How to Make a Clipping Mask in Illustrator
Cut out images with custom shapes in Illustrator.


