How to Crop an Image in InDesign

Share
What you'll need
Interests


You’ve placed that great image into your InDesign document, but only want to use a portion of it. We’ve all been there.
Of course, you could crop your placed image in a separate software application like Photoshop or Lightroom. There’s really no need to open up another application, however. You can easily crop the image in InDesign.
In this guide, we’ll show you how!
We’re going to assume you’ve already placed and fit your image into the frame. If you need help with this, then see our guide on inserting images in InDesign.

How to Insert an Image in InDesign
Knowing how to insert images is an essential skill for InDesign work. We can show you how!
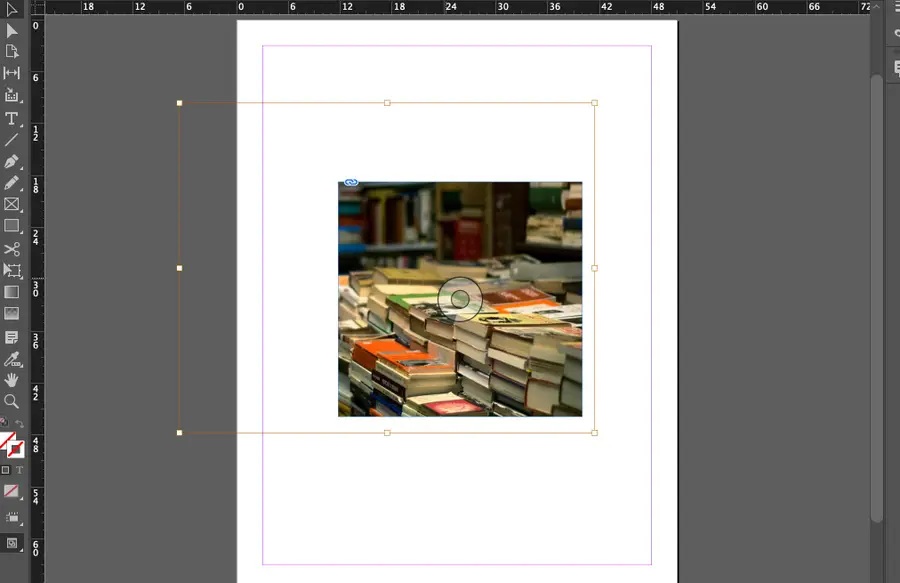
1 – Click the gray circle in the center of your image
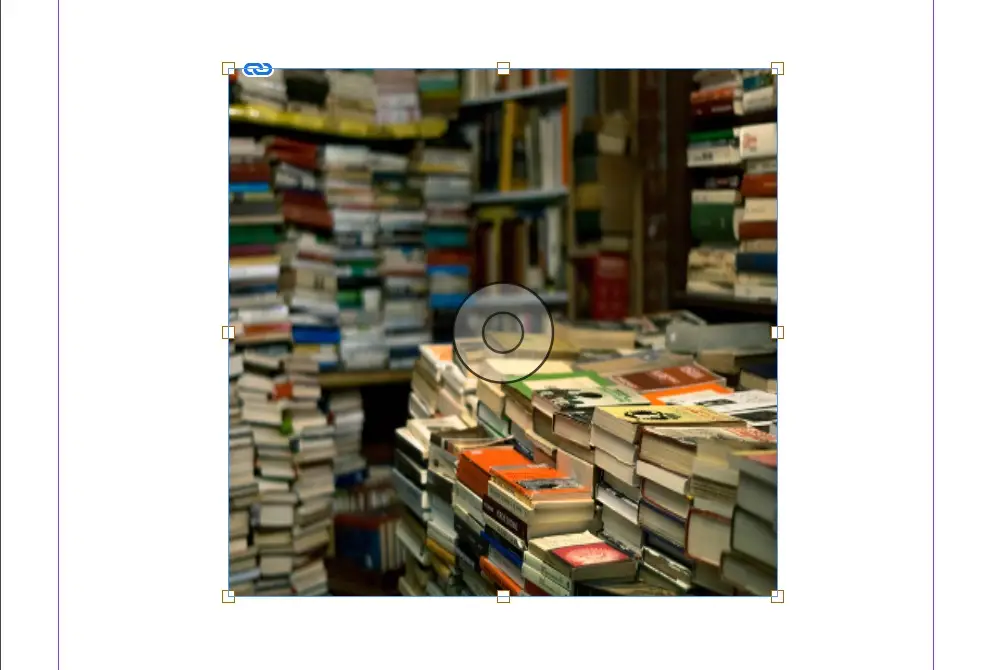
You should see a small gray circle in the center of your image’s frame. Click it. This should change the frame and box color to red. (See step image.)
This gray circle allows you to do a couple of things:
- Select the image in the frame, as opposed to the frame.
- Adjust the image, separate from its frame.
Think about the frame and image as a literal window frame with a cloudy sky in the background respectively. InDesign allows you to actually edit and move around the sky in the background while keeping the frame the same.
2 – Constrain your image proportions
In the “Transform” pane near the top-right of your InDesign screen, make sure the chain links are locked (as shown). This will ensure that your image does not lose its proportions as you enlarge it.
Also, note that if your original image was quite small, you may not be able to enlarge it enough for cropping into your frame (whether in InDesign or elsewhere). You’ll need a bigger image from which to work.
3 – Click and drag a corner out to expand the image
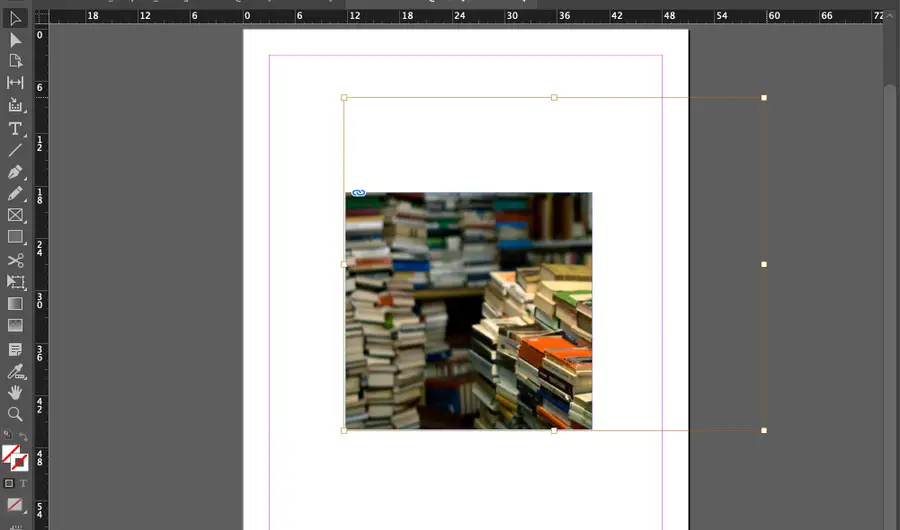
Click on one of the corner boxes and drag it outward to expand your image’s size.
Notice that:
- The frame does not change. Just like a window, you can only see what’s showing through the frame.
- Some of the image is missing and can’t be seen. (It’s what’s outside of the frame.)
4 – Drag the gray circle to crop the image
When you click and drag the gray circle now, you’ll essentially be cropping the image into your frame. Just drag the image until only the portion you want appears in the frame.
If you need to, you can enlarge or shrink the image (step 3) as needed to make the perfect crop.