How To Browse Privately on the Oculus Quest 2
Share
What you'll need
Interests
Posted in these interests:


Facebook, now branded as Meta, is notorious for gathering as much user information as possible. Regardless of how anyone feels about it personally, if you want to play on an Oculus Quest 2, you have to use your Facebook account to do it.
The Best Private and Secure Social Media Alternatives to FacebookFacebook steals your data, these services do not.
There is at least one way to easily hold onto your data, though. Rather than using the default settings for their VR browser, you can simply enter private mode!
Here’s our simple-to-follow guide to activating private mode browsing on the Oculus Quest 2!
1 – Open the browser
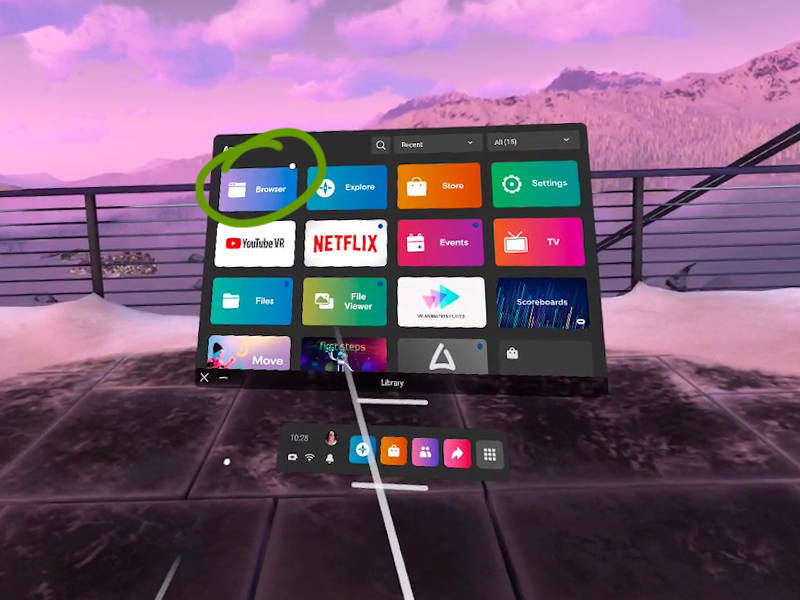
Located inside your library, click the browser app with the trigger on the touch controller.
2 – Open the menu
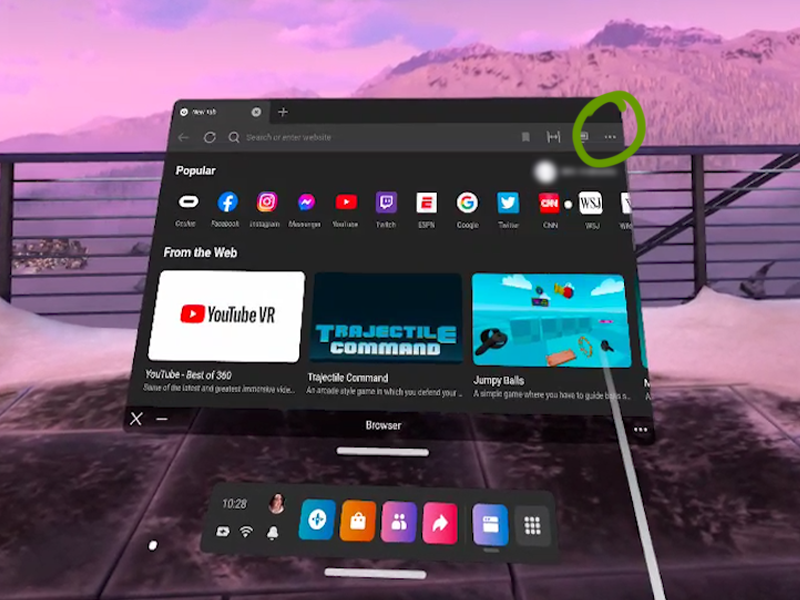
In the top right corner of the browser window, click the ... button with the controller.
3 – Enter private mode
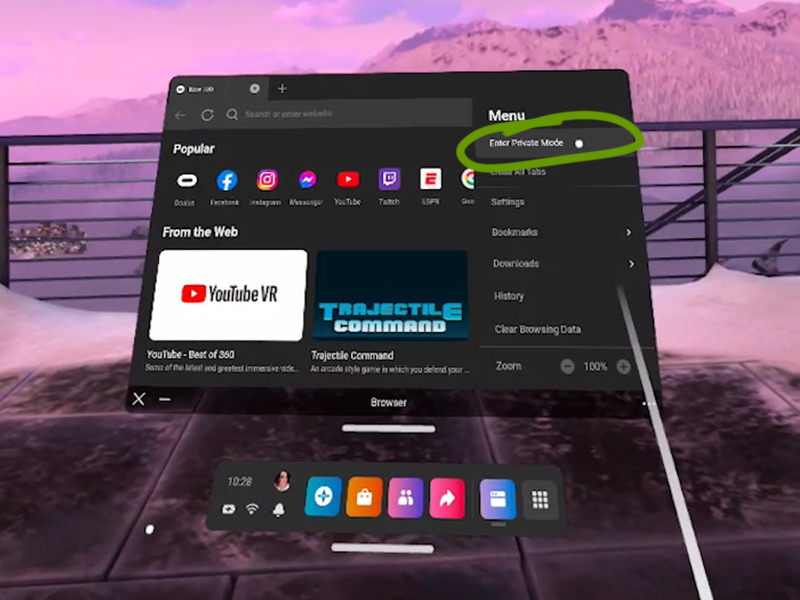
In the dropdown menu, choose “Enter Private Mode”. A new window will appear.
4 – Enjoy browsing privately!
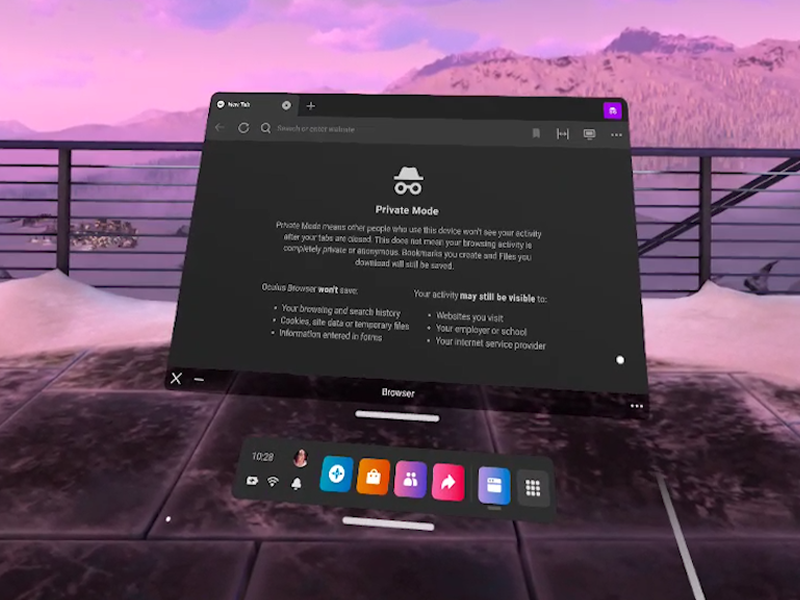
A new window will appear that explains what is and isn’t shared while private mode is enabled.
The Oculus browser won’t save:
- Browsing and search history
- Cookies, site data, or temporary files
- Information entered into forms
Unfortunately, your activity will be visible to the websites you visit, your employer or school, and your internet service provider (ISP).
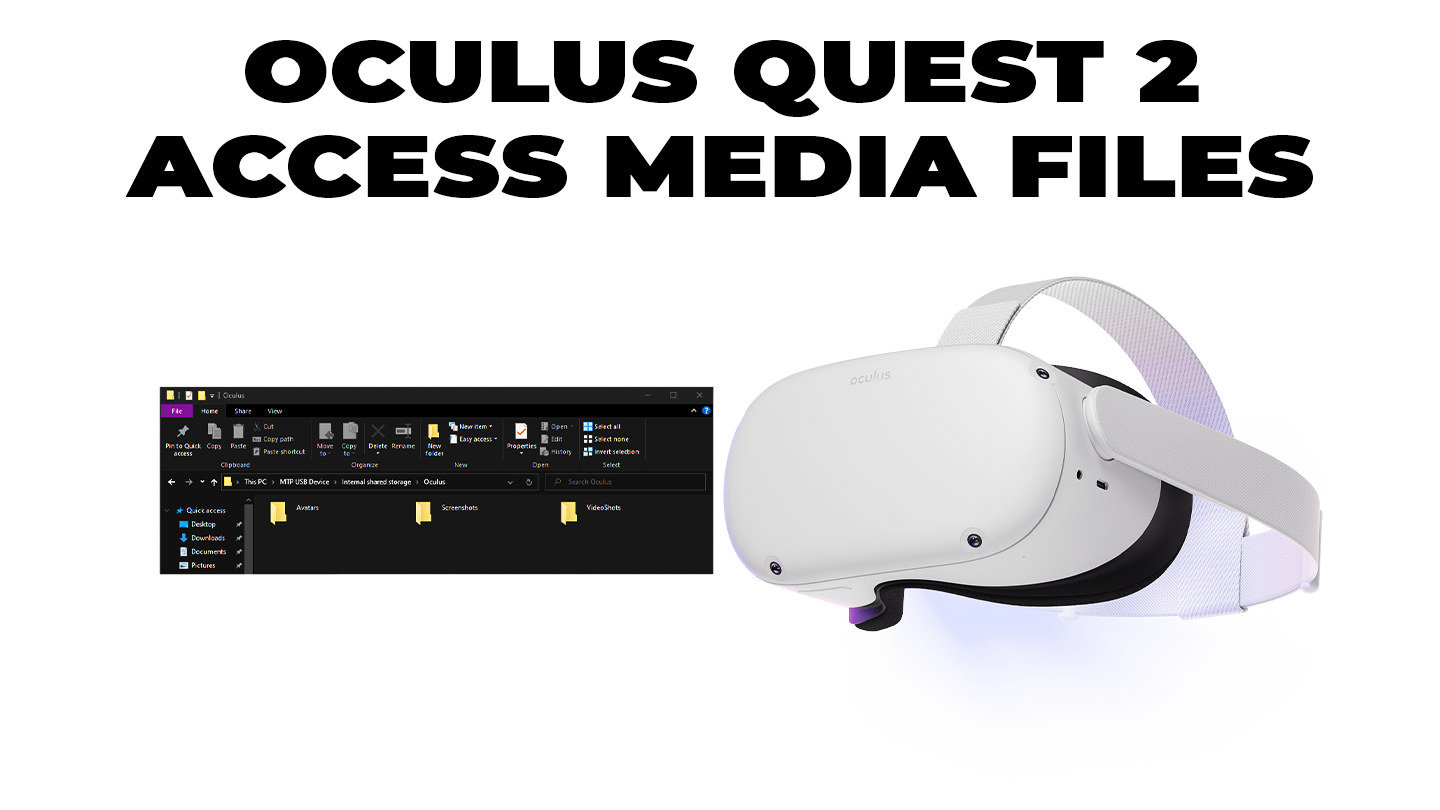
Check out our guide on how to access files on the Oculus Quest 2!


