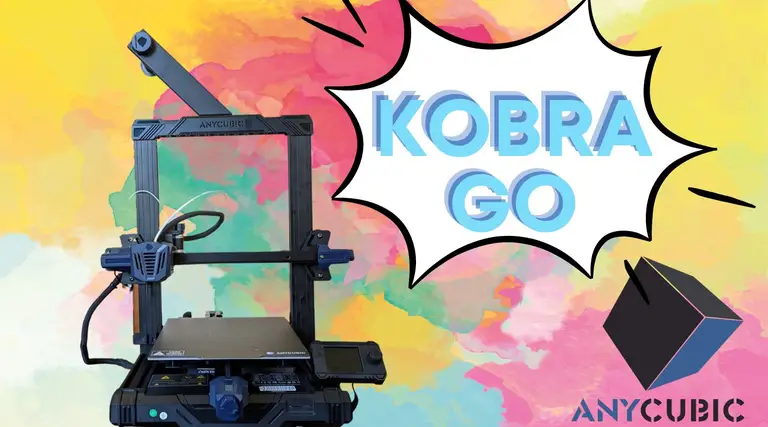
Creality Ender 3 Review: The Best 3D Printer Under $200

Behold the Anet A8 slayer.
Zach Zach (248)
0
Our rating: 4.75/5

The Ender 3 from Creality 3D has been one of the most anticipated 3D printer releases in recent years. Released in March 2018, the Ender 3 is a great example of everything that a budget 3D printer should be.

Originally released for less than $200, the Ender 3 offers great value, sporting features normally found in high-end printers: a Bowden extruder, heated bed, full extruded aluminum frame, V-slot wheels, and the ability to print ABS.

I was blown away that a budget printer could offer so much so I dove in to see what I could find wrong. As it turns out, I really couldn’t find much at fault. This is an extremely robust printer for the price and could easily demand a higher price tag. In addition, you can perform further Ender 3 upgrades down the road, both easily and inexpensively.

My primary printer is the Anet A8, which until now was seen as the standard for full-size budget 3D printer “kits”.

Will the Ender 3 unseat the A8 and take its rightful throne? In this Creality Ender 3 review, we'll answer that question—and more.

DEAL ALERT:

Apparently right now you can get the Ender 3 for around $200 (shipping is free too).

I'm not sure how long this deal is active but I'll remove this message once it's expired.

Pros

  • Quick assembly
  • Inexpensive
  • Great printing quality
  • Large bed/print volume
  • Heated bed
  • Prints both PLA and ABS

Cons

  • Arrived with bed wobble (fixed by tightening the eccentric nuts)
  • No glass bed included (this is common)
  • No wireless printing (though this can be added with OctoPrint)
  • Not a lot of test filament included
  • Some control interface gripes

Specs

Attribute
Build volume 220 x 220 x 250mm
Print materials PLA/ABS
Filament diameter 1.75mm
Nozzle diameter 0.4mm
Construction Extruded aluminum channel
Extruder type Bowden
Heated bed Yes
Weight 17.1 lb
Dimensions 22" x 23.6" x 24.4"
Price About $200 on Amazon

Ideal for:

  • Beginners
  • Intermediate and advanced users
  • Teachers
  • Students
  • Small business prototyping
Creality Ender 3 3D printerCreality Ender 3 3D printer ×1
Borosilicate glass bed, 235x235mmBorosilicate glass bed, 235x235mm ×1

Howchoo is reader-supported. As an Amazon Associate, we may earn a small affiliate commission at no cost to you when you buy through our links.

Ender 3 unboxing

When the shipment arrived I thought it was part of a multi-box delivery that was missing some pieces. It turns out this is just very compact and well packaged! Everything fits together nicely.

In the box, you get:

  • The Ender 3
  • SD card
  • Various tools for assembly
  • Replacement nozzles
  • Nozzle cleaner
  • Zip ties
  • Wire cutters
  • Print removal tool
  • Sample filament
Ender 3 assembly and setup

One nice thing about the Creality Ender 3 is how easy it is to assemble. Most "budget" 3D printer kits take hours to assemble. For example, my Anet A8 kit came in hundreds of pieces and took several hours to assemble.

The Ender 3 took about 30 minutes to assemble. The instructions mirror the "IKEA-style" manual whereby photos are used in lieu of broken English. Honestly, the instructions are only about 75% complete; they don't include information on leveling the print bed screws or loading filament. Even so, accomplishing these tasks were a breeze.

Be sure to set the power supply switch to the proper voltage: 115V for US or 230V for Europe.

Assembly video

Watch the video:

Leveling

Leveling is my least favorite part of the 3D printing process. Thankfully, compared to other printers I've used, leveling the Ender 3's bed is a breeze.

No longer will you need to order special nuts and bolts or 3D print your own knobs; the Ender 3 comes with large, built-in leveling knobs that you can turn with your fingers to level your bed quickly and easily.

Fixing Ender 3 bed wobble

If your bed seems a bit wobbly, tighten the eccentric nuts on the bottom of the unit until the bed doesn't wobble anymore. Mine came out of the box with some extreme wobble and I thought it was damaged in shipment. Turns out it was just loose (in my research I found a lot of people experienced this).

For the uninitiated, concentric nuts are basically nuts where the hole is off-center; by rotating the nut, you can move the item that's threaded through the hole (in this case, the wheels that stabilize the Y-axis). Just turn the nut a bit until the bed moves smoothly in the Y direction.

Loading filament

To load filament, select the preheat option in the menu, pinch the springed clamp on the feeder, and then push the filament all the way through the [clear] Bowden tube until a bit comes out of the heated nozzle. This wasn't super apparent since most Bowden extruders I've used can activate the feed mechanism through the printer settings/interface.

One thing I noticed is the "Preheat PLA" option in the menu heats the printer to 185°C; however, the temperature range for my PLA filament is 195-230°C. However, this shouldn't be an issue for loading filament.

Ender 3 build quality

The build quality of the Ender 3 surprised the heck out of me. The unit's primary structure is comprised of extruded aluminum channel rather than the cheap acrylic or stamped steel found on many inexpensive 3D printers, providing stable performance.

In fact, the only plastic parts on the machine are the power supply switch cover and a few other nonstructural components. Fitment is very good as well; tolerances line up, meaning that things fit together as they should without difficulty or gaps.

The extruded aluminum channel provides excellent rigidity as well; rigidity is an important factor in getting high quality 3D prints.

Ender 3 motion system design

Rather than using a rail-on-bearing system, the Ender 3's various axes uses V-Slot aluminum channel and POM wheels. In english: when the printer moves in the X, Y, or Z axis, the movement is supported by small wheels that run in tracks.

This innovative design provides precise positioning and results in quieter, higher quality prints and is normally a feature of higher-end machines. The only downside is tightening the concentric nuts to align the wheels and reduce wobble—this should only need to be done once.

Ender 3 footprint

The Ender 3 has a surprisingly compact footprint, especially when compared to a printer like the Anet A8. With a total size of 17.32" x 16.14" x 18.31", the Ender 3 doesn't take up an enormous amount of table space.

This printer features a rigid base. With many printers the base is flexible and is technically leveled to the surface it's sitting on (e.g. a desk or table). The Ender 3 features a rigid base, meaning that you can move it around without needing to re-level it each time, which is nice.

Ender 3 heated bed

The Ender 3 comes with a fast heating bed built in—this is a necessity for printing ABS, and (in my opinion) a necessity for printing PLA. A heated bed ensures proper bed adhesion so this is always on my list of requirements for any 3D printer.

Though not strictly necessary, I recommend picking up a glass bed to place over your heated bed. Glass beds make it easier to remove completed prints and are less of a pain than replacing tape or Build-Tak.

If you want to print quickly and easily, buy a glass bed. They run about $20 and are totally worth it. Before printing, just cover it with a thin layer of cheap hair spray and let it dry. This is the glass bed I purchased.

Ender 3 bowden extruder

The Ender 3 features a Bowden-style extruder; this means that the filament feeding mechanism is not attached to the extruder. Instead, it sits off to the side and filament is fed into the extruder through a clear tube.

Why is this important?

Well, it makes the extruder much lighter—and a lighter extruder means faster, higher quality prints. Heavy extruders tend to whip around at higher print speeds, ruining your print. Bowden extruders are the standard for avoiding this issue entirely.

I own an Anet A8. I rarely use it because it can be a death trap. Many budget or kit 3D printers forego basic safety features in order to keep the price as low as possible.

Creality didn't skip safety class. This printer features a fused plug to prevent shorts from becoming fires. The firmware installed on later Ender 3 production units includes thermal runaway protection. You can also easily do an Ender 3 firmware update yourself to add this protection to earlier units.

I feel comfortable using the Ender 3 even when I have to step out of the house for a few minutes.

Ender 3 print volume/bed size

Ender 3 bed size

The ender 3 bed size is 220x220mm and has build height of 250mm, making the Ender well-suited to print most things you'll want to print. This is a sufficiently large printer compared to a miniature printer like the Geeetech E180.

Ender 3 control screen

A built-in backlit LCD screen gives you access to the normal list of controls like preheating the printer, selecting files to print, and even controlling the X, Y, and X axis movements to aid in leveling your bed.

A single control knob lets you cycle through menu items, selecting items by pressing the knob in. The computer in the Ender 3 is noticeably better than the Anet A8's; the A8 seems to be single-threaded, requiring you to press a button and wait for the machine to respond before pressing another button.

There are three things that I don't like about the control interface in general:

Print speed can be accidentally adjusted

One thing about the Ender 3 interface that you absolutely must know is that turning the knob while on the "main info" screen actually adjusts print speed. You read that right. This is a cryptic feature because the only indication that this is happening is a percentage shown next to an fr symbol on the screen. I had to search through the manual to figure out what this meant.

I could see this being a neat feature if you wanted to speed up a print quickly in a case where quality doesn't matter. But honestly, this is a terrifying feature because a single bump could majorly screw up your print. I'm hoping I can disable this feature in a firmware setting or something.

Annoying print progress indicator

The print progress indicator is just a bar that fills up. It would be nice if it told me how much time remained on the print or, at the very least, the exact percentage of the print remaining. This seems like a trivial thing to add since the elapsed printing time is already visible on the screen. You sort of need to look at the bar, look at the elapsed time, and then mentally estimate how much time is left on the print.

No time to dwell

My only other gripe with the interface is that it returns to the "main information" too quickly. In other words, if you have a menu open and let the screen sit idle without making a selection, it will return to the main screen in about 10 seconds. This forces you to cycle through the menu again, which is a minor annoyance.

These issues aside, this printer provides a nice interface that's easy to use.

Spool of 3D printing filament

One thing that really blew my mind about this printer is that it can print both PLA and ABS plastics. The ability to print ABS is uncommon for inexpensive printers. ABS is the same plastic commonly found in car parts. This type of filament is far stronger than PLA and has a higher melting point, making it more suited for hot conditions (like things that might sit in the sun or your car).

While PLA is sufficient for most things you'll want to print, it is nice to have the option to print ABS as well. The only downside to printing ABS is that the fumes are toxic so you must print with good ventilation. There are tons of DIY ventilation setups out there you can build yourself. PLA is safe to print indoors but decent ventilation is still recommended.

Ender 3 SD card location for loading prints

This printer supports gcode files from any program—I recommend using Cura from Ultimaker to slice your drawings into gcode files.

If you're a beginner, here's a basic software breakdown of how you print 3D models:

  1. Load a drawing into a program like Cura
  2. Set your print settings (resolution, filament type, etc.)
  3. Cura will slice your drawing up and output a gcode file, which is a standardized 3D printing file format.
  4. You load the file into your printer and it prints.

You can load your files into this printer using either the [included] micro-SD card or via USB. The SD card slot is placed right in the front, as it should be, and not in some far-off stupid place.

Another feature I love is the ability to resume prints in the case of a power outage. If there's a power failure or power cut, you will be given the option to resume the print once power returns.

The resume print feature also works if you want to stop the print manually—which is handy if you need to run to the store or go to bed and don't want to keep an eye on your print.

Ender 3 print quality

This photo shows the first print I ran immediately after leveling the bed. I printed the sample print that came on the included SD card, which always seems to be a dog for some reason (c'mon, just give us Benchy).

One very silly thing is that the printer doesn't come with enough test filament to print the entire dog. You'll need your own spool of PLA handy if you want to use the test print—but you should probably have some on hand anyways. :)

Overall, this printer produces excellent quality prints.

Ender 3 test print

This photo shows finer print detail: good extrusion with no stringing or noticeable tags.

Fully assembled Creality Ender 3 3D printer

Honestly, for the price I don't think a better printer exists. This printer fully exceeded my expectations and destroys the Anet A8 in comparison. I firmly believe that this printer will unseat the A8 as the ultimate $200-range budget 3D printer. For those of us who can't (or won't) drop $1,000+ on a printer, the Ender 3 is a spectacular choice.

There's a new sheriff in town, A8, and your days are numbered. I'll miss you, but not that much.

Where to buy

If you're looking for a great budget 3D printer, check out the Ender 3 on Amazon.

If you thought my review was helpful, be sure to share it with your 3D printing buddies :) Happy printing!

Geee, what a printer! And it mixes colors?!
Ash Ash (362)
0

This is the Geeetech A20M large scale 3D printer. It comes with loads of cool features, extra goodies, and exciting end results. It features a heated glass bed and even supports multiple filaments.