Using 3D Reference Models in Clip Studio Paint

Share
What you'll need
Interests

Posted in these interests:

Have you ever struggled with dynamic poses or trying to find a precise reference photo? Having good references is an important part of the prep process when it comes to drawing. Traditionally, many art classes have students practice figure and anatomy drawing by studying a real life model in class. Thankfully, now, there are other ways to gain access to models and poses through digital software! Clip Studio Paint’s 3D models and 3D Modeler Asset is one of those options and is genuinely a great and customizable tool. This guide will show you how to import and manipulate 3D models in CSP so that you, too, can get just the right pose for your character!
1 – Choose and Import Your Model
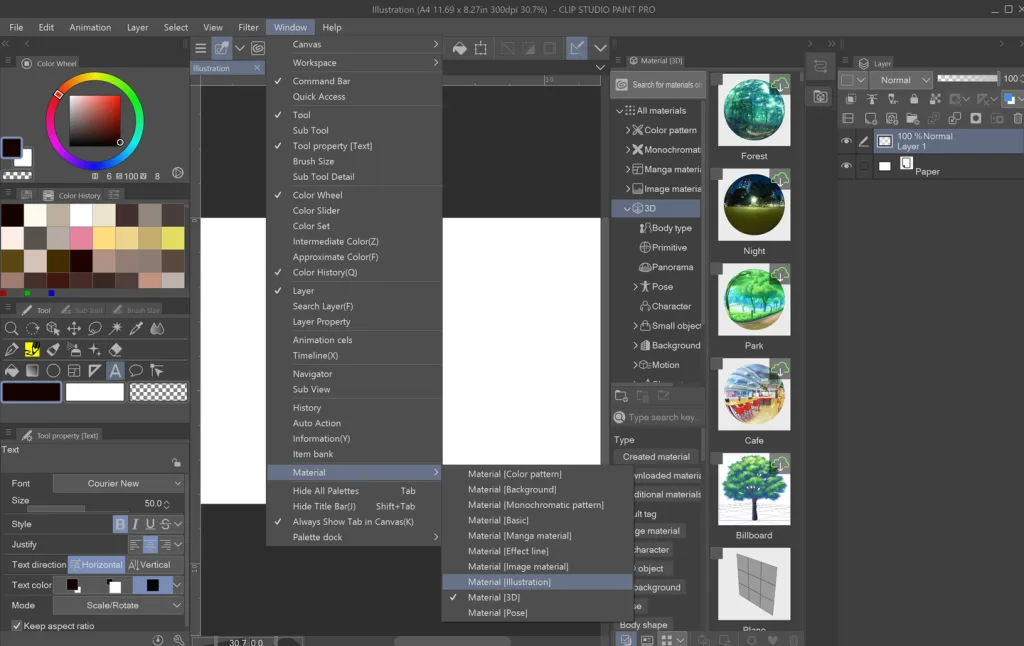
First, you need to import your model. To do this, you will need to open up the Materials tab. If you don’t already have a shortcut for this, then you can go to Window > Material > 3D Materials. Once you have the Materials tab popped out, you can select from a variety of options from scenes to objects and people!
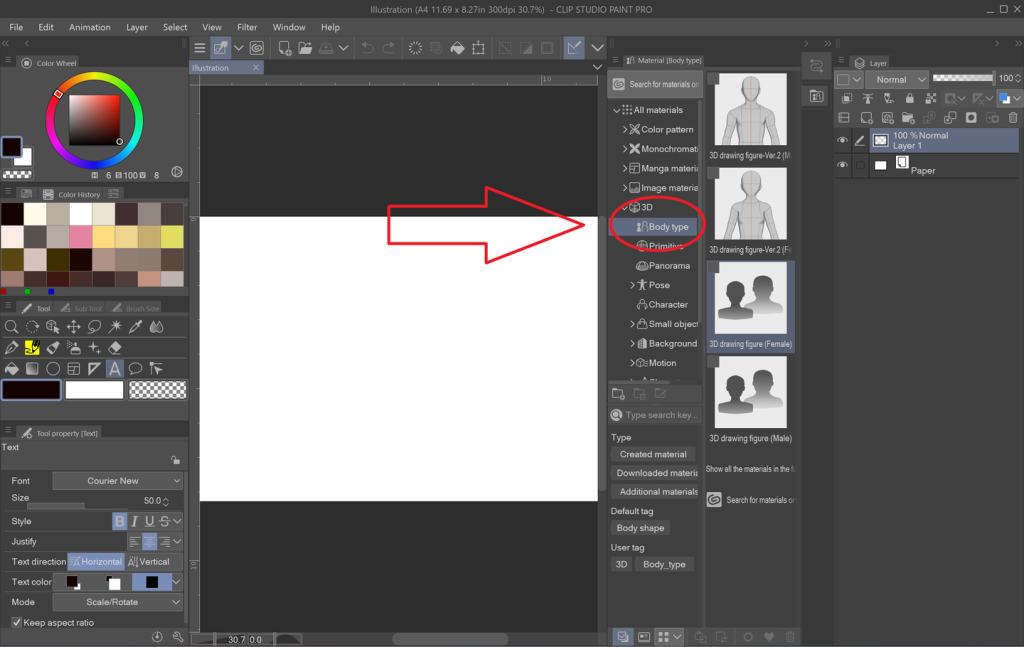
For human 3D models, click the 3D drop down menu in the Materials tab and select Body Type. CSP already comes with two types of models to choose from, both having male and female counterparts.
To import your desired model, simply drag and drop it on to the canvas.
If you want a further variety of models to choose from, you can download more via Clip Studio Paint Assets!
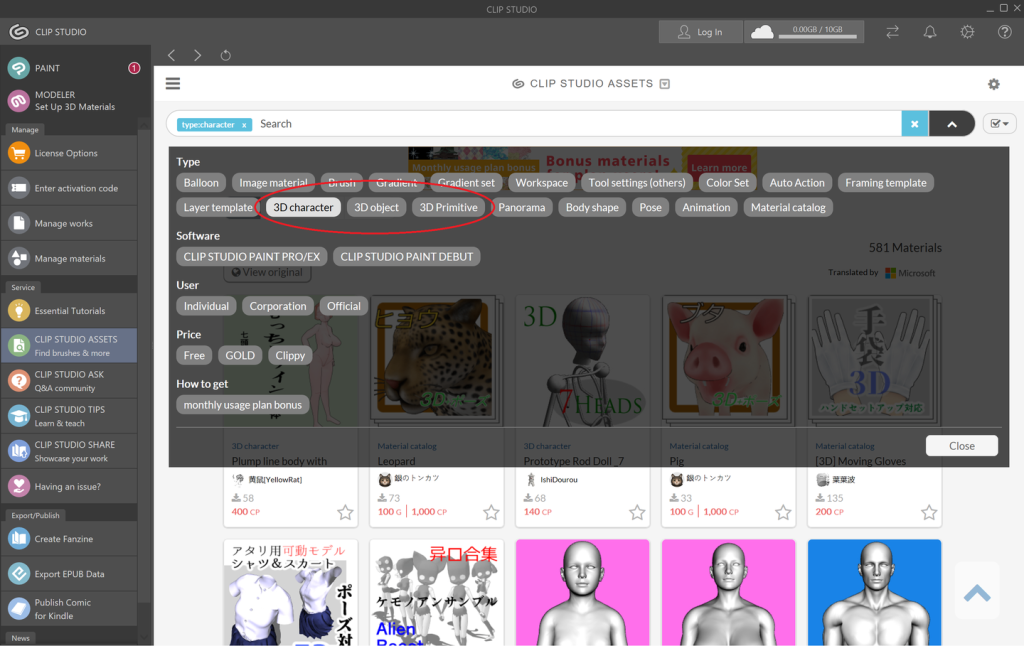
From there, you can browse a wide selection of user-made models and assets. Although some assets and models may require payment, there are also tons of free ones as well! If you would like to know how to access CSP Assets and download materials, then check out this tutorial. This tutorial uses downloading brushes as an example, but it’s the same process for all CSP Asset materials, so have fun browsing!

Downloading and Adding Assets in Clip Studio Paint
2 – Adjust Perspective, Placement, and Size
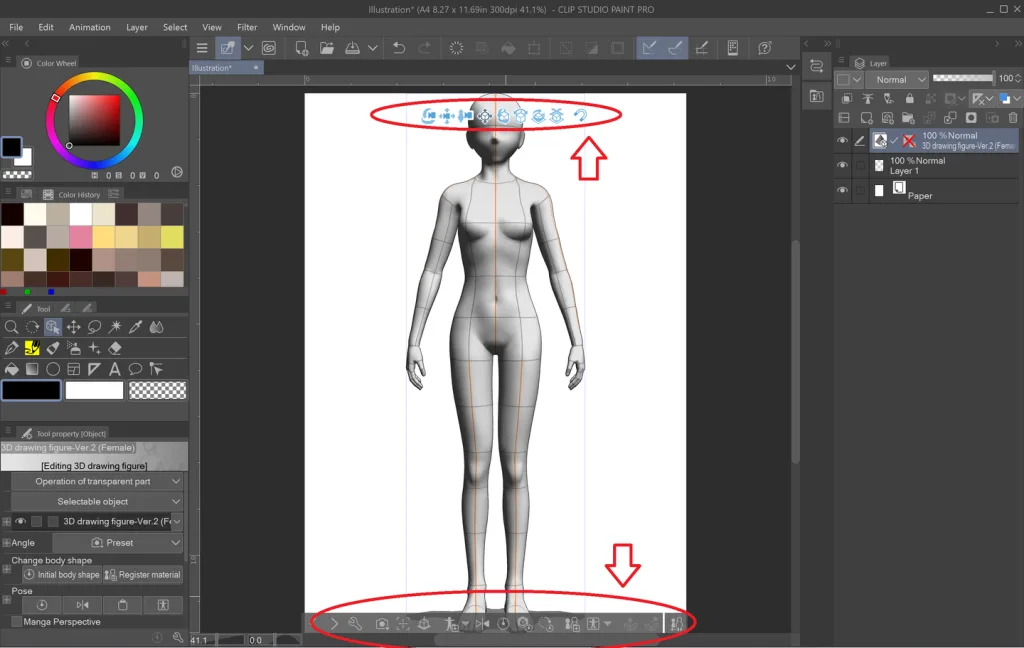
After you import your model, two smaller toolbars will appear on your screen above and below your model. The smaller one above your model with the blue icons adjusts the “camera” or how your model will be viewed on the canvas.
With the icons on this toolbar, you can adjust the size, angle, and perspective of your model.
You also have access to a cheat sheet via the Angle Presets menu, which is located in the Tool Properties tab on the left-hand side. If you don’t want to spend too much time fiddling with your model, you can select a preset angle from this drop down menu.
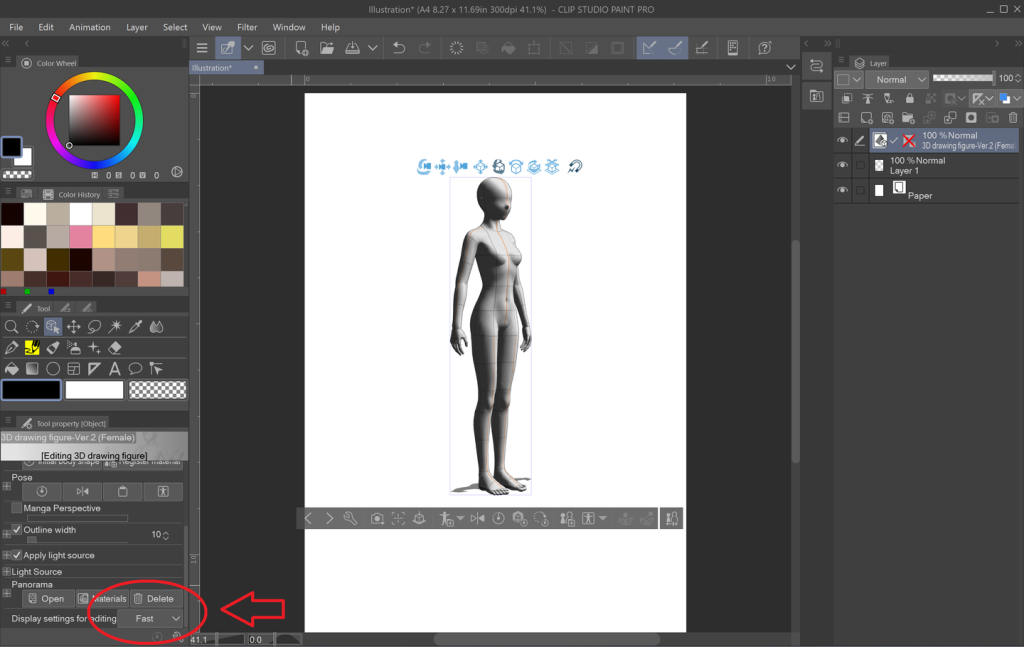
At the bottom of the Tool Properties for 3D modeling, there is a small drop down next to Display Settings for Editing. I highly recommend selecting the Fast setting from this drop down before start posing your model. This setting effectively helps Clip Studio Paint run a little smoother while you’re finagling your model and moving it around.
3 – Pose Your Model
Now, it’s time to pose your model! This process may take a bit of time learning and getting used to, but once you do, you can get some really dynamic poses from adjusting your model.
You can start with clicking on a large portion of your model and grabbing the blue dots where major joints would be. When it comes to limbs and individual appendages, you can then drag the motion lines that encircle the selected part to change the angle on them. The motion grid around the selected body part indicates the range of motion for that particular piece. For example, you can twist the model’s hand around on this circular grid to face the model’s palm upwards.
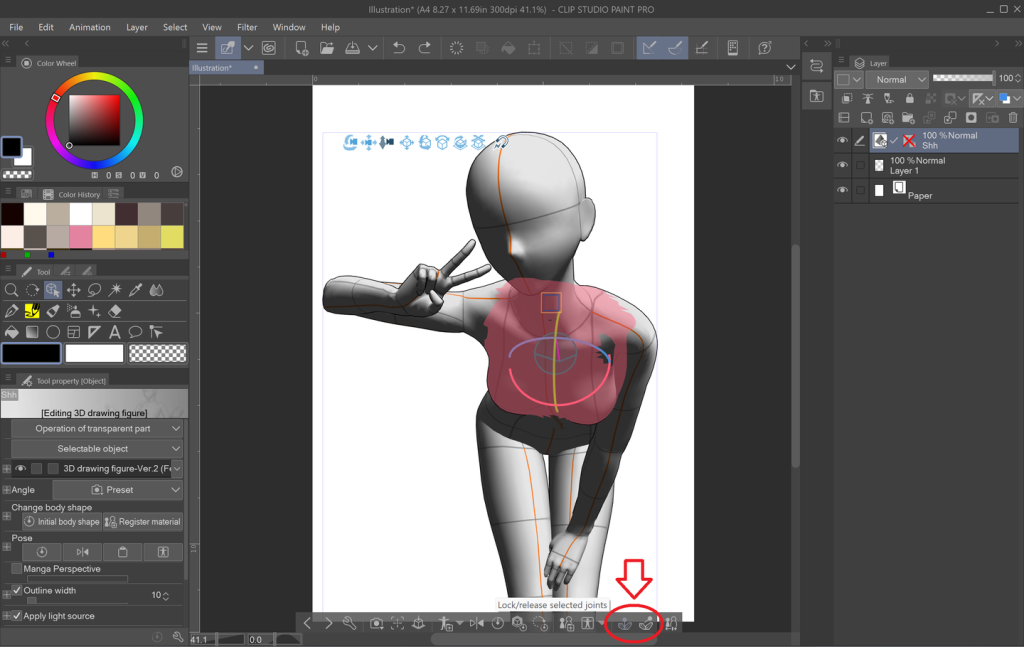
While you’re posing your model, you might want to keep a portion of the body still. To do this, you will need to lock specific joints. This is where the bottom toolbar comes into play. On this toolbar, you can flip your model, return it to its standard position, lock joints, and play with body proportions. In this example, you can lock the joints by selecting each body part you want to remain still and clicking the dandelion-looking icon on the bottom toolbar.
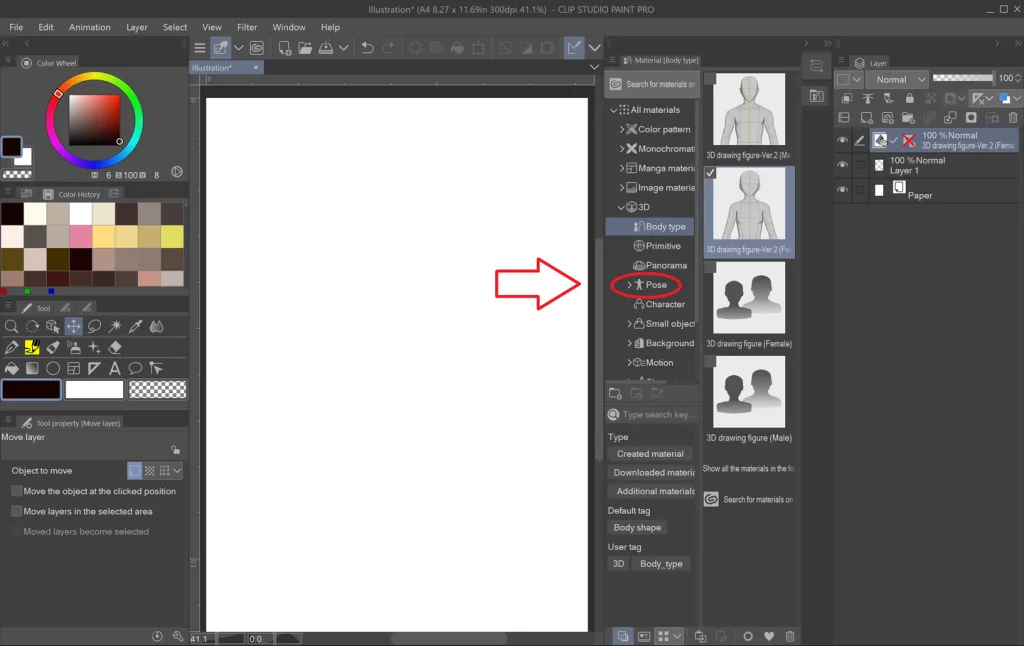
While I highly recommend playing with the model’s pose and creating one from scratch to get a better understanding of this tool, you can also import preset poses as well. To do this, go back to the 3D drop down menu in your Materials tab and select Pose. From there, you can scroll through a list of presets that automatically come with Clip Studio Paint. After you find a pose you like, drag and drop that pose on to the model on your canvas.
You can also do the same process with hands! This is probably my favorite cheat when it comes to the 3D modeler. There are hand pose presets in CSP that you can drag and drop on to the individual hands of your model. So useful!
4 – Touch Ups and Fine Tuning
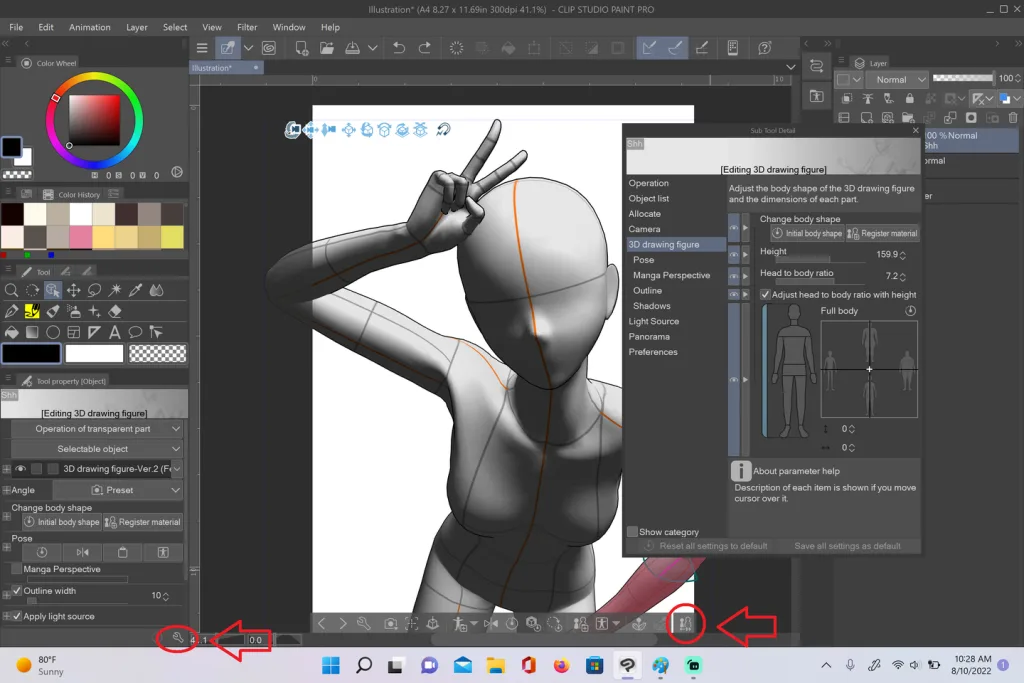
If you want to get into the real nitty gritty of your pose, then check out the 3D Drawing Figure Sub Tool. You can pop this menu out by either clicking the wrench at the bottom of the Tool Properties menu on the left or by click the people icon on the far right of the bottom toolbar.
In this menu, you can adjust the individual fingers of your character, how open or closed the hands are, the muscle mass, height, and body weight of your model, and even the light source! Be sure to experiment in this menu. If you’re ever stuck trying to get the pose of your model just right, you might be able to make some smaller adjustments via this menu.
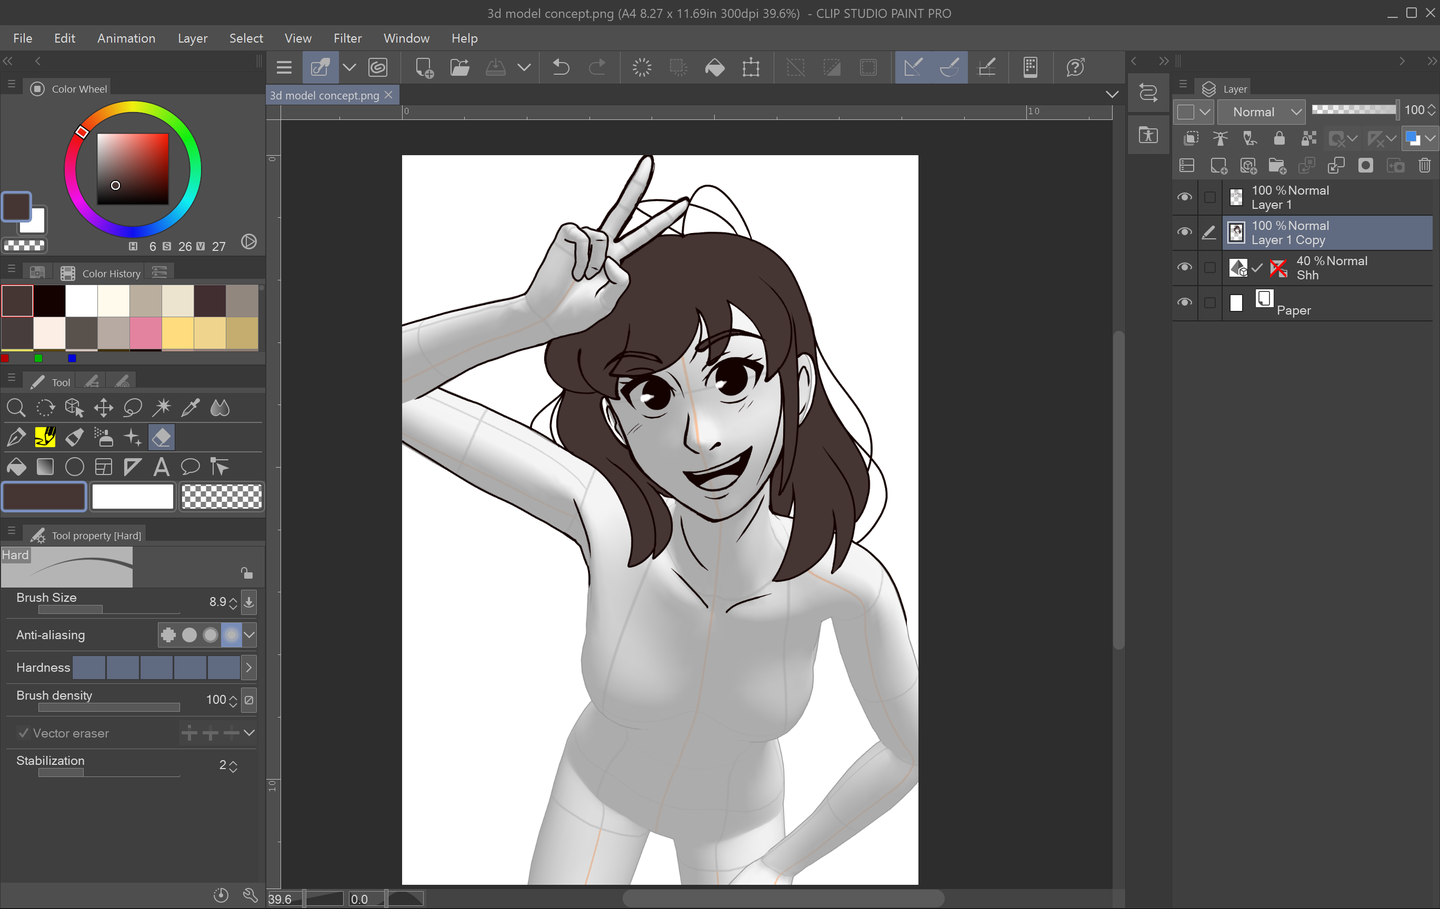
5 – Finalize Settings and Draw!
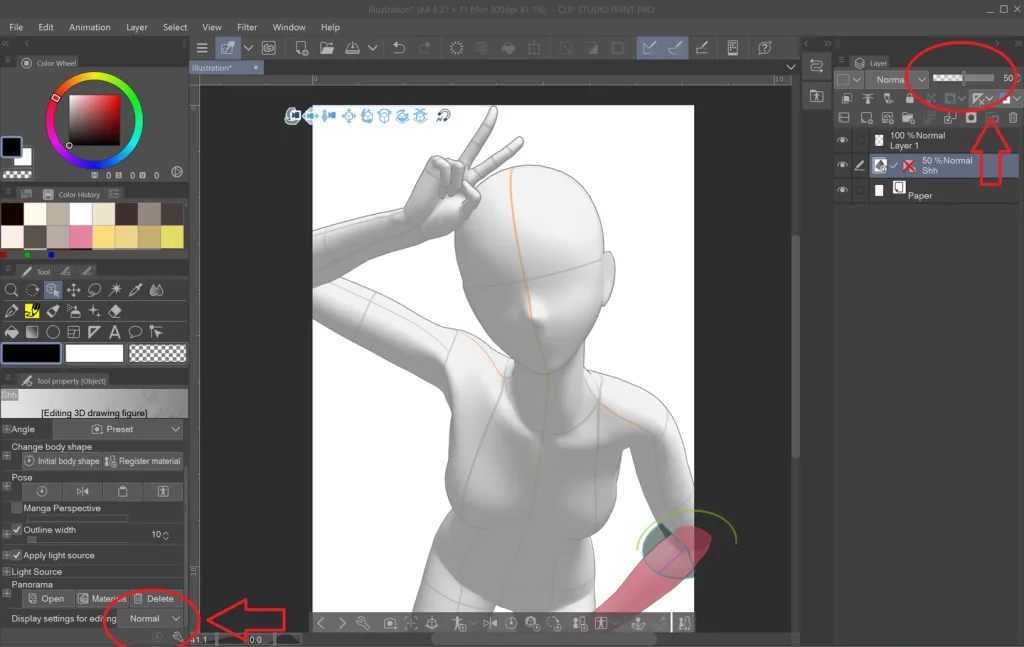
Once your model is all posed and ready, you can start drawing over it! However, you can’t change the opacity of the model’s layer while CSP is still set to Fast. To fix this, simply go back to the bottom of the 3D Model Properties menu and set Display Settings for Editing back to Normal. Afterwards, click out of that menu, and adjust the model layer’s opacity to your preferred settings. Now, you can create a new sketch layer over your fully posed model and begin sketching!