How to Upgrade Your Ender 3 Power Supply to a MeanWell PSU

Share
What you'll need
Interests


Aside from upgrading your Ender 3 board, upgrading your stock PSU to a Mean Well PSU is one of the best upgrades to make your 3D printer quieter.
Creality Ender 3 Silent Mainboard Upgrade: Better Prints with Less Noise!
Make your Ender 3 quieter and improve your prints with this board upgrade.
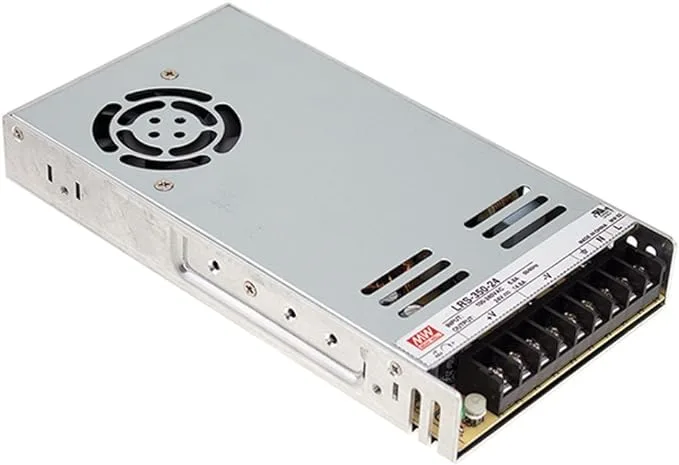
In this guide, I’ll show you how to upgrade your Ender 3 to the MeanWell LRS-3500-25 PSU. This is the same power supply used on the Ender 3 Pro.
Why upgrade?
There are several reasons to upgrade your Ender 3’s PSU to a Mean Well:
- Noise: The PSU fan only runs when needed (usually <20% of the time), meaning a much quieter printer.
- Safety: MeanWell power supplies are more reliable and safer than the cheap stock unit. They use higher-quality components that provide consistent, clean power with fewer spikes and sags.
- Reduce bed-leveling issues: By providing consistent power the MeanWell reduces issues with EZABL and other bed-leveling kits related to power ripples and grounding.
- Compact form factor: The MeanWell PSU is noticeably thinner and more compact than the stock unit; this is especially handy if you’re using an enclosure and want to keep your setup as compact as possible.
1 – Set the correct input voltage
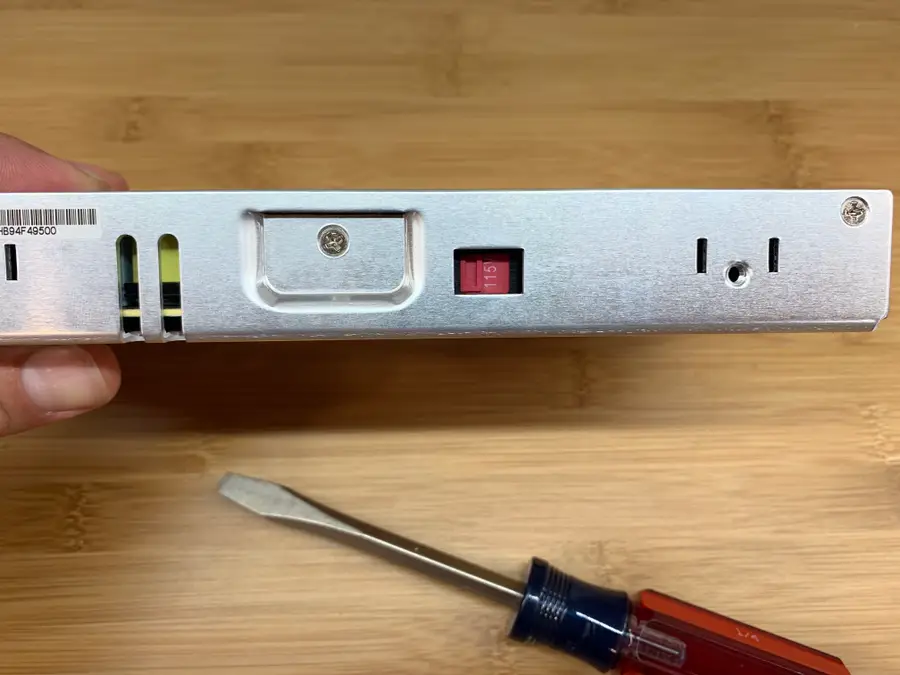
Use a flathead screwdriver to slide the input voltage switch to either 115V or 230V, depending on your country. I’m in the US so I switched it to 115V.
You probably know which mains voltage your country uses, but if for some reason you don’t, you can reference this “Mains electricity by country” Wikipedia article.
| 🛈 I put this step first because forgetting to do this could be catastrophic to both the PSU and your printer! |
2 – Print a MeanWell PSU cover
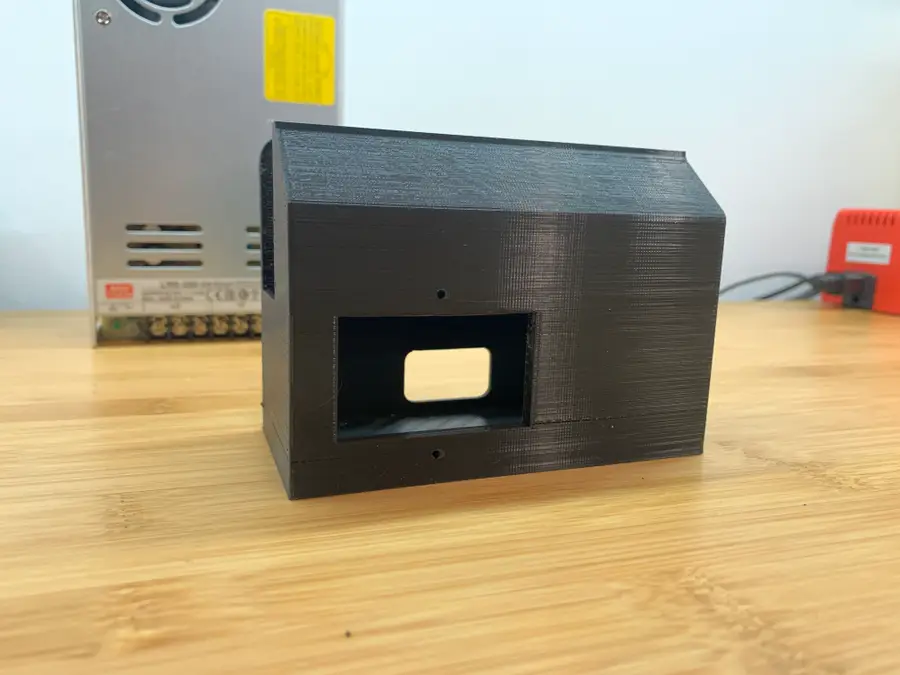
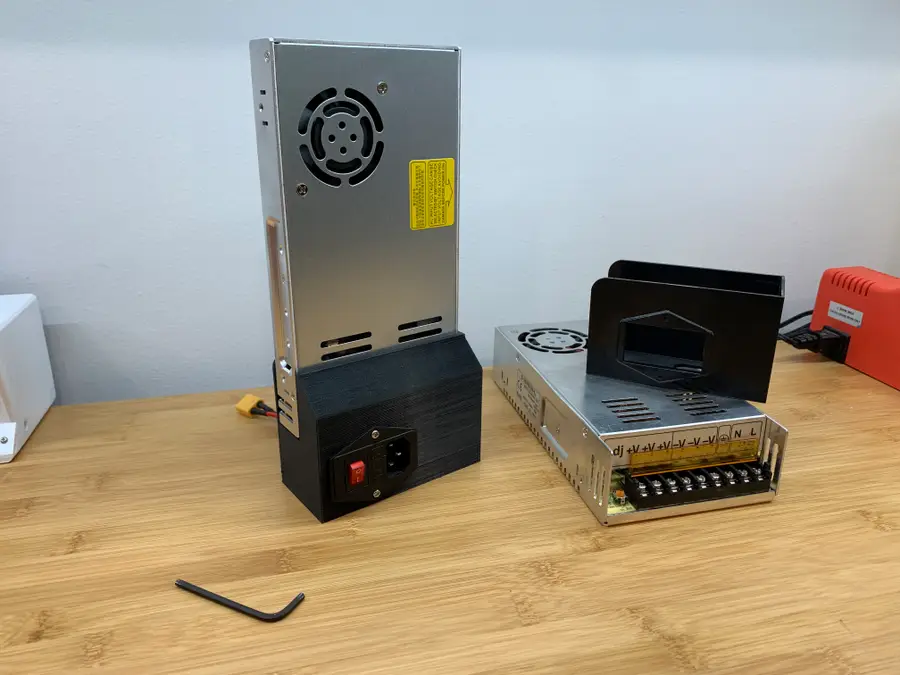
Your MeanWell PSU probably didn’t come with a PSU cover, the bottom portion that holds the AC plug inlet and protects your terminal block from dangerous shorts (and fingers).
Since the MeanWell PSU is smaller than the stock one, the old cover won’t fit; therefore, you’ll need to print a new one. You can find tons of designs on Thingiverse, but I recommend this excellent model from TH3D Studio.
Download and print that model. I was able to print mine standing up without supports. My Ender 3 was more than capable of “bridging the gap” without stringing.
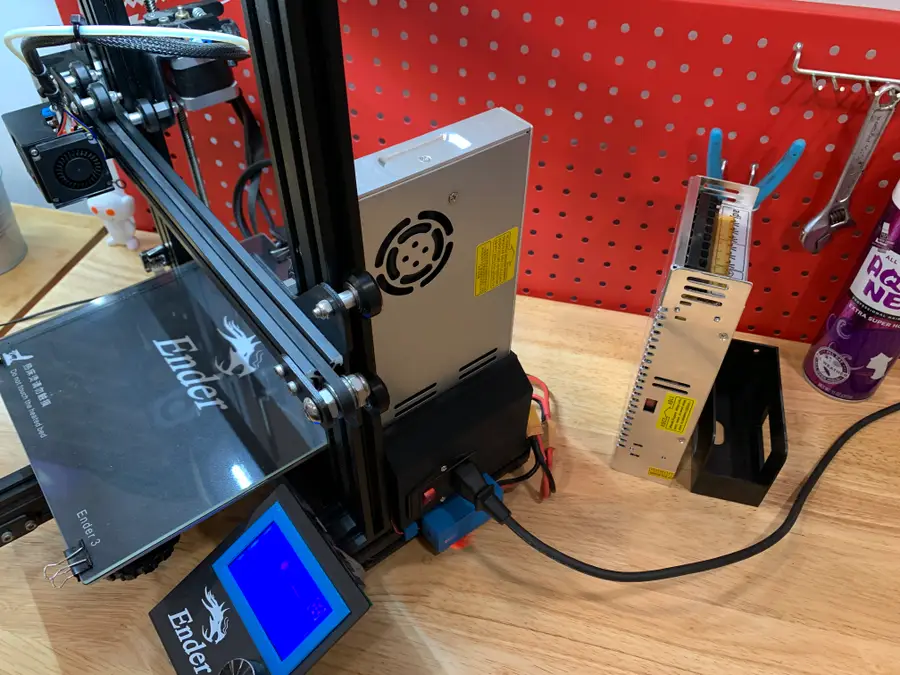
3 – Remove the old PSU
Unplug your printer’s power cable and disconnect the XT60 connector that connects the PSU to your printer.
Then, use an M3 hex key to remove the two front cap screws that secure the stock PSU to your printer’s right Z-axis vertical support.
Finally, set the old PSU aside.
4 – Transfer the AC inlet
We’ll need to disassemble the old PSU and transfer the AC inlet (plug) and wiring to the new MeanWell PSU.
Remove the two M3 screws from the bottom cover. Then, use a Phillips screwdriver to remove the two inlet screws.
Take a photo of the wiring (or reference my photo in the step below). Then, unscrew each screw to remove the 5 wires from the PSU terminal block.
Finally, insert the AC plug inlet into the new PSU bottom cover and secure it using the two Phillips screws.
| 🛈 I recommend letting the PSU sit unplugged for at least 30 minutes before taking it apart so that the capacitors have time to discharge. |
5 – Wire up the new MeanWell PSU
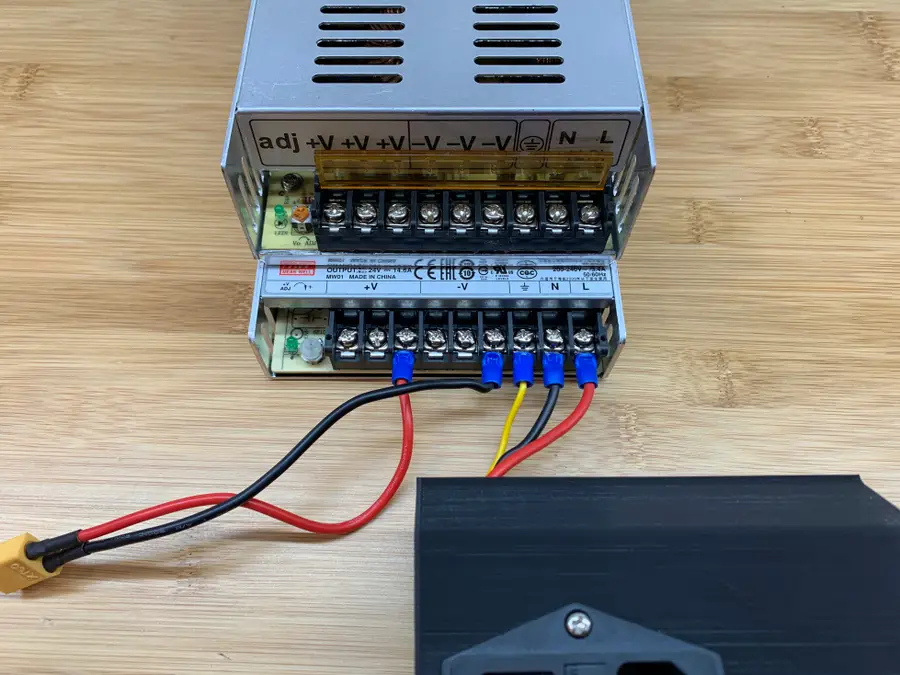
Wire up the PSU the same as the old one. In addition to the photo I took, here’s a handy table I made to help you with your wiring:
MeanWell PSU wiring
| From | Color | To |
|---|---|---|
| XT60 cable | Red | +V |
| XT60 cable | Black | -V |
| AC inlet | Yellow | GND |
| AC inlet | Black | N |
| AC inlet | Red | L |
6 – Secure the new cover
Route the XT60 cable through the back opening of the MeanWell PSU cover. Slide the cover into place, and secure it using the two M3 screws you removed from the old cover.
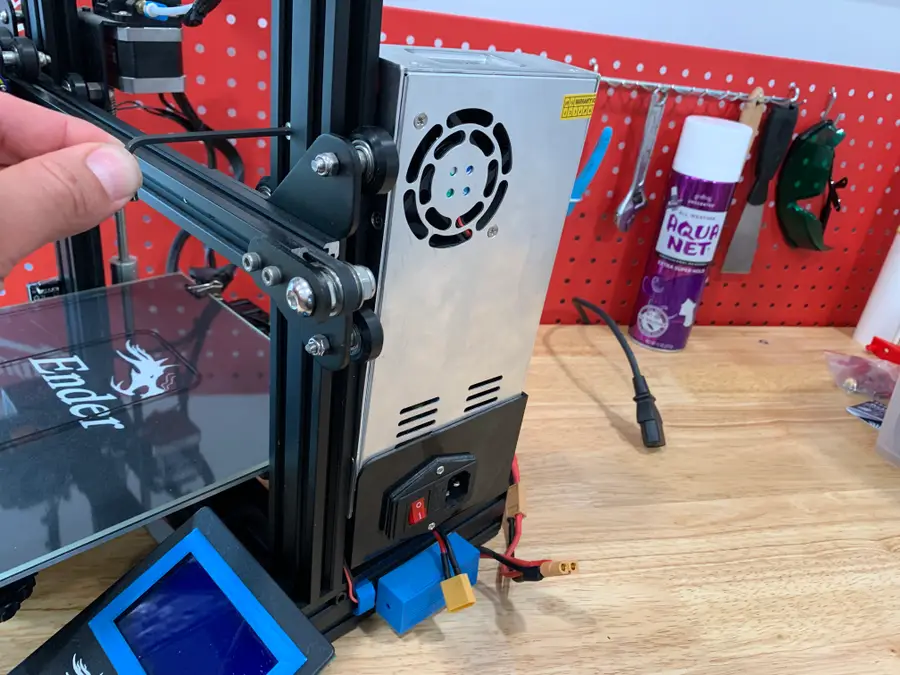
7 – Mount the new MeanWell PSU assembly
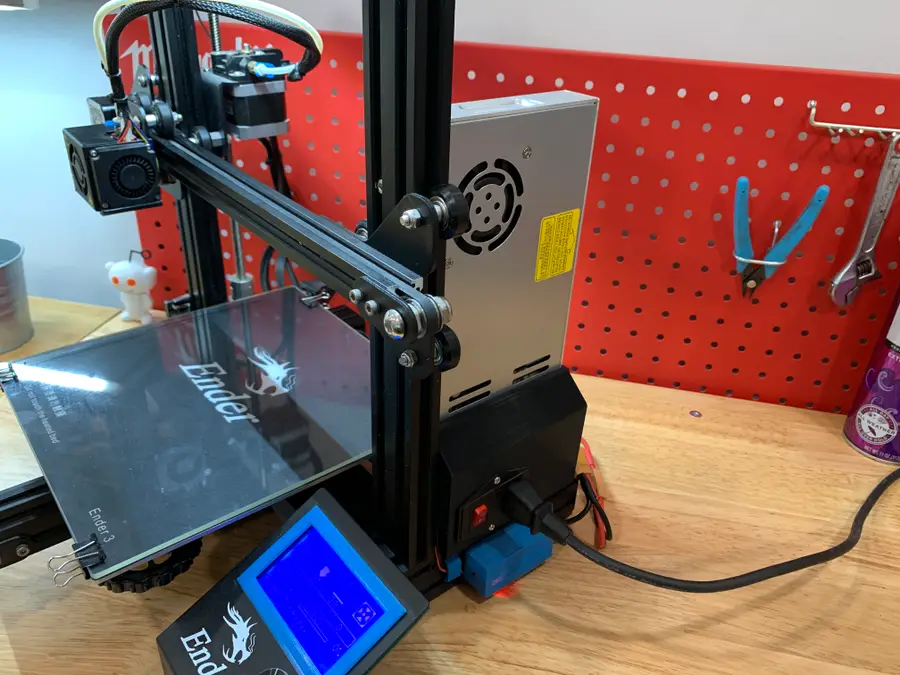
Mount your brand-new PSU to your Ender 3’s Z-axis support using the same screws that secured the old one.
Reconnect your cables and you’re good to go! Next, check out my Ender 3 mainboard upgrade guide—an upgraded mainboard gives you better prints while making your printer eerily silent.
Creality Ender 3 Silent Mainboard Upgrade: Better Prints with Less Noise!
Make your Ender 3 quieter and improve your prints with this board upgrade.