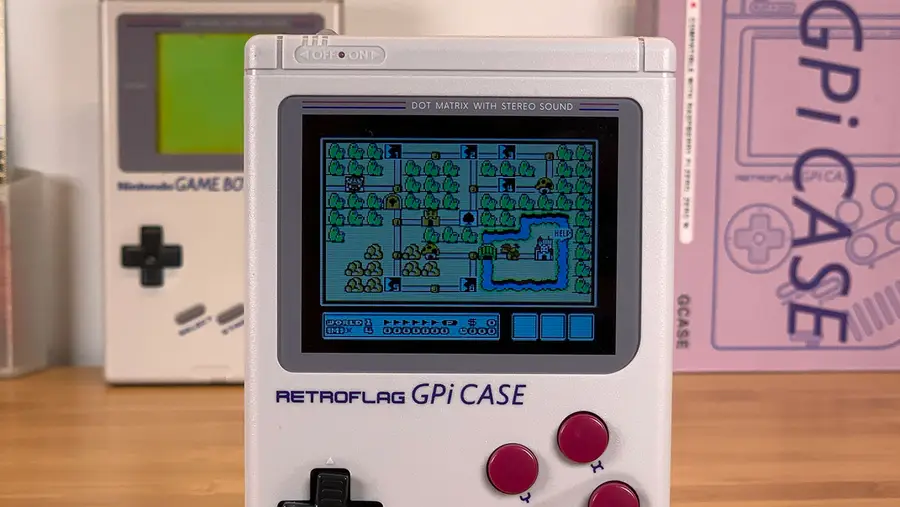
Because the Retroflag GPi CASE is technically a case, it doesn't contain a computer and relies on the tiny ~$10 Raspberry Pi Zero W computer to run everything.
In addition to the Pi Zero and the GPi itself, you'll need a few other things including an SD card and batteries. I've listed everything in the parts list for this guide. Because the GPi uses three replaceable AA batteries, I recommend picking up some rechargeable AA batteries and a charger. The environment (and your wallet) will thank you.
You can use either the Raspberry Pi Zero or Raspberry Pi Zero W, but I recommend the Zero W since it has onboard bluetooth and Wi-Fi.
The Raspberry Pi Foundation also sells a Raspberry Pi Zero WH, which stands for "with header" and comes with a 40-pin header pre-soldered; don't use this one unless you have the equipment to desolder and remove that header. The GPi will not fit a Pi that has a header soldered on.
As you can see, the SD card should be on the right and the ports should face up.
The GPi comes with a sliding cartridge -- much like the original Game Boy -- that houses the Raspberry Pi. The purpose of this cartridge is to connect the Raspberry Pi to the rest of the GPi, sending both power and data signals back and forth to make everything work.
Place the Pi into the cartridge housing with the ports facing up and the SD card slot facing towards you. If oriented correctly, the Pi's Micro SD card slot should be accessible from outside the housing.
Finally, use the flathead side of the included screwdriver to secure the Pi in place using the four (4) small brass screws.
The GPi's "IO conversion board" is a small board that connects the Pi to the rest of the GPi's circuitry. A "pogo pin" system is used to connect the Pi to this board.
What's a pogo pin?
A pogo pin is a small spring-loaded connector. Basically, spring-loaded connectors on the IO conversion board press up against the Raspberry Pi's GPIO (40-pin) header, thus eliminating the need to solder anything. Everything that goes on between the GPi CASE and the Pi itself happens through these pins.
Carefully lower the IO conversion board into place so that it lines up with the Pi.
Then, slide the brown cable retaining clip outward, insert the USB extension cable, and then slide the retaining clip back to secure the cable.
Snap the cartridge housing back together and secure it using the four (4) small silver screws. This will hold the cartridge case shut while also securing the Pi to the IO board.
Once everything is nice and secure, slide the cartridge into place like you would any Game Boy! Contacts in the bottom of the cartridge will make contact with the GPi's main logic board, connecting your Pi once and for all.
In a nutshell, RetroPie is a software library that will allow you to load and emulate games on the GPi. If you so choose, you can also run RecalBox on the GPi instead of RetroPie. However, RetroPie is more popular and generally better supported, so that's what I'll recommend and cover in this guide.
To install RetroPie, download the latest SD card image labeled "Raspberry Pi 0/1" from the RetroPie downloads page. Then, flash it onto your microSD card using a tool such as Etcher.
I wrote a separate guide on installing RetroPie; use that guide to install RetroPie and then return here! That guide also covers steps like enabling SSH (so that you can log into the GPi from your computer to perform certain setup tasks).
This interest contains guides that cover all things RetroPie!
What is RetroPie? RetroPie is a popular software library for the Raspberry Pi that is used to emulate retro video games.
Because RetroPie and Recalbox output video via HDMI by default, we need to configure it to output over the GPIO header instead. Retroflag wrapped this, and other configuration settings, into a small patch file that needs to be run.
Download the patch ZIP file from the Retroflag downloads page. Unzip the file, and then:
For Windows
In Windows Explorer, copy the entire GPi_Case_patch folder to the root directory of your SD card.
Open the GPi_Case_patch folder and double-click install_patch.bat to execute it.
You're done! To undo this and output to HDMI again, run the uninstall_patch.bat file in that folder (though I don't know why you'd want to do this).
For Mac
Open your SD card in Finder.
Back up config.txt and overlays/dpi24.dtbo by copying them somewhere safe, like a backup folder.
From the patch zip file, copy config.txt to the SD card's root directory.
From the patch zip file, copy overlays/dpi24.dtbo and overlays/pwm-audio-pi-zero.dtbo to the SD card's overlays directory.
You're done! To undo this and output to HDMI by default, replace those two files with your backups from earlier.
The Retroflag GPi controller configuration screen. The case is the controller. ;)
You'll be immediately asked to configure the controller, which is the GPi itself. Hold and press any button to start the process. Then, when prompted, press each corresponding button that appears on the screen.
The "Left shoulder" and "Right shoulder" buttons are found on the back of the unit and are denoted by 3 dots. After configuring those, press and hold any button repeatedly to skip the remaining buttons that don't exist on this controller.
This may take several minutes to run. When it finishes, it will automatically reboot your Pi. The GPi power switch will now safely turn your Pi off and on!
Now that your GPi is up and running, you'll need to find and add install some retro games!
When you add games to the GPi, what you're really doing is adding games to RetroPie. You'll often see the term "ROM" used interchangeably with "game"; this is because each game is stored in a single ROM (read-only memory) file.
Finding GPi (RetroPie) ROMs
While you can find RetroPie ROMs on any torrent site, you shouldn't download any copyrighted titles as this may be illegal. Check out our full guide to RetroPie ROMs to learn how to find and download RetroPie ROMs.
Installing RetroPie ROMs
After downloading a ROM or ROM pack, unzip each .zip file to reveal a single ROM file -- for example, SomeGame.nes.
Once you have a ROM file, there are a few ways to transfer it to the GPi:
1. Transfer ROMs over your network
By default, the GPi will appear as a network share device/drive in both MacOS and Windows. Obviously, you'll need to be on the same network as your Pi.
On Mac, open Finder and navigate to Locations > Network > retropie > roms. Paste each ROM into its corresponding system folder.
On Windows, open Explorer and enter \\RETROPIE into the address bar. Then, open the roms folder. Paste each ROM into its corresponding system folder.
2. Transfer ROMs via USB drive
To do this, you'll need to remove the Pi from the GPi so that you can access its USB port. Then, along with a micro USB adapter, add ROMs using a USB drive. This is the fastest approach as far as transfer time goes.
After adding your ROMs and restarting the GPi, you'll see an icon for each system. Select a system by pressing A and then select a game.
Customizing the interface with themes
You can install various RetroPie themes to change the way the interface looks. I recommend the GMZ35 theme since it's designed for small screens and it makes text far more readable!
Exiting a game
To exit a game and return to the RetroPie UI, press START+SELECT together.
Featured image: Nintendo Life
For years, clever makers on the Sudomod forums have been building their own portable video game emulation consoles by putting Raspberry Pis into original Game Boy shells.