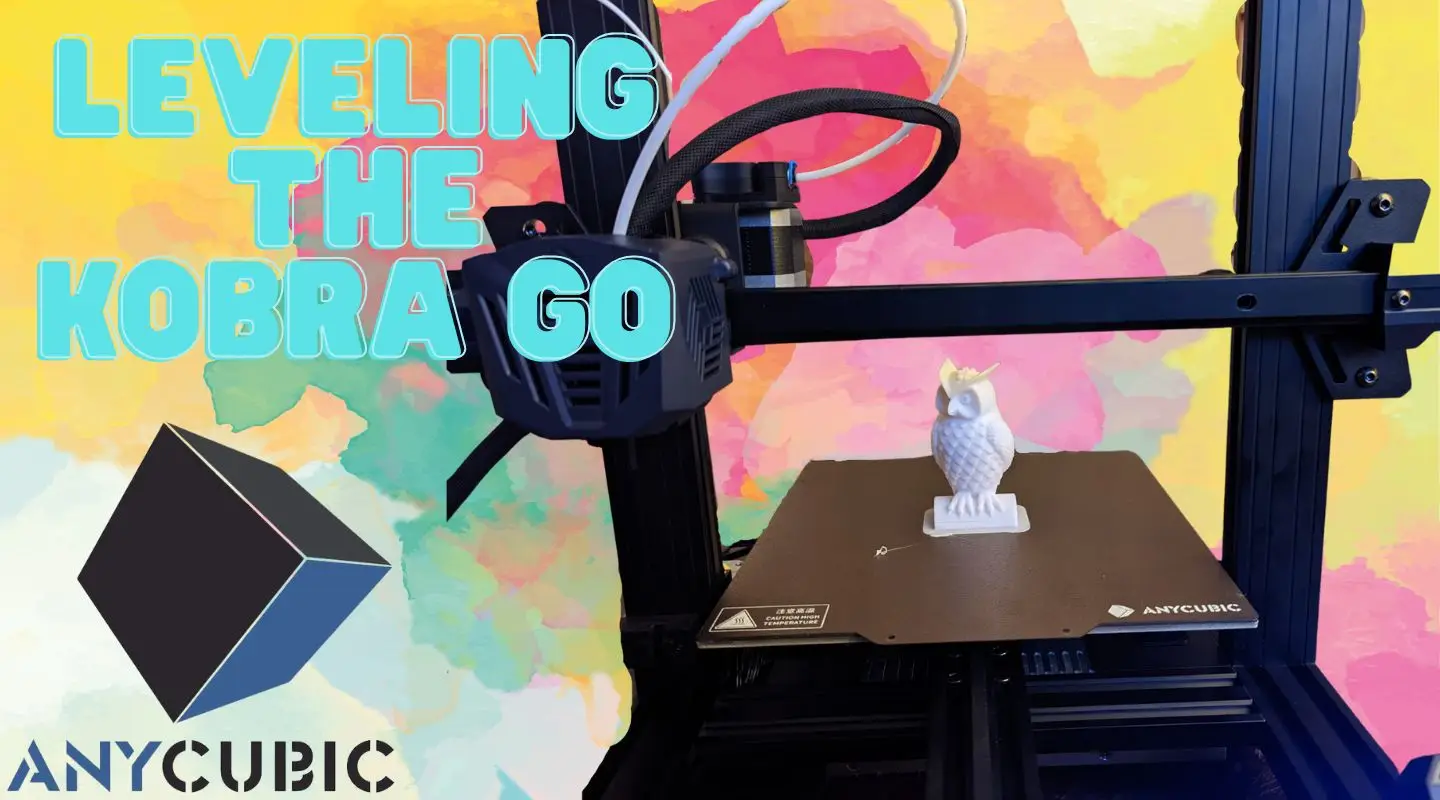
Leveling the Kobra Go 3D Printer

Share
What you'll need
Interests
Posted in these interests:

I’ve been a pretty die-hard fan of Anycubic’s Kobra series and the 25-point automatic leveling is a huge part of the reason. Of course, many printers can be modified to have automatic leveling, but not many entry-level DIY kit printers come with this feature. That’s what makes the Anycubic Kobra Go so darned unique.

Anycubic’s Kobra Go 3D Printer Hands-On Review
A detailed review on the Anycubic Kobra Go DIY 3D printer
There might still be times when you need to manually adjust the z-distance, but for the most part, the Kobra Go handles itself as smoothly as a dream. Just run the automatic leveling program, wait, and profit!
1 – Turn on the Kobra Go and select the Menu
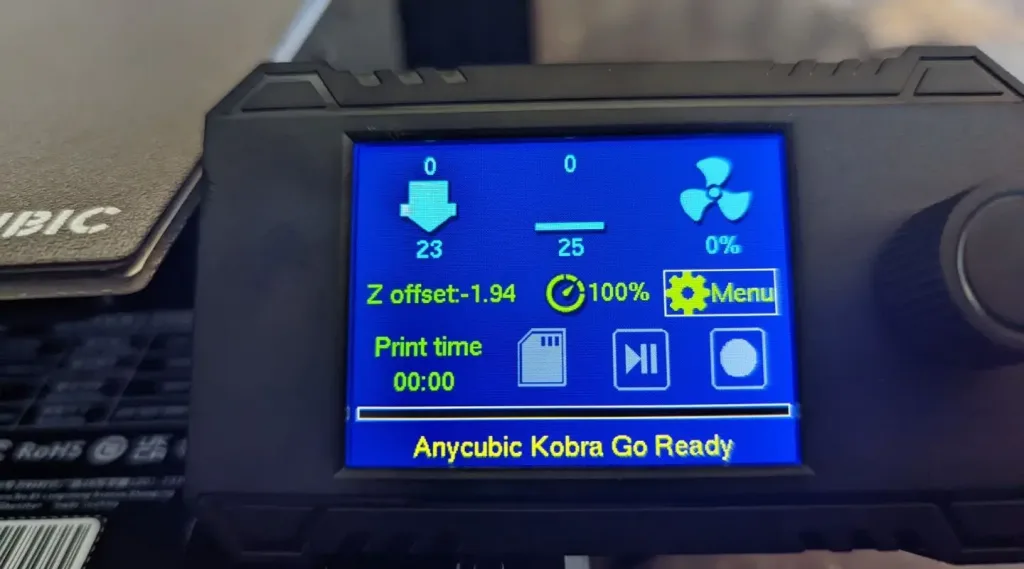
You make selections on the Kobra Go’s small screen by turning the control knob to the left or right, delightfully familiar for Ender 3 users.
2 – Scroll down and select leveling
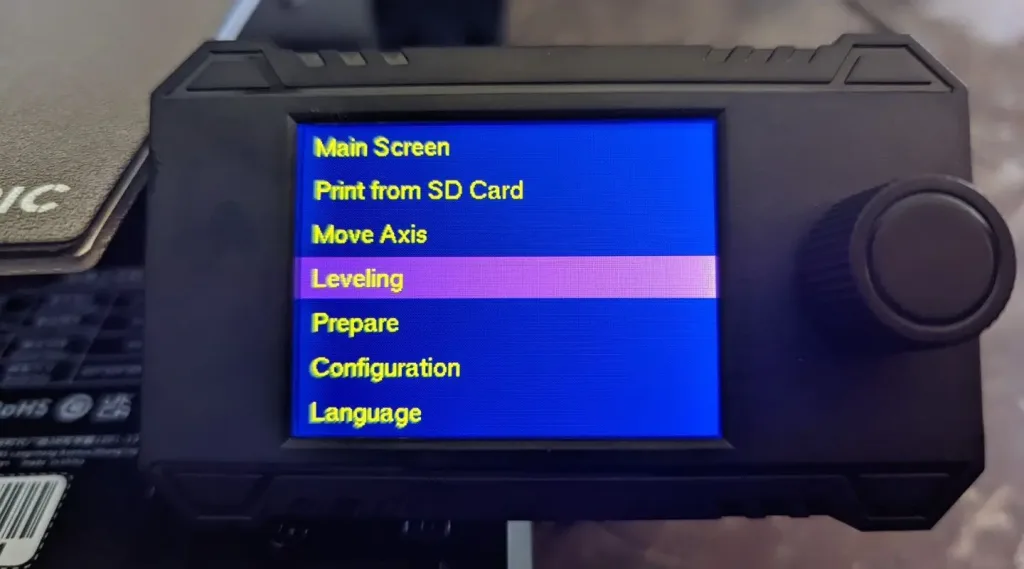
The menu is easy to navigate, and the screen on the Kobra Go is surprisingly high quality for a kit FDM printer.
3 – Select the Auto Leveling option from the Kobra Go menu

If you need to adjust the Z Offset, you can do that here, or you can do it from the main page during a print by turning the knob left or right to adjust down or up.
4 – Allow the automatic leveling program to complete

This program runs through 25 points across the print bed, so it can take a few minutes to complete. Go make yourself a smoothie.
5 – Complete!
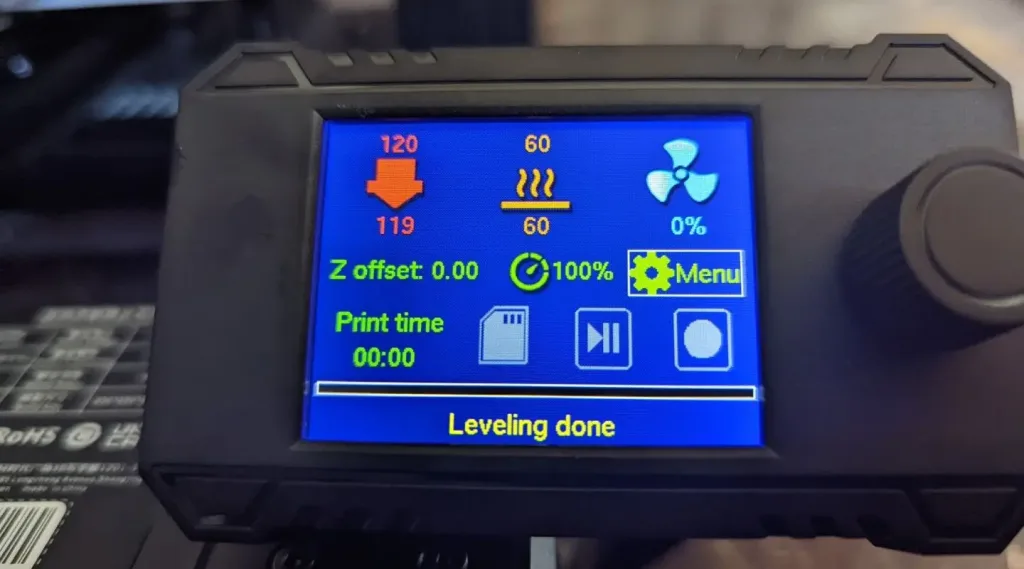
And that’s it: your automatic leveling is complete! You’re now ready to load in some filament and watch the printer do its thing.