How to Make Your Own Vinyl Record Clock

Share
What you'll need
Interests

If you’re a music enthusiast (or know somebody who is and expects a gift from you), nothing beats a vinyl record clock. I’m a huge fan of simplicity and this clock takes the cake. Note: I chose to purchase a clock movement kit since it was inexpensive and I didn’t have any old clocks lying around to cannibalize parts from.
1 – Choose a record

There’s no point destroying a perfectly good record (let alone one you like), so I recommend choosing one that’s no longer playable. I chose a “Hit Explosion” record that had a pretty big gouge on one side.
2 – Expand the record’s hole
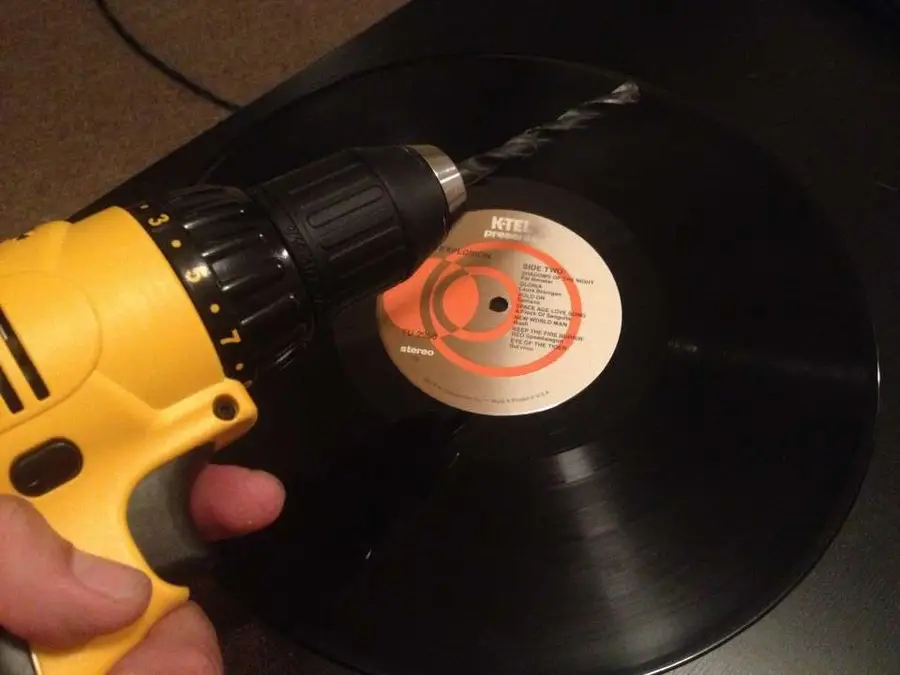
I chose a 1/4″ clock movement kit because most vinyl record holes are approximately 1/4″ in diameter. This size clock kit includes a clock movement that has a 1/4″ spindle. Using your drill and a 5/16″ drill bit, widen the record’s center hole so that the spindle will more easily fit into the record.
3 – Attach the clock movement to the record
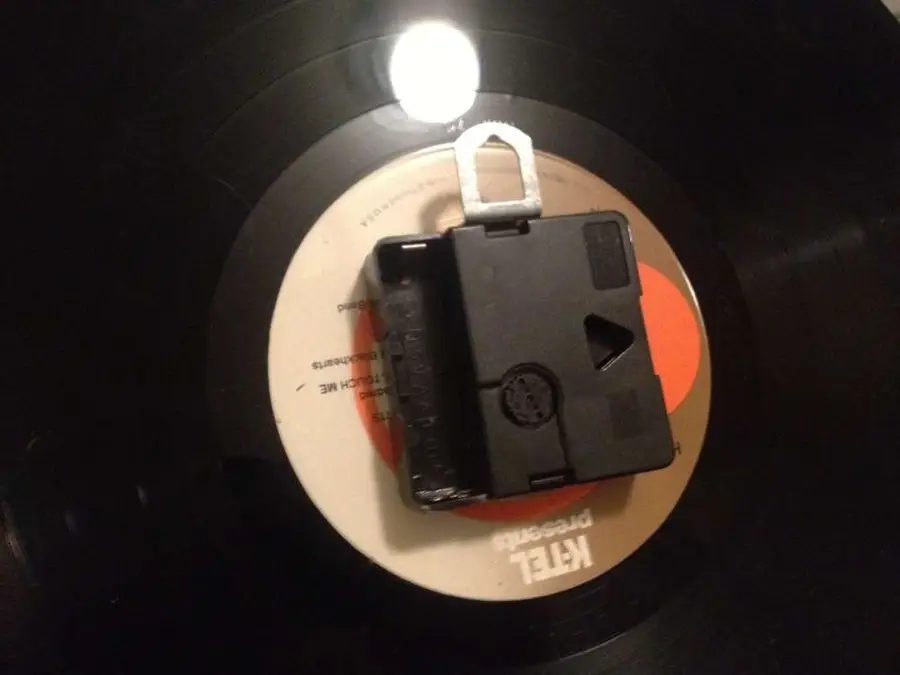
Push (or screw) the clock movement’s spindle through the record’s center hole. Using the supplied hardware (normally a nut and washer), secure the clock movement to the record. You can tighten the nut with your fingers — using a wrench is unnecessary and might crack the record.
4 – Paint the clock hands (optional)
Most clock movement kits come with black hands and, since most vinyl records are black, you might want to paint them. I painted my clock hands orange to match the label of the record I’m using. If you don’t feel like breaking out the spray paint, you can order a clock movement with silver or gold hands (though I’ve found the 1/4″ kits to be hard to find in these colors).
| 🛈 Be sure to use primer spray paint prior to painting your clock hands (which I neglected to do). This will make the color more vibrant Plus, the primer will help to make the paint adhere to the clock hands. |
5 – Attach the clock hands
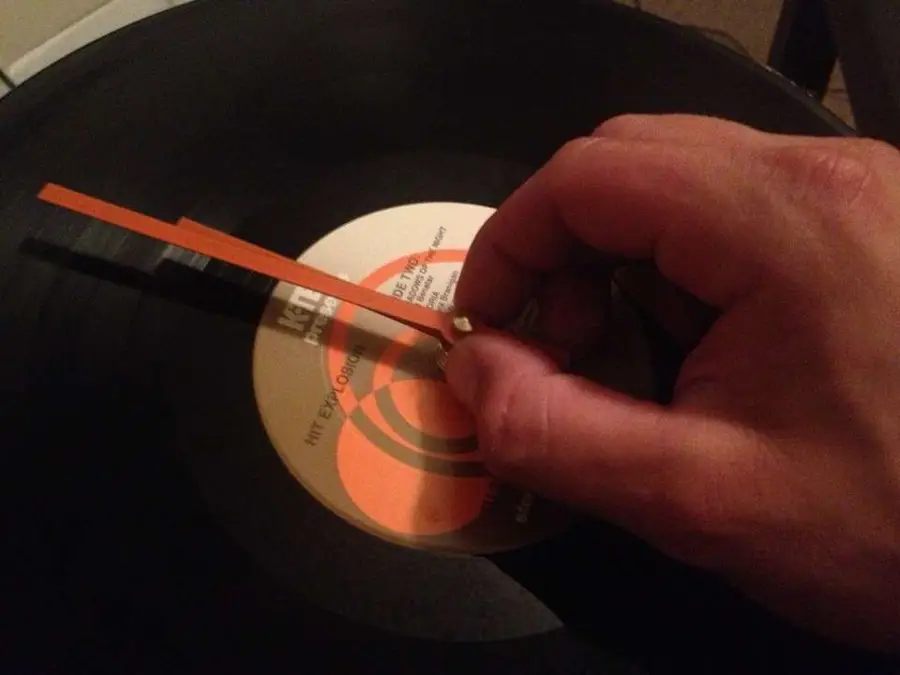
Clock movement kits vary — I recommend checking the instructions that came with your kit to ensure that you don’t break the very fragile tiny hands.
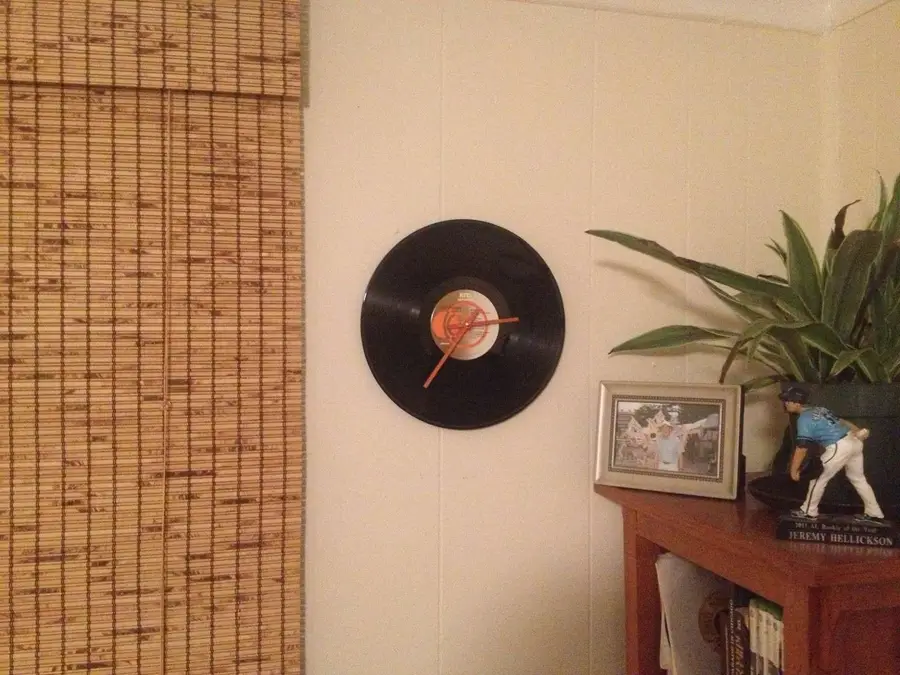
6 – Hang up your clock

The clock movement kit I ordered (which I’ve linked to at the top of this guide) has an integrated hanger. This is super useful and saves a ton of time. Now you just need to hammer a nail into the wall and voila! You’re finished!