How to Setup a Raspberry Pi Wireless Access Point


Share
What you'll need
Interests
Series


Most users will be looking to use the on-board Wi-Fi to connect a Raspberry Pi to existing wireless networks. If you’re out and about, however, you might prefer to turn your Pi into a portable router without needing any additional hardware.
From a VPN travel router that you can use to safely connect to wireless hotspots on the go, to a portable access point that lets you tether and share your mobile data with multiple devices, there are a number of uses for your Pi’s on-board Wi-Fi beyond simply connecting to a network. You could even make a Raspberry Pi WiFi extender to boost connectivity around your home.
This is easily done, as the Wi-Fi chip inside a Raspberry Pi can work in one of two modes. The default is client mode, where the Pi connects as a client to an existing wireless network. The other is AP mode, which stands for Access Point.
Setting your Raspberry Pi Wi-Fi to AP mode allows you to create and manage your own wireless network, allowing other devices to connect through it. If you want to create a Raspberry Pi wireless access point, here’s what you’ll need to do.
1 – Before You Begin
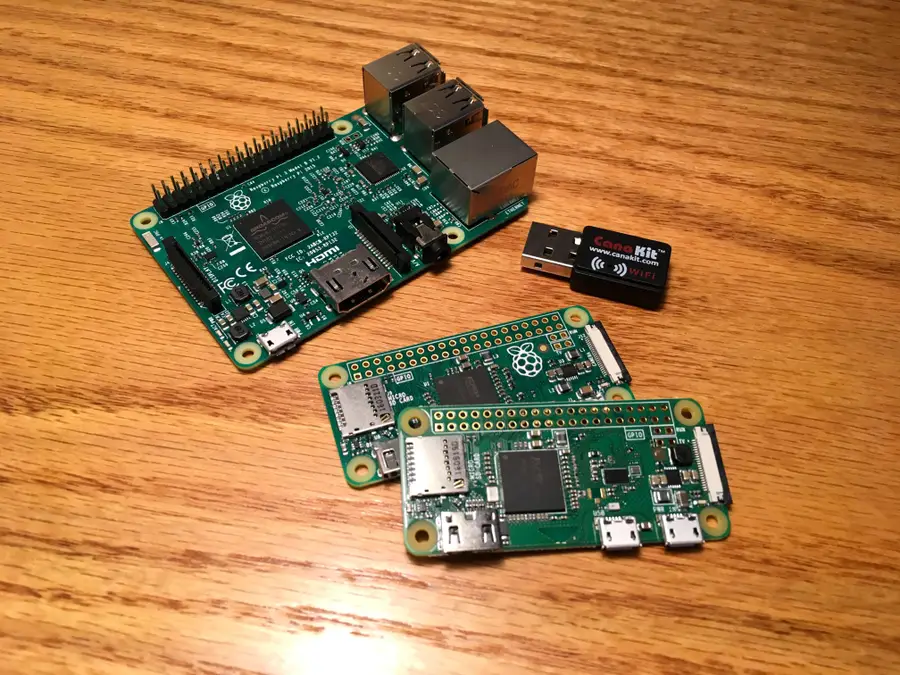
To create a Raspberry Pi wireless access point, you’ll need a Raspberry Pi 3 or later that runs the latest version of Raspberry Pi OS. These instructions will assume you’re using Raspberry Pi OS, but the steps may work with other Linux-based distributions.
This guide will assume that you’re using an ethernet cable to physically connect the Pi to your ISP’s router so that the Pi can get online directly. You’ll then configure the Pi so that the onboard Wi-Fi chip broadcasts a network for other devices to connect to, creating a bridge across those networks.
This will allow those devices to access the internet, using your Pi as a gateway. You can use a USB wireless adapter to create your access point instead, but you’ll need to check whether the chipset of your USB device has Linux drivers that support AP mode. Many devices don’t.
For the sake of this example, the Ethernet connection will be on the 192.168.0.0/24 network (the Pi’s address being 192.168.0.75). Our Wi-Fi network will be in the 192.168.100.0/24 range. Your existing wired network may be configured differently, but the instructions should work fine, as long as you change your configuration accordingly.
If you want to create a portable internet connection using a USB mobile data connection instead, then these instructions should act as a starting point, but extra configuration may be required to set up your mobile connection first.
2 – Installing Packages
Before you begin configuring your Raspberry Pi wireless access point, you’ll need to update your system.
To do this, and assuming you’re running the latest version of Raspberry Pi OS, you’ll need to run the following commands in an open terminal window or over a remote SSH terminal connection:
sudo apt update
sudo apt upgrade
sudo reboot
This will update your Pi and reboot once the process is complete. Once this is done, you’ll need to install a few additional packages to get your Pi access point up and running.
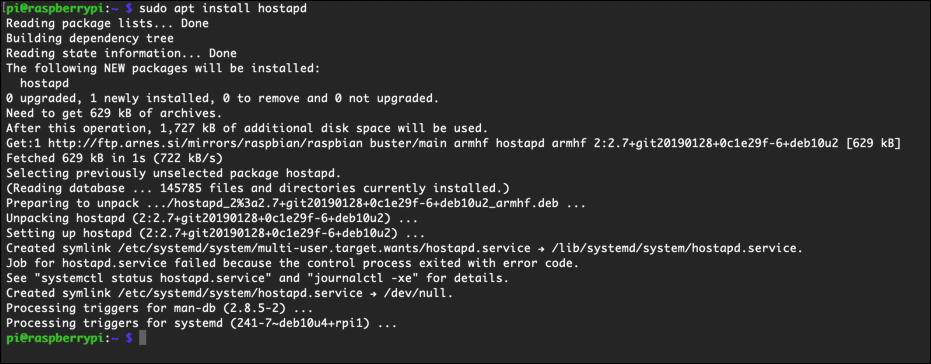
The first package you’ll need is hostapd, which handles setting up the wireless adapter as an access point. Install it by opening a terminal window (or SSH connection) and typing:
sudo apt install hostapdDon’t be alarmed if an error appears after installing hostapd. Since this package may potentially conflict with your existing Wi-Fi setup, apt installs its system service in a masked (disabled) state.
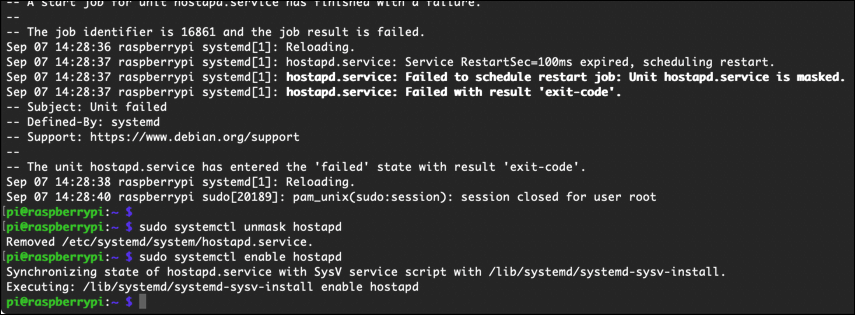
This means you’ll need to enable it once the package is installed. To do this, run the following commands in a terminal or over SSH:
sudo systemctl unmask hostapd
sudo systemctl enable hostapd
Once this is done, you’ll need to install dnsmasq next, which handles any devices that connect to your new access point. It provides tools that allow DNS, DHCP, and router advertisements to occur.
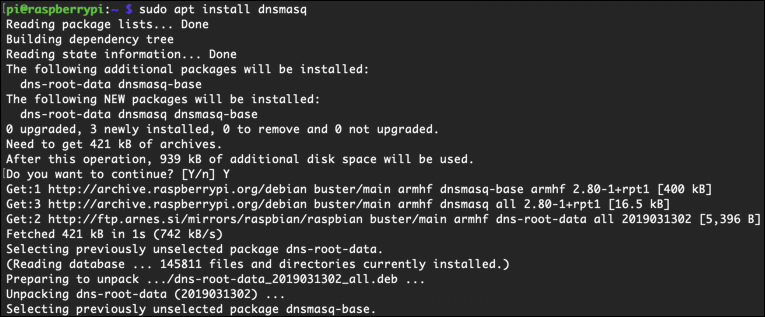
To install it, type the following in a terminal or SSH window:
sudo apt install dnsmasqFinally, you’ll need to install a couple of convenience packages that allow you to retain your firewall configuration rules across reboots. To do this, run the following in an open terminal or SSH window:
sudo apt install netfilter-persistent iptables-persistent
sudo reboot
Your Raspberry Pi will reboot at this stage to ensure all packages have been installed correctly.
3 – Configuring Routing
Once your Pi has rebooted, you’ll need to begin configuring your Raspberry Pi to work as an access point.
The first step is assigning a static IP address to the internal wireless radio on your Raspberry Pi. This is necessary because DHCP is used to assign IP addresses to incoming devices, and a static IP is required for your Pi to act as a DHCP server, which will issue IP addresses to allow external connections.
To do this, you’ll need to edit the /etc/dhcpcd.conf file by typing the following in a terminal or SSH window:
sudo nano /etc/dhcpcd.conf In the nano text editor, add the following to the file at the end:
interface wlan0
static ip_address=192.168.0.100.1/24
nohook wpa_supplicant
Press Ctrl+X on your keyboard to save the file, confirming the save by hitting Y next.
Remember that we’re using the 192.168.100.0/24 network range in this example guide, so we’re using the first IP (192.168.100.1) for the access point itself. If you want to use a different network range, you’ll need to change this here.
4 – Configuring Masquerading
Once your network routing is set up, you’ll need to configure masquerading. This describes the process of allowing clients (devices connecting to your Pi) to access the local network first, and then the internet from there.
It is closely related to NAT (Network Address Translation) used on local network routers, which also masquerades the clients’ IP addresses from the servers’ point of view.
To do this, type the following in an open terminal or SSH window:
sudo nano /etc/sysctl.d/routed-ap.confIn the open window, add this single line to the file, pressing Ctrl + X and Y to save afterward:
net.ipv4.ip_forward=1This instructs the Pi to forward all data packets in all directions, according to the routing and firewall settings.
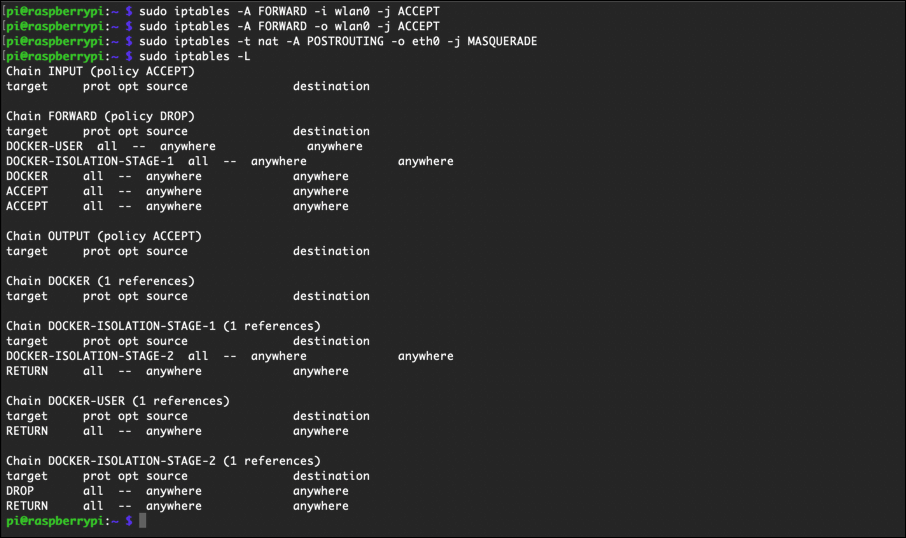
Once this is set up, you’ll need to configure your firewall rules. This involves allowing the wireless interface to forward data back and forth, and the masquerading itself. To do this, type the following in an open terminal window or over SSH:
sudo iptables -A FORWARD -i wlan0 -j ACCEPT \
sudo iptables -A FORWARD -o wlan0 -j ACCEPT \
sudo iptables -t nat -A POSTROUTING -o eth0 -j MASQUERADE
If you’re using a tethered internet connection from another mobile device over USB, you’ll need to replace eth0 with the correct name of your USB device (for instance, usb0).

Assuming no errors, you’re safe to save your rules. Before you do, however, you should check that the firewall rules have been added correctly by typing the following in a terminal or SSH window:
sudo iptables -L
sudo iptables -t nat -L
If you’re ready to save, type the following in a terminal/SSH window:
sudo netfilter-persistent saveThis should ensure that your firewall settings are saved and will continue when you reboot your Pi.
5 – Configuring DNS and DHCP
Your Raspberry Pi access point is nearly ready, but you’ll need to configure your DNS and DHCP settings next. This involves configuring dnsmasq, so that wireless devices connecting to our access point are properly set up for interacting with our network.
The default configuration of dnsmasq is almost 700 lines long, but we can get away with much less. Make a copy of the original (and creating a new copy) by typing the following in an SSH or terminal window:
sudo mv /etc/dnsmasq.conf /etc/dnsmasq.conf.backup
sudo nano /etc/dnsmasq.conf
This will create a new configuration file. From here, add the following to the file, hitting Ctrl +X followed by Y on your keyboard to save it afterward.
interface=wlan0
dhcp-range=192.168.100.2,192.168.100.255,255.255.255.0,24h
The first parameter is the first IP address (usually ending in .2, as .1 is the Pi itself), the second is the last IP address. The third parameter is the network mask, which varies by network size. The last parameter is the DHCP lease’s duration, and 24 hours is perfectly fine in pretty much all cases.
You can leave these settings as-is, but if you’re using a custom IP range, you’ll need to change these settings before you save.
6 – Configuring Wi-Fi Settings
The final stage of setting up your Raspberry Pi wireless access point is to configure your Wi-Fi device. We’ll assume you’re using the onboard Wi-Fi chip, but you can use a third-party USB wireless adapter, so long as the chipset of that device supports AP mode. Just replace wlan0 with the name of your device if you do so.
To start, open a new terminal window or connect over SSH and type the following to unblock your Wi-Fi network, then create a new hostapd configuration file:
sudo rfkill unblock wlan
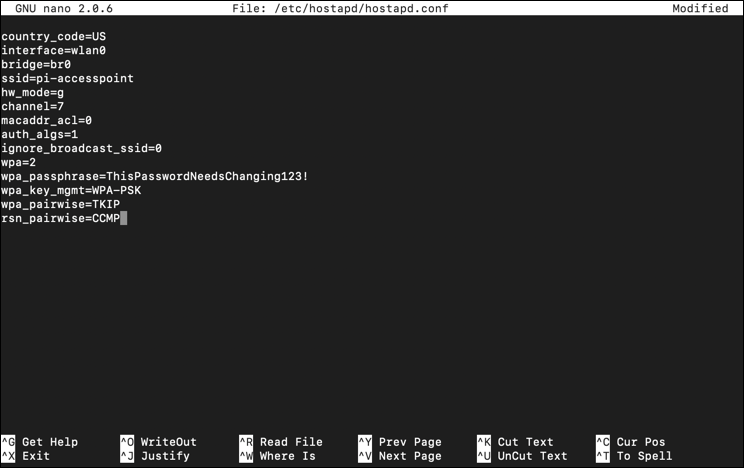
sudo nano /etc/hostapd/hostapd.confIn the text editor, add the following content, replacing the settings as you see fit:
country_code=US
interface=wlan0
bridge=br0
ssid=pi-accesspoint
hw_mode=g
channel=7
macaddr_acl=0
auth_algs=1
ignore_broadcast_ssid=0
wpa=2
wpa_passphrase=ThisPasswordNeedsChanging123!
wpa_key_mgmt=WPA-PSK
wpa_pairwise=TKIP
rsn_pairwise=CCMP
Press Ctrl+X, followed by Y, to save the file afterwards.
Most of the configuration shown above can be left as-is, but you should pay particular attention to a few lines that you may wish to change.
For instance, country_code should contain your country’s two-letter code, e.g. US, IT, DE, GB, etc. This ensures that the Pi’s Wi-Fi radio is compliant with the legislation controlling radio communications in your country.
You’ll also need to replace the ssid value with your preferred network name, and wpa_passphrase with the Wi-Fi password you want to use to allow other devices to connect to your Raspberry Pi access point.
The channel option is the network’s channel on the 2.4GHz Wi-Fi network, generally ranging from 1 to 12. While it is possible to create an 802.11a network in the 5GHz range, reports of its reliability are spotty, so we suggest sticking with a 802.11g network in the 2.4GHz range.
If you want to give 5GHz a try, change hw_mode to a, and set channel to 36 or 40. Once you’re done, type the following in your terminal or SSH window to reboot your Pi:
sudo reboot7 – Using Your Raspberry Pi Access Point
Once your Pi has rebooted, you should be able to see your Raspberry Pi access point appear in the wireless network lists on other devices. You can then connect to it, allowing you to share your Pi’s internet connection as a portable router.
To test it, simply open up a web browser on your other device. If you can visit howchoo.com without any issues, congratulations! Your Pi is working as a wireless access point.
You can then use it with other Raspberry Pi projects to allow other devices to connect, you can turn it into a portable VPN travel router for safe internet access while you’re away from home, or you can create an additional Wi-Fi hotspot in your home if your router is out of range.


