How to Set a Completely Custom Slack Notification Sound

Share
Interests
Posted in these interests:

The notification sounds in Slack leave much to be desired. From harsh thumps to the word “hummus” spoken out loud—these are some seriously grating audio bites to take in throughout the day. A bad notification sound can make a simple message a stressful reminder that your attention has been interrupted. That’s why we’re here to help! Improve your workflow by adding a custom notification sound.
Slack doesn’t officially support custom notification sounds. We can get around this by overwriting one of the existing Slack sound files. All you need is an mp3 file and about 5 minutes. In this guide, I’ll show you how to set a custom Slack notification sound for both Windows and macOS.
1 – Customize the Slack notification sound on macOS

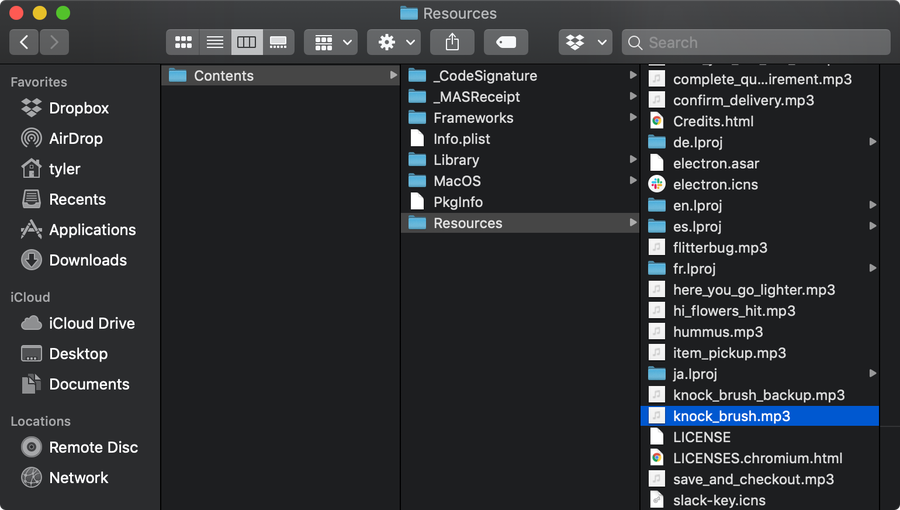
First, open Applications. Right click on Slack and choose Show Package Contents.
Navigate to Contents > Resources. This location stores the notification files used by Slack.
Your replacement file needs to be an .mp3 with the exact same name as the file you want to replace. For example: knock_brush.mp3. Once you have your file ready prepared, place it in the Resources folder to override the existing file. Make sure to back up the original sound files so you can easily restore them if necessary.
If your file is not an mp3, visit this guide to learn how to convert any audio file to an mp3.
Restart the Slack desktop application.
| 🛈 You will have to replace the notification audio file again if you update Slack. Keep a backup of the replacement sound. |
2 – Customize the Slack notification sound on Windows

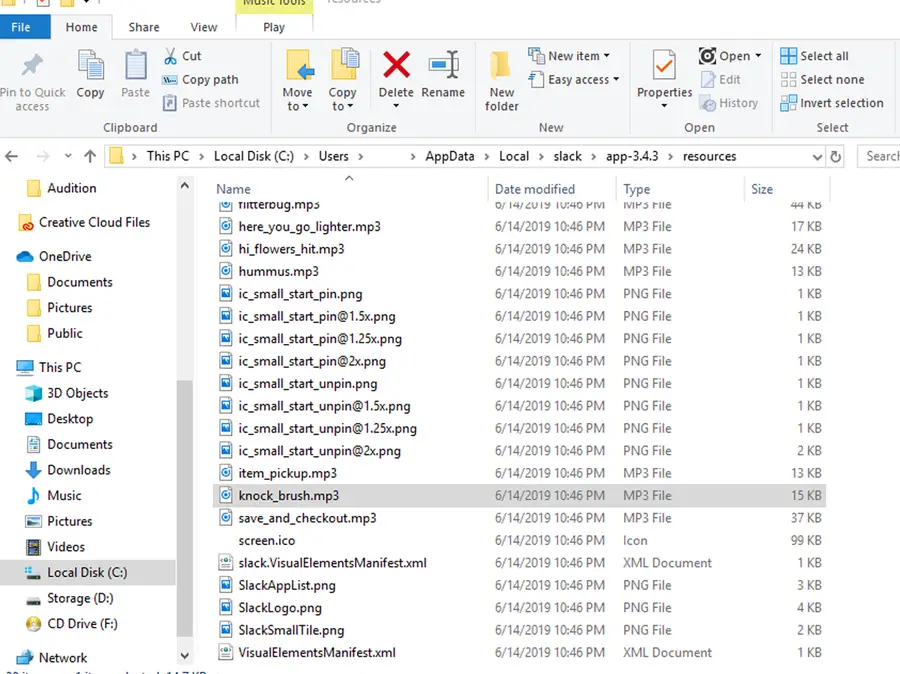
To replace the existing notification file, give your replacement sound file the exact same name as the one you want to replace. Make sure the replacement file is a .mp3 file. For example: knock_brush.mp3.
Place the custom audio file you want to use in the following folder:
C:\Users\[Username]\AppData\Local\slack\app-3.4.3\resourcesReplace [Username] with your Windows username. Restart Slack.
| 🛈 You will have to replace the notification audio file again if you update Slack. Keep a backup of the replacement sound. |
3 – Set your custom notification sound in Slack
Open the Slack community you want to adjust notification audio for. Expand the drop-down menu in the upper left-hand corner. The menu is labeled with the name of your currently active Slack community.
Select Preferences > Notifications.
Scroll down to Sound & appearance. Choose the custom file you replaced in the Slack installation folder. Congratulations! You’ve got a custom slack notification sound.
| 🛈 These settings are saved for each community and do not apply to global Slack preferences. |
4 – Where to find free notification sounds
You can find replacement audio files online for free. There are entire websites dedicated to providing free notification sound libraries. Here are a couple of sources to get you started.
Orange Free Sounds – This website hosts audio files that can be downloaded for free. You can find specific licensing information available for each file. They even have a category just for notification sounds.
Notification Sounds – This website is dedicated exclusively to notification audio. Everything is available for free.
5 – Back up your audio clip
Save a copy of your chosen .mp3 file, and keep it somewhere safe as you might need to repeat this process when you update Slack.
You’re all done! Now the next time your coworker leaves his computer unlocked, you can play a prank that he’ll never figure out how to undo. 😉 Unless he finds this guide, I guess.


