How to partition a hard drive on macOS
Share
Today we’re covering the easiest way to partition a hard drive on macOS. These steps will work on both internal hard drives and external devices like USB drives. Partitioning is useful for things like virtual machines or dual boot rigs. But it can also be a useful troubleshooting tool.
Partitioning involves splitting a hard drive into individually usable chunks. The capacity of the hard drive is split between the partitions, not shared. So a 100GB hard drive can make two 50GB partitions. But the split doesn’t have to be even. You can specify any amount you need. One partition can be 22Gb while the other is 78GB.
1 – Partition a hard drive using Disk Utility
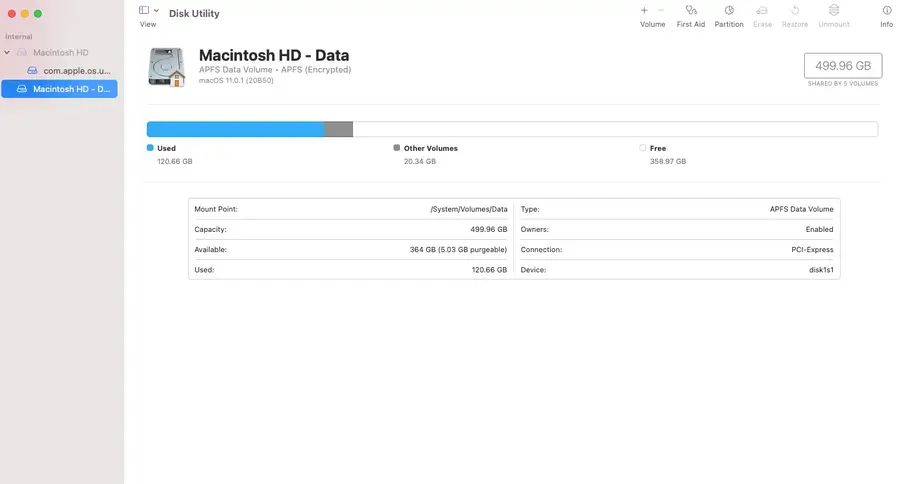
Navigate to Applications > Utilities > Disk Utility. Or search for Disk Utility in Mac’s Spotlight Search.
When Disk Utility is open, select the hard drive you want to break into a partition on the left side of the window.
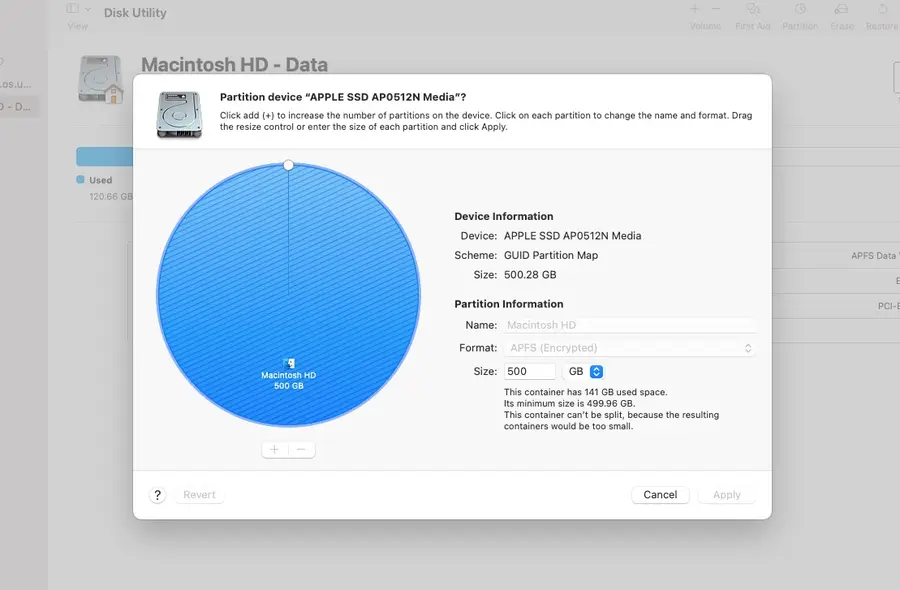
- Click Partition from the top menu bar.
- Select Add Volume to create a new partition.
- Choose a size and name for your new partition.
- Click Apply.
It may take a few minutes for the process to complete.
2 – Partition a hard drive using Terminal
Navigate to Applications > Utilities > Terminal.
Use the diskutil list command to see a list of drives connected to your computer. Take note of the disk name on the drive you want to partition.
This is the command to create a single partition:
diskutil partitionDisk /dev/disk2 GPT JHFS+ NewPartition 0bReplace /dev/disk2 with the name of your hard drive. Replace JHFS+ with the formatting of your choice. Changing NewPartition will change the name of your new partition. Lastly, 0b represents the size of the new partition. Adjust this to create a specific partition size.
Here’s an example showing the creation of multiple 10GB partitions:
diskutil partitionDisk /dev/disk2 GPT JHFS+ Partition1 10g JHFS+ Partition2 10gIt may take a few minutes for the partition to be created. Congratulations! You’ve successfully split your hard drive.

