How to Format a Hard Drive on macOS


Share
Whether your troubleshooting an old hard drive—or preparing or backing up an SD card for a Raspberry Pi—you’ll probably need to format that. We’ve got you covered! Today we’re looking at the best ways to format a hard drive on macOS.
These processes will work for hard drives, external drives, and flash drives alike. First things first, make sure the drive you want to format is connected to your computer.
If you, instead, need to format a hard drive in Windows, we have a separate guide for that.
1 – Format hard drive with Disk Utility
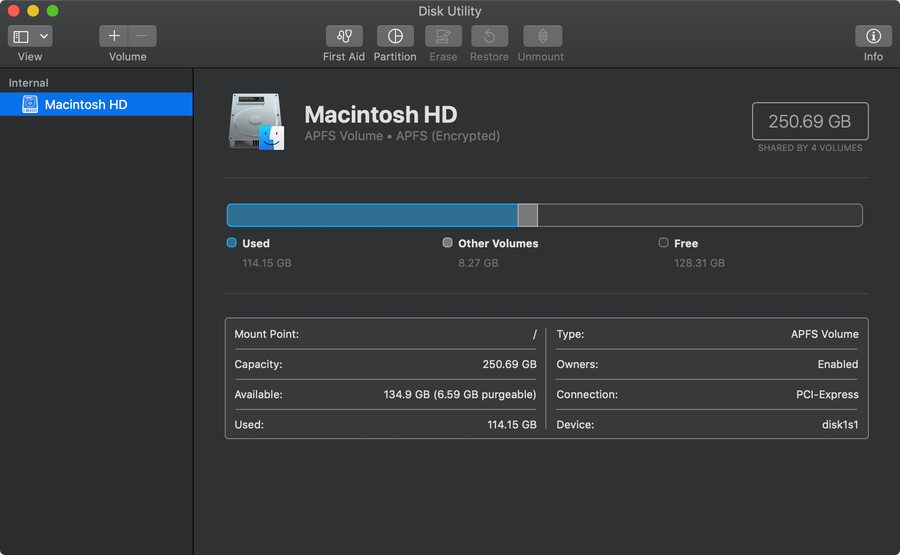
Navigate to Applications > Utilities and choose Disk Utility.
Select the drive you want to format from the left-hand navigation menu. Click Erase in the bottom right-hand corner.
Select a file system to format the drive with. If you’re not sure, Mac OS Extended (Journaled) is a safe bet. Choose a new name for the formatted drive and click Erase.
2 – Format hard drive through Terminal
| File System | Abbreviation |
|---|---|
| Mac OS Extended (Journaled) | JHFS+ |
| Mac OS Extended | HFS+ |
| MS-DOS fat32 | FAT32 |
| ExFAT | ExFAT |
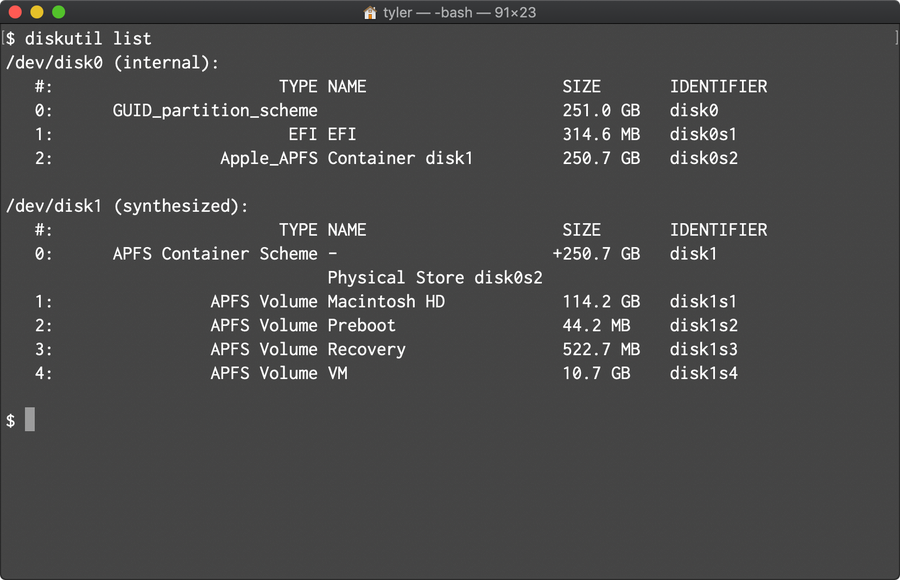
Navigate to Applications > Utilities and choose Terminal.
Type diskutil list and press enter. This will provide a list of hard drives attached to the machine. Locate and note the name of the drive you want to format.
You can use the diskutil eraseDisk command to format a hard drive. Run the following command, be sure to make adjustments for your drive. Replace JHFS+ with any file system you need (check the chart above for a list of file systems you can use). Replace CleanDrive with the new name for your formatted drive. Put your disk name in place of /dev/disk1
diskutil eraseDisk JHFS+ CleanDrive /dev/disk13 – You’re done!
Congratulations! Your hard drive has been formatted.