How to Install Raspbian Jessie on the Raspberry Pi

Share
Interests

Raspbian is a free Debian-based operating system optimized for the Raspberry Pi. Jessie is the development code name for Debian 8. This guide will walk you through the process of installing Raspbian Jessie on your Raspberry Pi.
| Note: A new version of Raspbian is available! Learn how to install Raspbian Buster. |

1 – Download Raspbian
Since Jessie is no longer the latest version of Raspbian, it’s been removed from the Raspbian Downloads page. However, you can still Download Raspbian Jessie from the Raspbian Image Archive using our guide.

Download Raspbian Jessie
Need an older version of Raspbian? No problem.
Choose either full (for a desktop) or lite (for command line/CLI only).
2 – Put your micro SD card into your computer
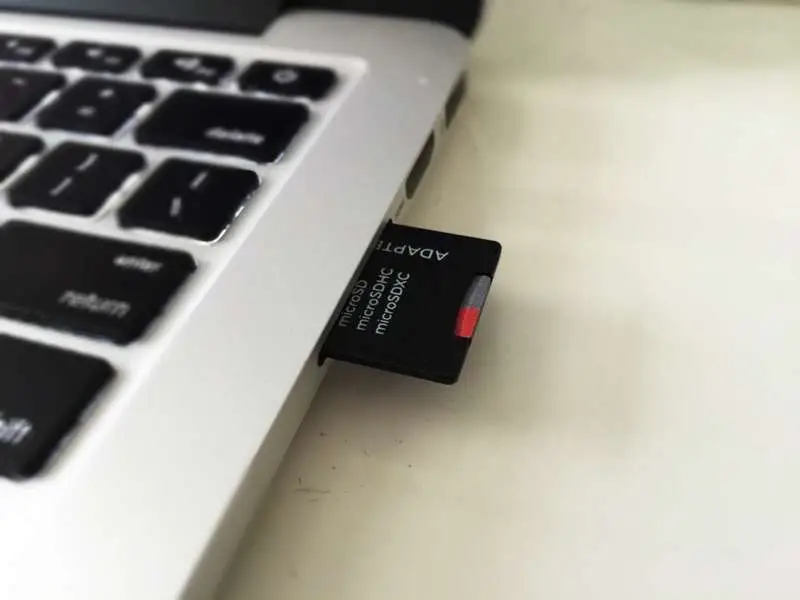
You’ll probably need to use an adapter.
3 – Using MacOS
If you’re using MacOS, you can use the following instructions. If you’re using Windows, scroll down.
4 – Open the Disk Utility and find your SD card
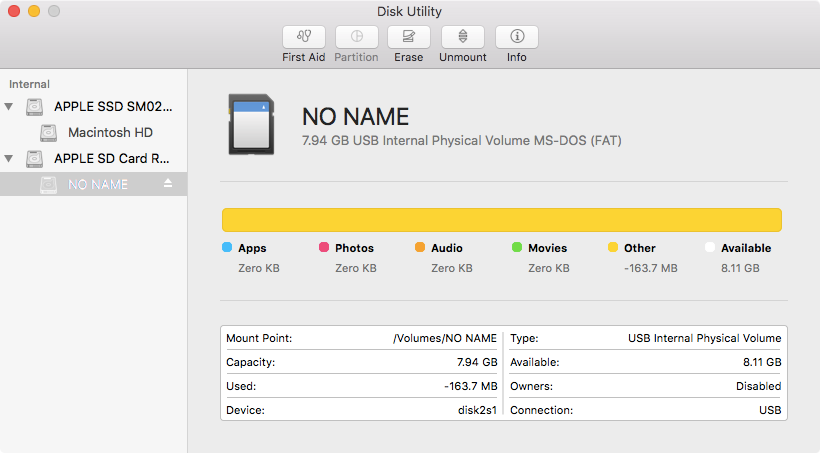
To open Disk Utility you can type cmd + space bar and search. Or you can use Finder to navigate to Applications > Utilities > Disk Utility.
5 – Format the SD card

You’ll need to format the SD card to FAT-32. To do so you’ll need to click on the “Apple SDXC Reader” in the left column of Disk Utility.
Click the “Erase” tab.
Choose a name for the card (I chose Jessie). For the format, choose MS-DOS (FAT).
Click “Erase” when you’re finished.
6 – Determine the mount point
Using the df command we’re going to determine the mount point.
Type:
df -hIn the output, under the Mounted on column look for the name of your SD card. I named my JESSIE so I’m looking for /Volumes/JESSIE.
Then take note of the filesystem name in the first column. Mine is /dev/disk2s1. This is actually the partition name, but what we’re really concerned with is the device name which is disk2. Copy this device name.
7 – Unmount the volume
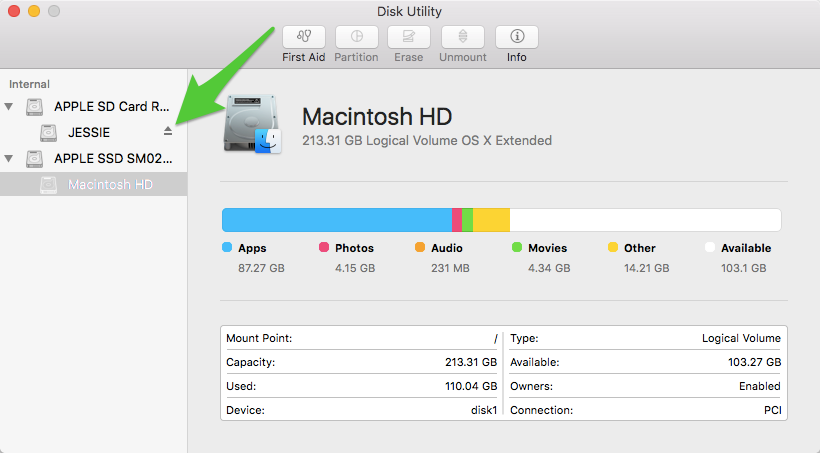
For this step you can use either Disk Utility or Finder. In either case look in the left column for the name of your SD card. In my case it’s JESSIE and click the eject symbol.
8 – Find the disk image
Hopefully by now the disk image is done downloading. By default, the disk image will download to your Downloads folder. Open up the Terminal application and type:
cd ~/DownloadsTo locate the img type:
ls -lha | grep jessieYou should see some output like this:
Downloads> ls -lha | grep jessie
-rw-r--r--@   1 tyler  staff   292M Feb 25 15:04 2017-01-11-raspbian-jessie-lite.zip
Now unzip the image. Make sure to use the name of your file.
unzip 2017-01-11-raspbian-jessie-lite.zip9 – Flash the disk image
Go back to Terminal (ensuring you are in the same directory as before), and type:
sudo dd bs=1m if=DISK_IMAGE_NAME of=DEVICE_NAMEMake sure to replace the values for DISK_IMAGE_NAME and DEVICE_NAME. Mine looks like this:
sudo dd bs=1m if=2017-01-11-raspbian-jessie-lite.img of=/dev/rdisk2Enter your password, wait until it finishes, and you’re done.
Note: You may have noticed that we’re using rdisk2 instead of disk2. You can actually use either, but rdisk2 is significantly faster.
10 – Using Windows
If you’re using Windows to format the Disk you can use the following steps.
11 – Format the SD card
Open Windows Explorer and find your SD card. Right click on the icon and click Format…. Make sure Fat 32 (default) is selected and hit enter.
12 – Download and launch Win32 Disk Imager
Go here and download the app called Win32 Disk Imager. After downloading the program, click to uncompress the files, and then click Win32DiskImager.exe to launch.
13 – Flash the SD card
In the Win32 Disk Imager, click the blue folder icon and locate the Jessie image you downloaded. Then in the Device box make sure the drive letter for your SD card is selected.
Click the Write button to begin.


