How to Set Up a Raspberry Pi Network Monitor

Share
What you'll need
Interests


Laptops, smartphones, tablets, even lightbulbs—an endless number of devices now have the ability to connect to your local network and the wider internet. Keeping an eye on network-capable devices is important, especially if you’re worried about network security or you’re trying to troubleshoot bandwidth issues.
This is where a network monitor can prove useful. There are a few ways to do this, but if you want to keep an eye on the devices and data traveling over your network 24/7, then you may want to set up a network monitor using a Raspberry Pi single-board computer.
Running in the background, your Raspberry Pi will log network traffic and performance, allowing you to troubleshoot or monitor certain issues. If you want to set up a Raspberry Pi network monitor, here’s what you’ll need to do.
1 – Creating a Raspberry Pi network monitor using NEMS
For this project, we’ll be using Nagios, which is an industry-standard, open-source monitoring tool for Windows and Linux PCs and servers. Specifically, we’ll be using NEMS (Nagios Enterprise Monitoring Server), a version of Nagios that you can use on the Raspberry Pi as a replacement for Raspberry Pi OS.
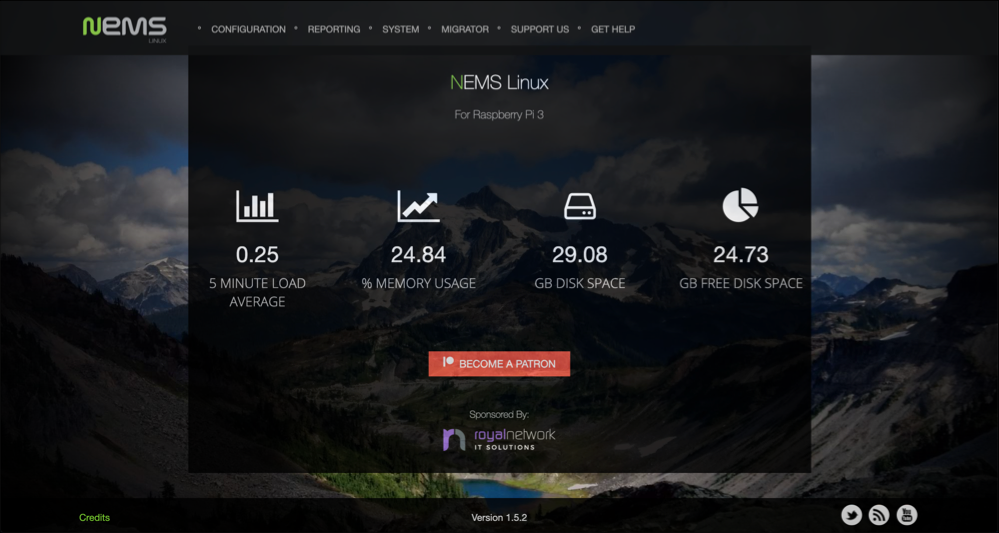
Nagios (on NEMS) has a range of features that make it the ideal option for network monitoring, as we’ll explain further. To run NEMS, you’ll need a Raspberry Pi 3 or 4. Older Raspberry Pi’s may work with some features disabled, but the NEMS development team recommends the newest Pi models for best performance.
To install NEMS on a Raspberry Pi, you’ll also need a microSD card with a minimum size of 16GB, with 32GB preferred.
A keyboard, mouse, and monitor are all unnecessary, as you’ll be able to access NEMS over SSH or by using a dashboard interface that you can access from your web browser.
How to Connect to a Raspberry Pi Remotely via SSH
The preferred (and most common) method of connecting to your Pi to run commands.
2 – How to install NEMS on a Raspberry Pi
Before you can use NEMS, you’ll need to first flash a microSD card (16GB and above in size) with the latest NEMS image, which you can download from the NEMS website.
You can then flash the image to your Raspberry Pi using the Raspberry Pi Imager, a tool created by the official Raspberry Pi Foundation for installing new operating systems. The Raspberry Pi Imager works on Windows, macOS, and Linux, and can be downloaded from the Raspberry Pi Foundation website.

How to Use Raspberry Pi Imager
New official Raspberry Pi imaging software.
- Open the Raspberry Pi Imager tool to begin, then click the Choose OS button.
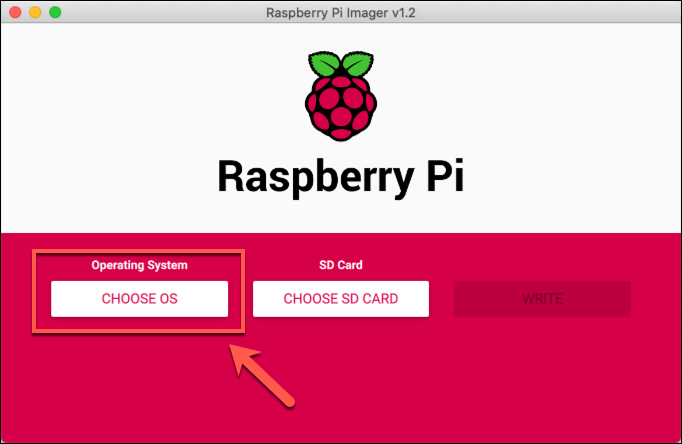
- In the Operating System selection menu, press the Use custom option. You’ll need to find and select your NEMS image file (in the IMG file format).
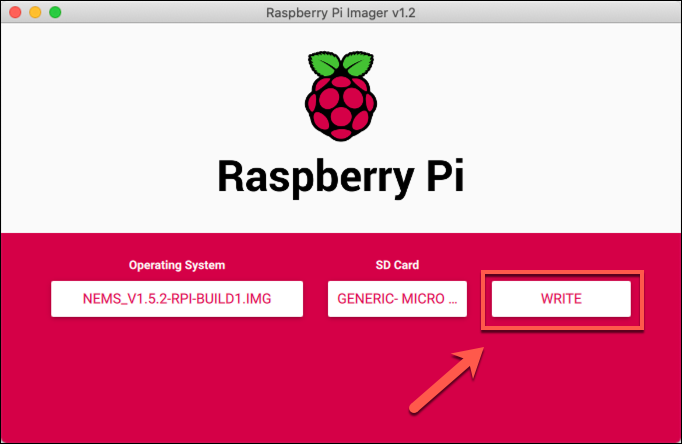
- With the NEMS image file selected, click Choose SD Card to select your microSD card.
- Once you’re ready to write the image to your SD card, press the Write button. This will take a bit of time to complete.
If the image is written to your microSD card successfully, remove it from your PC and return it to your Raspberry Pi. You’ll now be ready to begin setting up and using NEMS.
3 – Signing in to NEMS on a Raspberry Pi
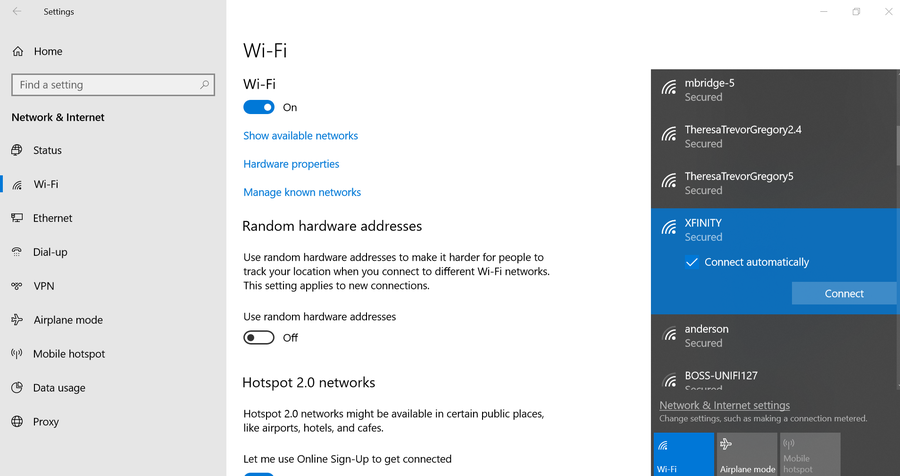
During setup, it’s best to connect your Raspberry Pi running NEMS to your local network using a wired ethernet connection. If that isn’t possible, you’ll need to set up Wi-Fi on your Raspberry Pi by adding a wpa_supplicant.conf file to the boot partition on your microSD card, but this may not work effectively.
You’ll also need to know the local IP address for your Raspberry Pi when you first boot it. You can find this from your local router’s DHCP list, or by using apps like Fing or nmap to scan your local network.

To set up NEMS, power up your Raspberry Pi with your microSD card inserted. Once your Pi is set up, access NEMS from your web browser by typing http://ip-address, replacing ip-address with the IP address for your Raspberry Pi.
Alternatively, you can visit your NEMS web portal at http://nems.local instead. This may or may not work, depending on how your network is currently configured.
You can also follow these instructions by making an SSH connection to your Pi, using the default username and password (nemsadmin for both).
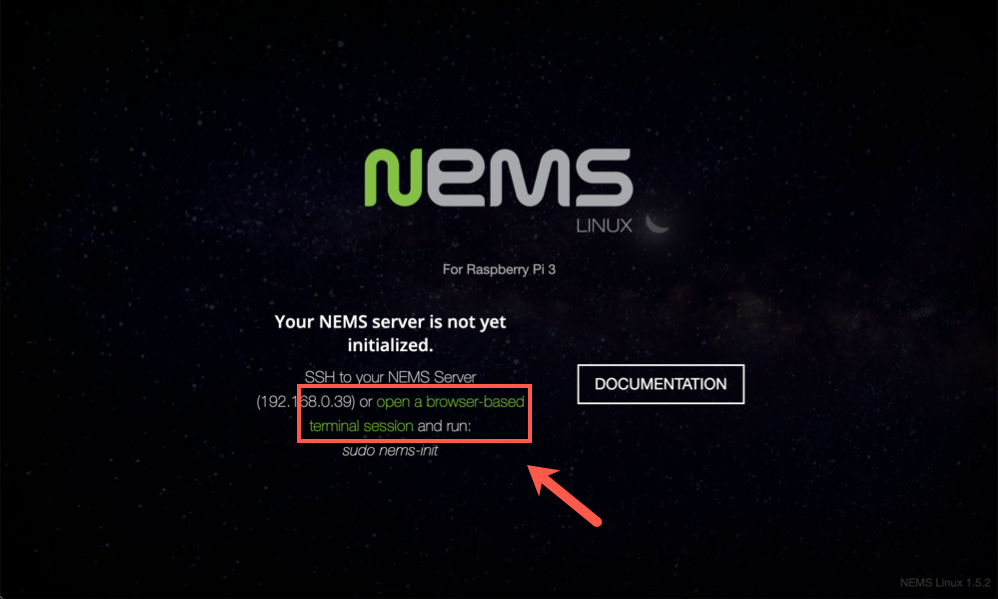
If you decide to use the web interface, you’ll see the Not Initialized screen. Click the open a browser-based terminal session link to open the web-based terminal.
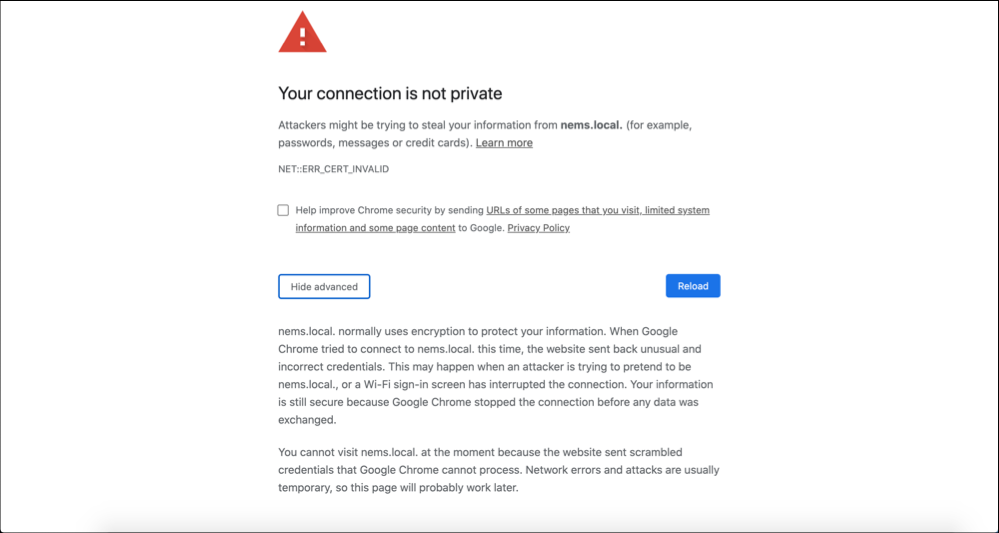
Web browsers like Google Chrome will sometimes block this page due to a slight mismatch with the security certificate issued for NEMS, and you’ll need to bypass this. If you’re using Chrome and you get this error, press the Advanced button, then type thisisunsafe on your keyboard.
Don’t worry—this is safe to do! You can regenerate your SSL certificates at a later stage to overcome this problem once your Raspberry Pi has been correctly configured.
Once the portal loads, sign in using the default username and password (nemsadmin) to access the NEMS admin portal (named Cockpit).
4 – Configuring NEMS on a Raspberry Pi
Once you’ve signed in, type sudo nems-init at the web terminal, accessible from the Terminal section. This will begin the initial configuration.
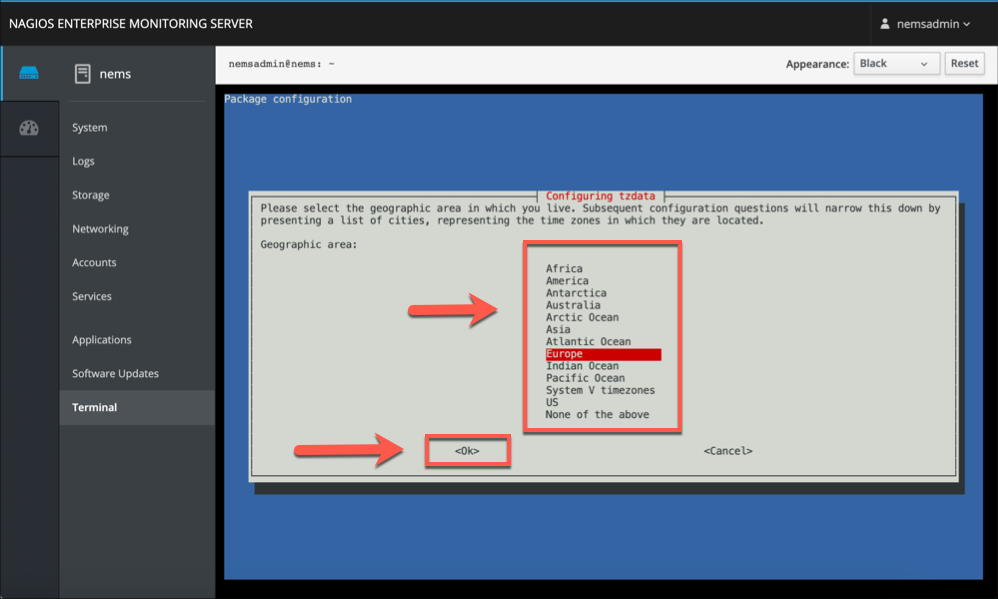
You’ll first need to select your geographical area from the configuration menu using your keyboard arrow keys. Once you’ve selected an option, hit the tab key on your keyboard to select OK, then hit enter to proceed.
Select your nearest city from the next list, hitting enter (or tab and enter) to confirm. You’ll then need to follow a similar process for determining your locale, which is used to set certain keyboard and language settings.
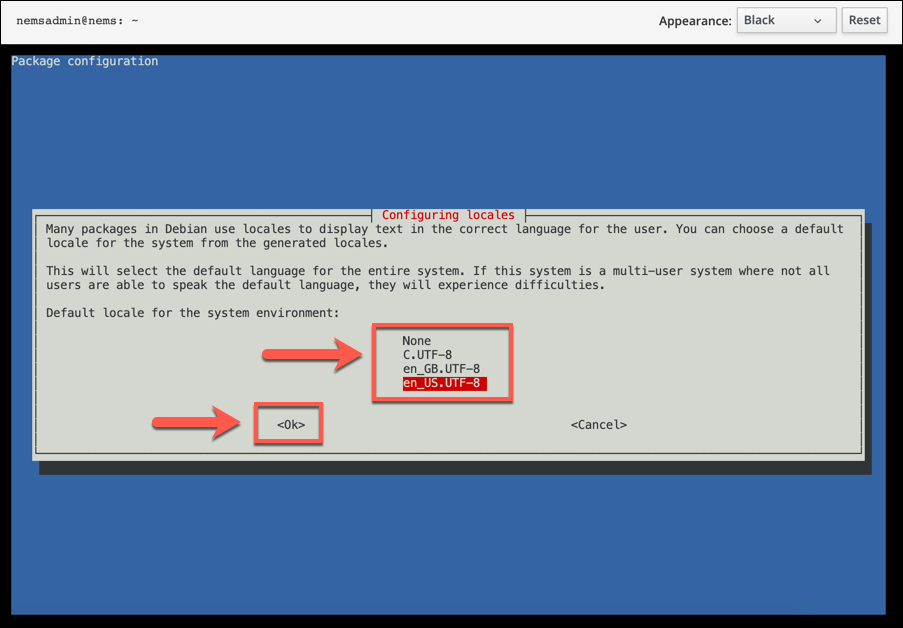
Find your preferred language (or languages) in the list (eg. en_US.UTF-8). Once your chosen languages are selected, hit tab and enter on your keyboard to proceed. You’ll then need to confirm the default locale from the next menu—use your arrow keys to select your preferred locale, then hit enter (or tab and enter) to confirm.
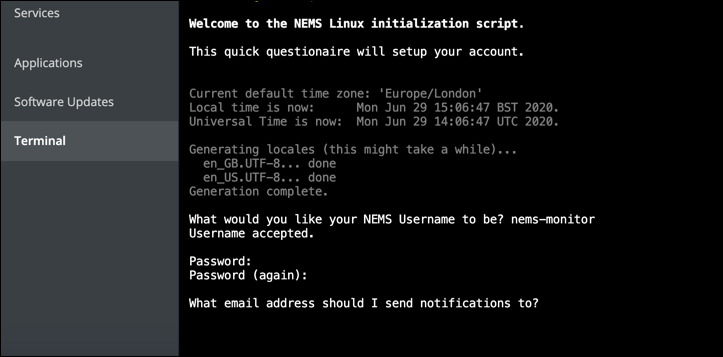
Your locale settings will be applied at this point, which may take a little bit of time to complete. Once the configuration is complete, you’ll move to the next stage of the setup process.
You’ll need to choose a new username and password to use with NEMS next. Type a username into the terminal, then hit enter to confirm. For security reasons, we’d avoid common usernames like admin or root here.
Repeat the process by providing a secure password for your new user account, which you’ll need to type twice to confirm. If the password is accepted, provide an email address at the next stage, which NEMS will try to use to send you urgent notifications while you’re not actively monitoring the Nagios portal, although this may require further configuration to work.
The NEMS initialization script will set up your new account at this stage, applying the correct user privileges and generating secure SSH certificates for remote connections.
You’ll need to sign-out once NEMS confirms the process is complete, as the initial nemsadmin user account you were using will have been disabled.
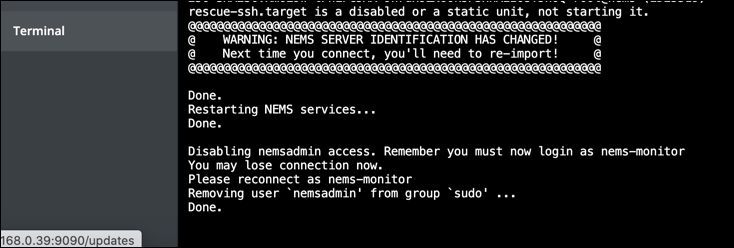
To do this, press the menu in the top-right and click Log Out. This will return you to the portal authentication page, where you can sign in using your new username and password to make further changes to your NEMS configuration and view performance logs for your Raspberry Pi.
If you encounter any problems, restart your Raspberry Pi to fully load any changes you’ve made to your NEMS configuration.
5 – Available NEMS dashboards for network and system monitoring
You’ll be able to view installed Nagios network plugins and dashboards from the NEMS web portal, accessible at https://nems.local or https://ip-address (replacing ip-address with your Pi’s IP address).
Other plugins you wish to install may come with their own instructions and prerequisite packages, so be sure to check the manpages and documentation for these packages first.
By default, NEMS includes some useful web dashboards and tools for you to use, including:
- NEMS Adagios, a configurable web dashboard for your Nagios services (accessible at https://nems.local/adagios/status)
- Nagios Core, the original and configurable Nagios web dashboard (accessible at https://nems.local/nagios/)
- NEMS Mobile, a basic mobile UI for viewing Nagios data from mobile devices (accessible at https://nems.local/mobile)
- NEMS TV Dashboard, a dashboard for Nagios data for display on a large monitor or TV (accessible at https://nems.local/tv/)
- NEMS Tactical Overview, an emergency dashboard that will display urgent problems with any of your Nagios monitored devices or services (accessible at https://nems.local/nagiostv/)
- Monitorix, a lightweight network and system monitoring dashboard (accessible at https://nems.local/monitorix/)
- Cockpit, the NEMS web admin portal with web terminal and other tools and statistics available (accessible at https://nems.local:9090/)
- RPi-Monitor, a dashboard to monitor your Raspberry Pi system resources (accessible at http://nems.local:8888/)
- Monit, a dashboard to monitor whether services such as Nagios, Samba, Monitorix and others are working or not (accessible at https://nems.local:2812/)
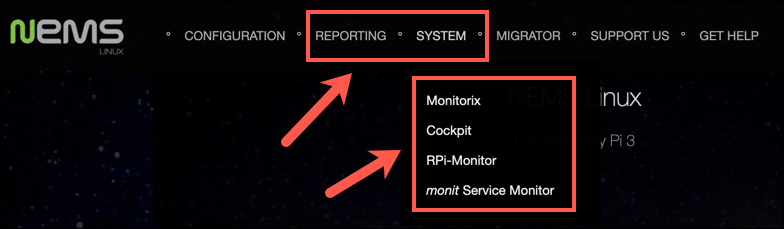
You can access these services from the Reporting and System menus on the NEMS web portal, which you can access at https://nems.local/ or https://ip-address (replacing ip-address with your Raspberry Pi’s IP address),
6 – Using SNMP for general network monitoring with Cacti
The Simple Network Management Protocol (SNMP) is used to share information between network-capable devices on a local network. You can use this protocol on a Raspberry Pi to gain an overview of your network for basic network monitoring.
To do this, you’ll need to use RRDTool and Cacti. RRDTool is used for logging real-time data using SNMP, while Cacti presents it in a dashboard you can use alongside other NEMS dashboards. This will only work with routers that support SNMP, so be sure to check this first.
You’ll need to open the web terminal at https://nems.local:9090/system/terminal or https://ip-address:9090/system/terminal (replacing ip-address with the Raspberry Pi IP address) to begin the download, configuration and installation process.
You can also do this over an SSH connection if you’d prefer.
7 – Downloading and configuring Cacti
To install the necessary packages, type the following in the open terminal window, typing Y to confirm:
sudo apt install -y snmp php-snmp rrdtool librrds-perlYou’ll need to restart your web server (Apache) and database (MariaDB) services to ensure RRDTool loads, as well as add timezone information to your database. Type the following at the terminal to do this, using the password nagiosadmin:
mysql_tzinfo_to_sql /usr/share/zoneinfo | mysql -u root -p mysql
sudo systemctl restart mariadb
sudo systemctl restart apache2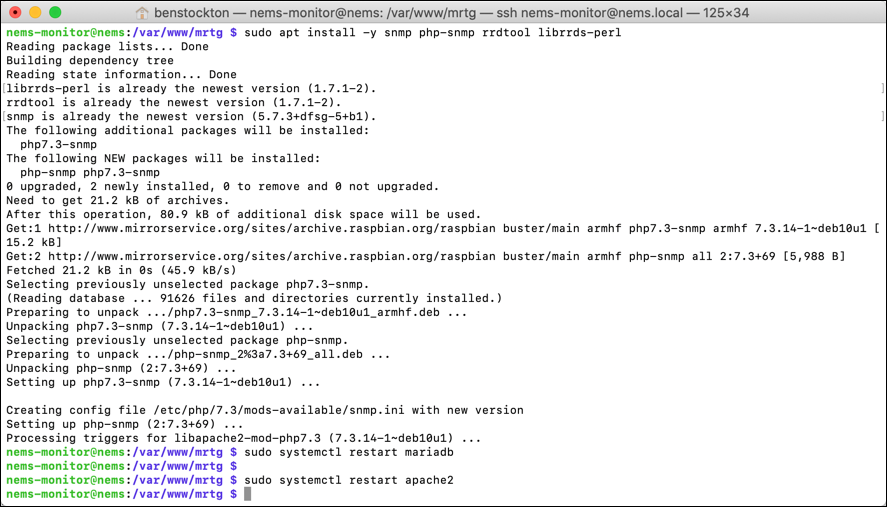
You’ll need to create a new database for Cacti to use. First, sign in to the MariaDB terminal using the username root and password nagiosadmin:
sudo mysql -u root -pOnce you’re signed in, type the following into the terminal window to create your new database:
create database cacti;
GRANT ALL ON cacti.* TO cactiuser@localhost IDENTIFIED BY 'cactipass';
flush privileges;
exit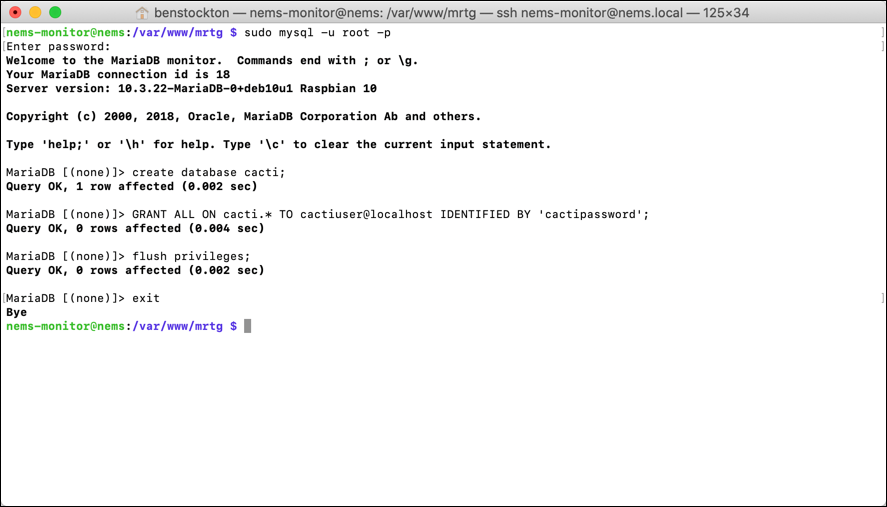
It’s advisable to replace the default pass listed here (cactipass) with a more secure alternative.
Once you’ve created your new database user (cactiuser), you’ll need to give it access to the MySQL timezone table. To do this, type the following at the terminal:
sudo mysql -u root -p
GRANT SELECT ON mysql.time_zone_name TO cactiuser@localhost;
flush privileges;
exit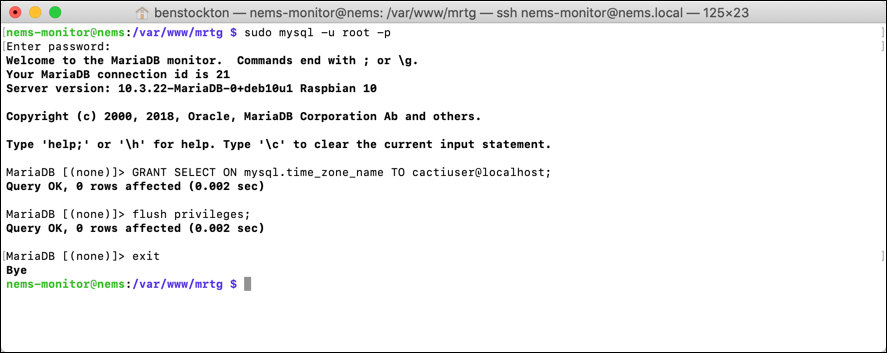
With the database for Cacti ready, you can finally install the Cacti dashboard. To do this, type the following into the terminal to update your database, download and extract Cacti, and load the configuration into your new Cacti database:
sudo mysql_upgrade -u root -p
sudo service mysqld restart
cd /tmp
wget https://www.cacti.net/downloads/cacti-latest.tar.gz
tar -zxvf cacti-latest.tar.gz
sudo mv cacti-1* /opt/cacti
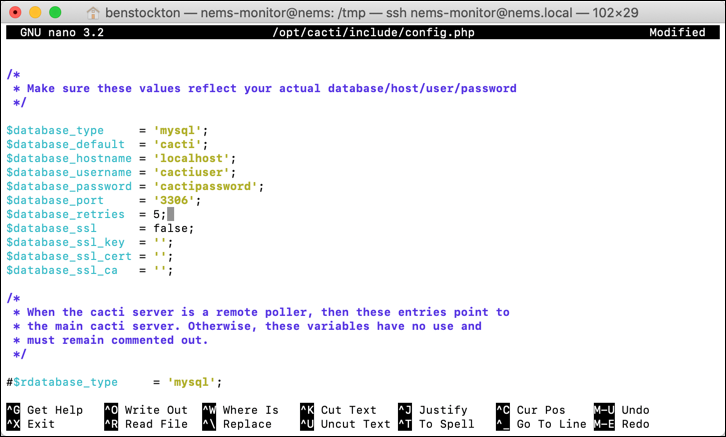
sudo mysql -u root -p cacti < /opt/cacti/cacti.sqlYou’ll need to update the Cacti config to use the correct username and password by typing sudo nano /opt/cacti/include/config.php to edit the file, adding your new username and password to the $database_username and $database_password sections.
Press Ctrl+O and Ctrl+X to save and exit. Cacti will need to be told to update on a regular basis, which you can do using crontab. The following steps will set Cacti to update every 5 minutes, but you can change this if you would prefer:
sudo nano /etc/cron.d/cacti
*/5 * * * * www-data php /opt/cacti/poller.php > /dev/null 2>&1
Press Ctrl+O and Ctrl+X to save and exit the file. You’ll next need to update your Apache web server configuration, so open the configuration file with sudo nano /etc/apache2/sites-available/cacti.conf at the terminal and adding the following:
Alias /cacti /opt/cacti

  <Directory /opt/cacti>
      Options +FollowSymLinks
      AllowOverride None
      <IfVersion >= 2.3>
      Require all granted
      </IfVersion>
      <IfVersion < 2.3>
      Order Allow,Deny
      Allow from all
      </IfVersion>

   AddType application/x-httpd-php .php

<IfModule mod_php.c>
      php_flag magic_quotes_gpc Off
      php_flag short_open_tag On
      php_flag register_globals Off
      php_flag register_argc_argv On
      php_flag track_vars On
      # this setting is necessary for some locales
      php_value mbstring.func_overload 0
      php_value include_path .
 </IfModule>

  DirectoryIndex index.php
</Directory>
Once this is added, press Ctrl+X and Ctrl+O to save and exit. Finally, you can enable your configuration for Cacti, restart Apache and create a log file for Cacti (useful for troubleshooting) by typing the following:
sudo a2ensite cacti
sudo systemctl restart apache2
sudo touch /opt/cacti/log/cacti.log
sudo chown -R www-data:www-data /opt/cacti/
If these steps complete successfully, you’re now ready to begin installing Cacti.
8 – Installing Cacti
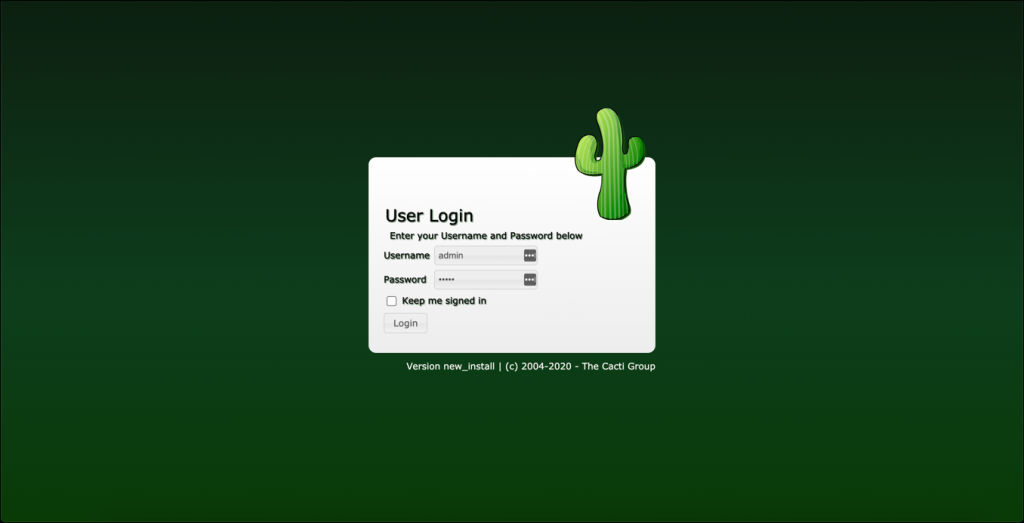
You should now be able to access Cacti by opening your web browser and accessing the installation dashboard at https://nems.local/cacti or https://ip-address/cacti (replacing ip-address with your Raspberry Pi’s IP address).
Sign in using the username admin and password admin to begin the installation.
Cacti will ask you to change the default password. Type the existing password and a new password, then press Save to confirm.
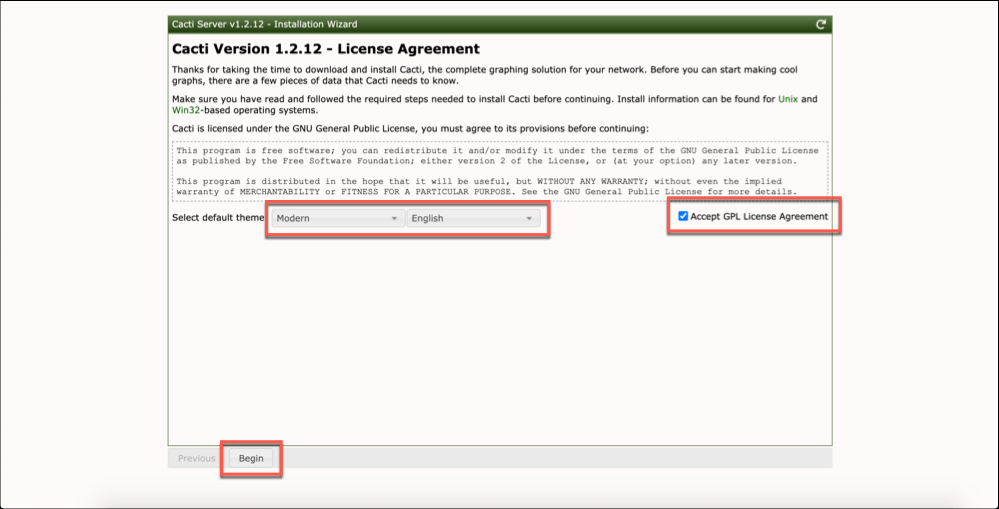
You’ll be required to accept the license agreement next. Press the Accept GPL License Agreement checkbox, then select a theme and language from the available drop-down menus.
Once you’re ready, click Begin to proceed.
Cacti will check that the required PHP and MYSQL modules and databases are ready to use. If there are any warnings or errors, these will be listed here, and you may have to fix these before you can proceed.
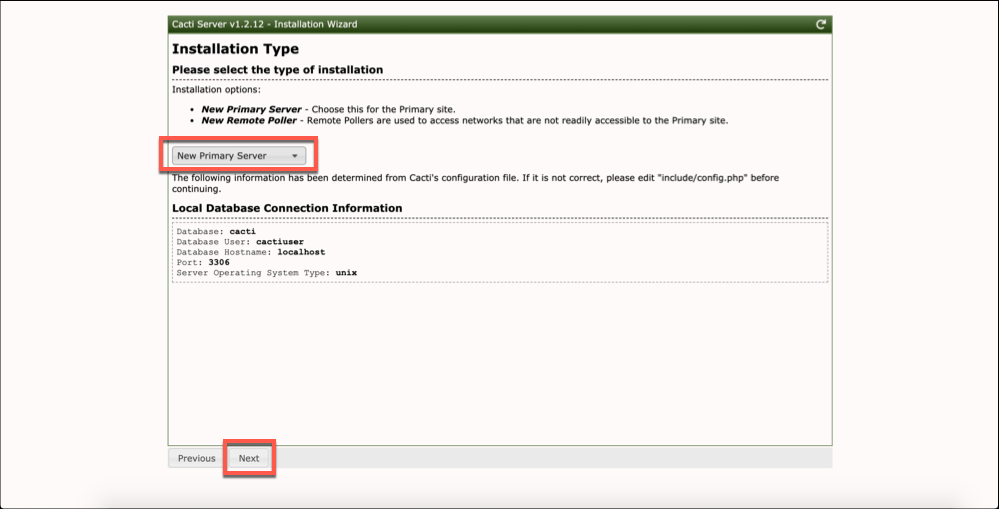
If there are no errors (or only minor warnings), click Next to move to the next stage. You’ll want to leave the Installation Type as New Primary Server, then click Next.
Cacti will perform another check to confirm that it has permissions to write to your microSD card. Assuming no problems, click Next to proceed.
You’ll also be asked to confirm that critical binary locations are correct. These should all be correct with a green tick to confirm next to each option, so click Next to move to the next stage.
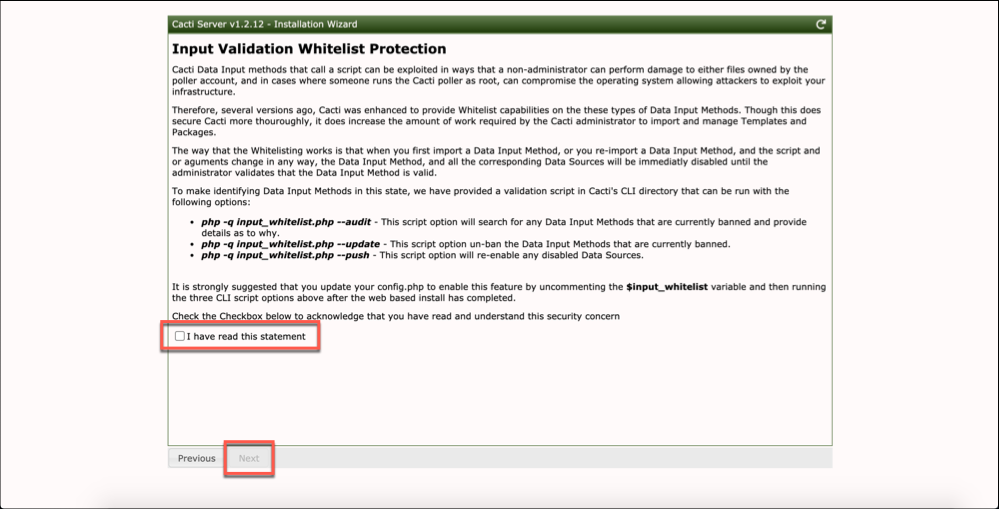
Cacti uses whitelist protection for security, which you can activate using the instructions shown at the next stage. This isn’t strictly necessary, however, so click the I have read this statement checkbox, then click Next.
The default settings at the next stage should be fine to leave, but you can change how often Cacti polls your network for data here. Make sure that the IP address range listed under Network Range matches the IP range on your local network before clicking Next.
Cacti uses default templates to pool data from various different types of devices. It’s recommended to leave all of the templates at the Template Setup stage enabled, then click Next.
Cacti will also check whether your database is compliant and safe to write to. Check this page for warnings (and correct any that appear accordingly), then click Next.
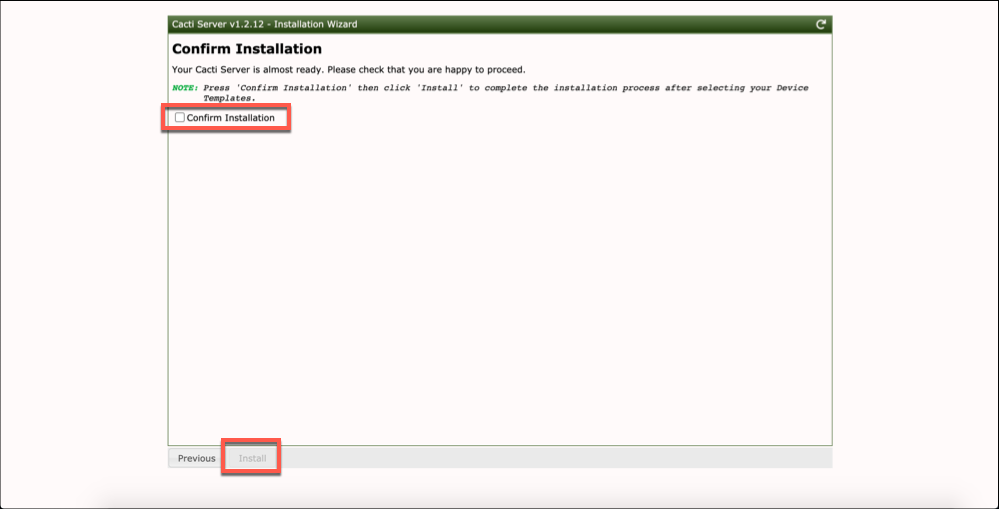
Finally, click the Confirm Installation checkbox, then click Install to begin the installation.
The installation will take a little bit of time to complete. Once it’s done, you can access your network data by clicking the Get Started button at the bottom of the page.
Using SNMP, you can test your network to automatically detect new devices. You can find these under the Automation > Discovered Devices menu, with further configuration available for your network testing under Automation > Networks.
From here, you can add these as saved devices, which will appear under the Management > Devices menu.

Cacti is extremely customizable, allowing you to create your own graphs, reports, and monitoring logs. You may wish to extend and configure it further, depending on your own network and requirements.
You can find out more about how to do this from the extensive Cacti documentation pages.
9 – Installing additional network monitoring plugins for Nagios (optional)
Nagios is a platform that can be extensively configured and adapted to suit your own needs. You may wish to install additional plugins for further network monitoring from sites such as the Nagios Exchange or the Monitoring Plugins project.
The Monitoring Plugins project offers a set of around 50 network monitoring plugins that you can use to log data and import into other dashboards.
If you want to install the plugins from the Monitoring Plugins project, access the NEMS admin portal (Cockpit) by opening https://nems.local:9090/system/terminal or https://ip-address:9090/system/terminal (replacing ip-address with your Raspberry Pi’s IP address) and signing in using the username and password you created earlier. You can also do this using an SSH connection to your Pi.
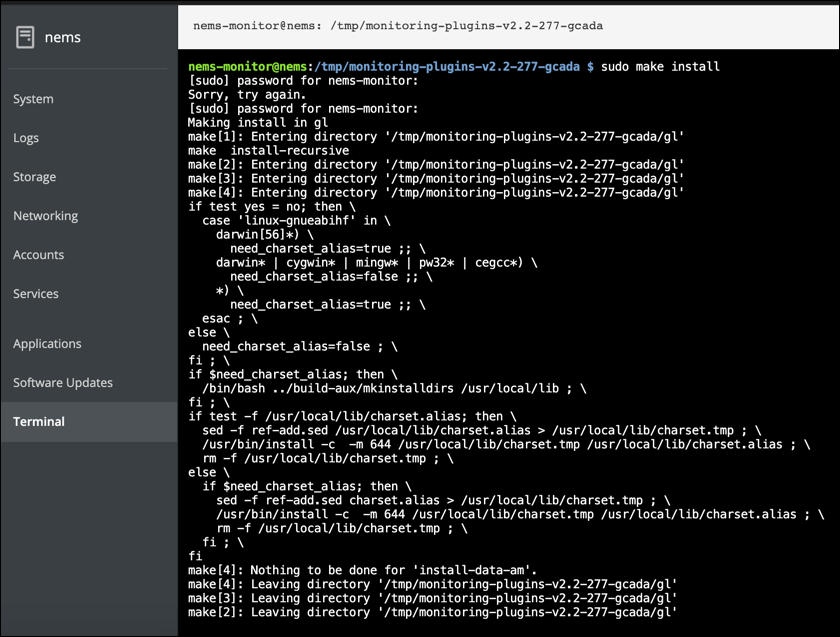
At the terminal window, type the following to download, compile, and install the plugins:
cd /tmp
wget https://www.monitoring-plugins.org/download/monitoring-plugins-2.2.tar.gz
gzip -dc monitoring-plugins-2.2.tar.gz | tar -xf -
cd monitoring-plugins-2.2
./configure
sudo make
sudo make install
You can replace the tar.gz URL and further references to the file with the latest version, available for download at the Monitoring Plugins project download page. If the Stable release fails to compile or install, repeat the steps using the Development Snapshot release instead.
This will take some time to complete. Once completed, type sudo reboot to reboot your Raspberry Pi and reload your Nagios configuration to support the new plugins.
You can find out more about each individual plugin, including how to execute them and integrate them into your Nagios logging and graphing dashboards, at the Monitoring Plugins project documentation pages.
10 – Updating SSL certificates for NEMS web portal (optional)
If you’re having trouble with SSL certificate errors in your web browser when you connect to the NEMS portal, you’ll need to regenerate your certificates to solve the problem.
To do this, open a secure SSH connection to your Raspberry Pi or access the web terminal for NEMS at https://nems.local:9090/system/terminal or https://ip-address:9090/system/terminal, replacing ip-address with the IP address for your Raspberry Pi.
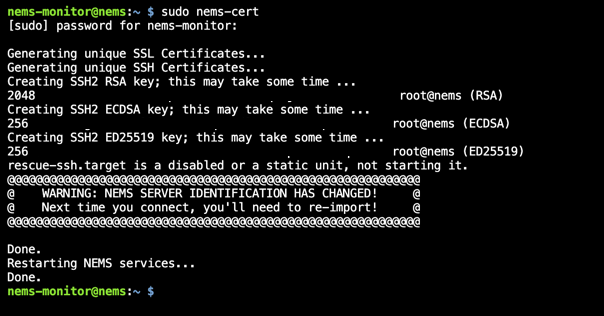
At the remote SSH or web terminal, type sudo nems-cert to regenerate your certificates. The process will complete automatically, and should stop any errors from occurring.
If the errors do reappear at any stage, repeat these steps to solve the problem.
11 – Next steps after basic NEMS configuration
Once you’ve completed basic configuration for NEMS, you’ll probably want to install the Nagios monitoring agent to be able to monitor certain network devices more closely. You can then add and configure these in the Adagios dashboard.
If you’re only looking for more basic and automatic network monitoring, then Cacti should suit your needs. If Cacti is set up correctly, it will continue to poll your network for new devices at regular interviews, which you can then add to specific Cacti graphs and logs for regular monitoring.
If you have resources to spare, you could also think about using Nagios alongside other projects on your Raspberry Pi. At its core, NEMS is simply a lightweight version of Debian Linux, so you should be able to install other packages to create a 24/7 server for your network without too much of an impact on performance.
For instance, NEMS has Samba installed by default, so you could think about creating a very simple file share for your devices. If you’re creating a Raspberry Pi NAS drive, however, you’ll probably want to use a separate Raspberry Pi to ensure adequate system resources are available.