How to Configure a Static IP Address on the Raspberry Pi

Share
What you'll need
Interests

Posted in these interests:

The network capabilities on the Raspberry Pi make it possible to create some really fun projects. Once in a while, you’ll come across a project that could benefit from a static IP address. If you’re using your Raspberry Pi for storage as a NAS device, an FTP server—or any other kind of server for that matter—a static IP address can be a big help.
1 – Update Raspberry Pi OS

This guide should work with any Raspberry Pi using Raspberry Pi OS (formerly Raspbian). Make sure your copy of is up to date. If you’re not sure where to begin, visit our guide on how to update Raspberry Pi OS.

How to Install Raspberry Pi OS on Your Raspberry Pi
Get the new official Raspberry Pi OS on your Pi.
2 – Find your router IP address
We’ll need both your router IP address and name server IP. We can find this information by running a few commands in a terminal on the Pi. Remote into the Pi using SSH or open a terminal window from within Raspberry Pi OS.

How to Connect to a Raspberry Pi Remotely via SSH
The preferred (and most common) method of connecting to your Pi to run commands.
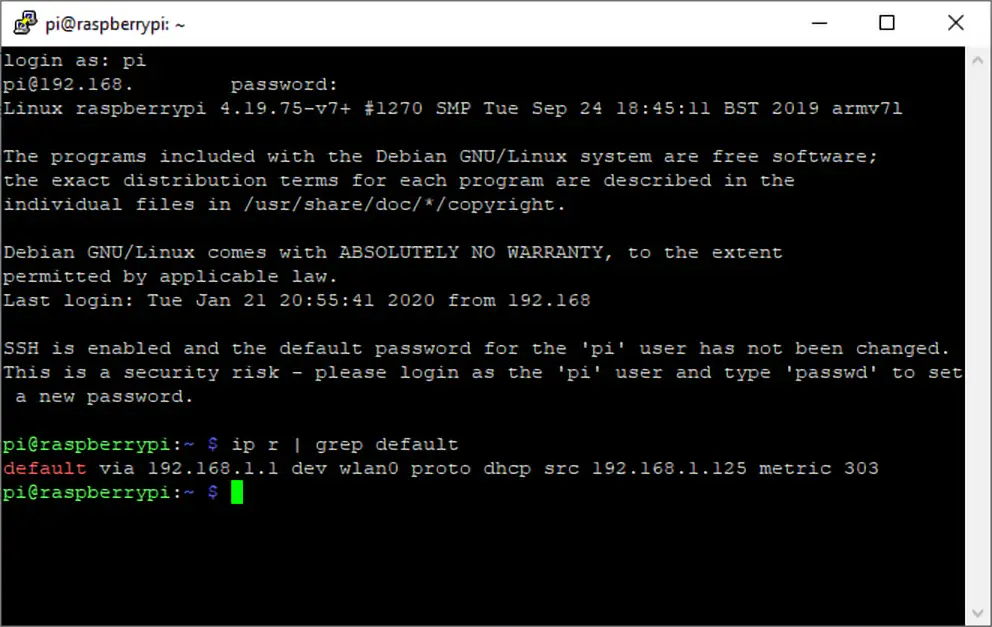
To find your router IP address, enter the following command:
ip r | grep defaultThe router IP address will appear after the text “default via”—take note of it. The name server can be found in the resolv.conf file. Open it using the following command.
sudo nano /etc/resolv.confTake note of the name server IP address and close the file with CTRL + X.
3 – Edit the dhcpcd file on the Raspberry Pi
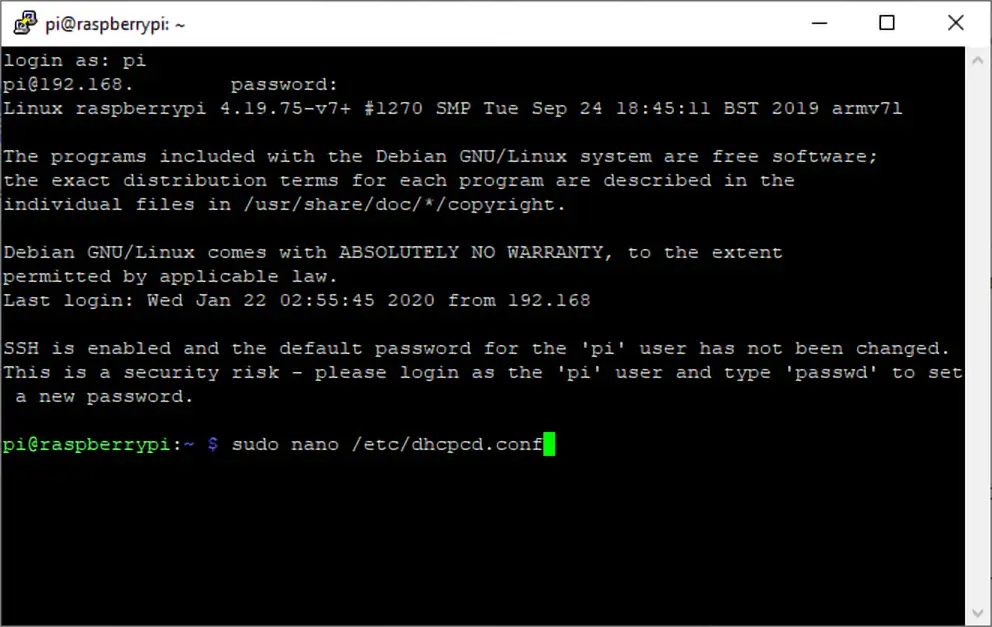
The static IP is set by adding it to a file on the Raspberry Pi. In the terminal window, run the following command to edit the dhcpcd.conf file.
sudo nano /etc/dhcpcd.conf4 – Set the static IP address
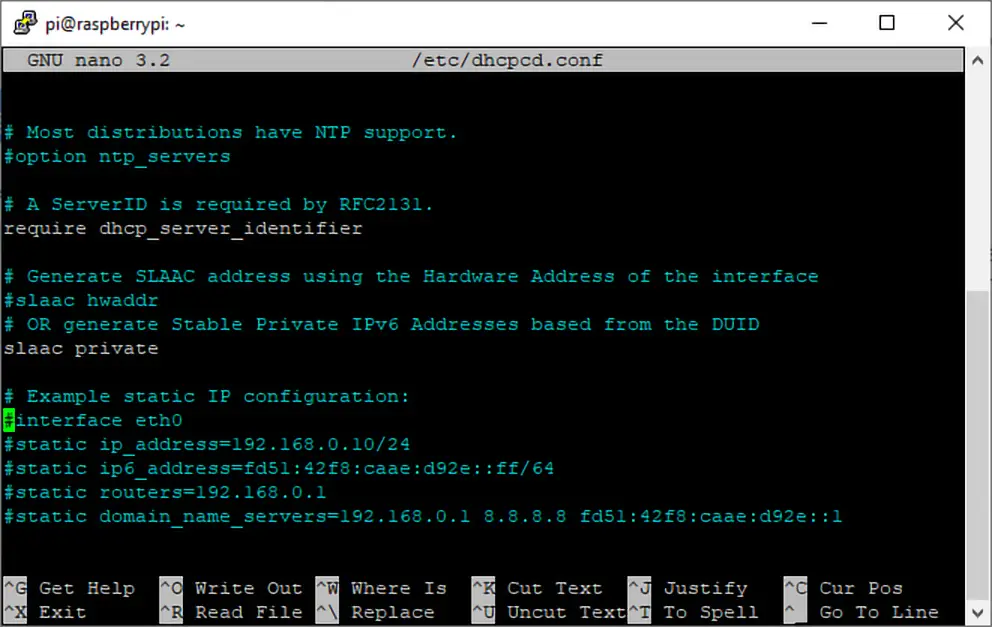
This document has a few lines of code that can be activated by removing the # to the left of each line. Use the following ledger to properly set your static IP address.
- Network = If you’re using a wired connection, set this to
eth0. If you’re using a wireless connection, set this towlan0. - Static_IP = This is the static IP address you want to assign to the Raspberry Pi.
- Router_IP = This is the IP address for the router.
- Name_Server = This is the name server address. You can use another DNS IP here if you’d like.
Enter your information into the file, be sure to remove the <> brackets. Check the screenshot for an example.
interface <Network>
static ip_address=<Static_IP>/24
static routers=<Router_IP>
static domain_name_servers=<Name_Server>
When that’s completed, save the file using CTRL + X.
5 – Test the static IP address
When the changes have been made, restart the Raspberry Pi. Now is a good time to test your project and make sure the IP address isn’t changing. Disconnect and reconnect your Pi from the network. If the IP address changes, verify the information in the previous step saved properly. If it stays the same, congratulations! You’ve set a static IP on the Raspberry Pi.


