Make a Smart Alarm Clock With a Raspberry Pi

Share
What you'll need
Interests


Posted in these interests:

If you don’t know what time it is—this is the project for you! In this guide, I’ll be covering all the basics you need to start your Raspberry Pi smart alarm clock project. We’ll go over the parts we need, how to connect them, and programming the alarm clock functions into the Raspberry Pi.
Which Raspberry Pi will work? This project will work with any Raspberry Pi, including the Raspberry Pi Zero. I have a Raspberry Pi 3 B+ handy, so I’ll be using it throughout this guide.
Note: This guide includes a few python scripts that can be found in this Github repository.
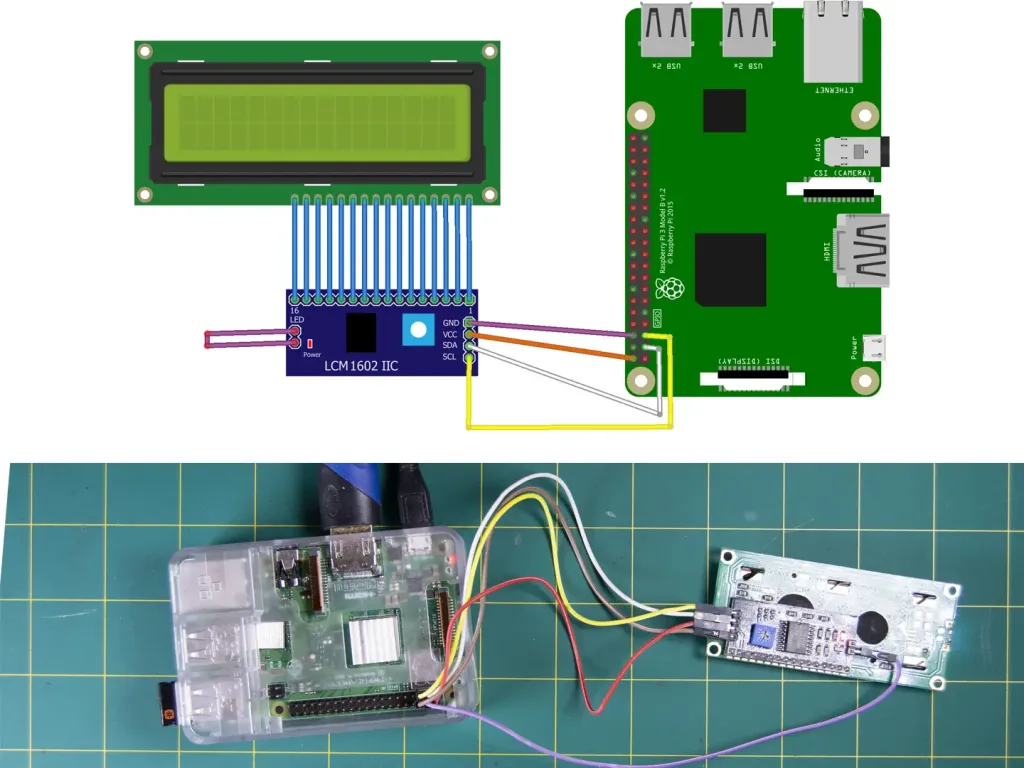
1 – Connect LCD to Raspberry Pi
| Pi | LCD |
|---|---|
| SDA | SDA |
| SCL | SCL |
| 5V | VCC |
| GND | GND |
| 5V | LED |
Use the table above and diagram reference to connect your i2c LCD screen to the Raspberry Pi. Note: I’m using a backpack module to make the process a little easier. You can connect the LED to either the LCD itself or the Pi for custom control options.
2 – Install and update Raspberry Pi OS
We’ll be creating our Raspberry Pi alarm clock on top of Raspberry Pi OS (formerly Raspbian). Make sure Raspberry Pi OS is installed—visit our Raspberry Pi OS installation guide to get started.

How to Install Raspberry Pi OS on Your Raspberry Pi
Get the new official Raspberry Pi OS on your Pi.
3 – Enable I2C
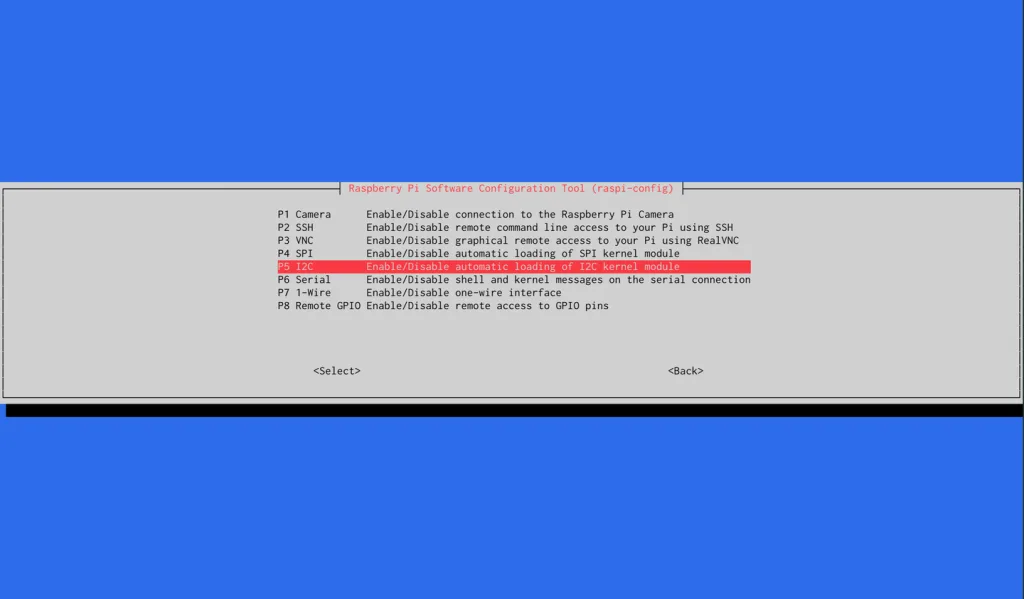
To use our LCD screen, we’ll need to enable i2c. Access the Raspberry Pi configuration menu:
sudo raspi-configUnder Interfacing Options, select the option to enable I2C. Confirm the change and restart your Raspberry Pi.
4 – Download I2C tools package for LCD screen
We need to see which I2C address our LCD is using. To do this, we’ll be installing a package called I2C Tools. Run the following command:
sudo apt-get install i2c-toolsInstall the following SMBUS Python library:
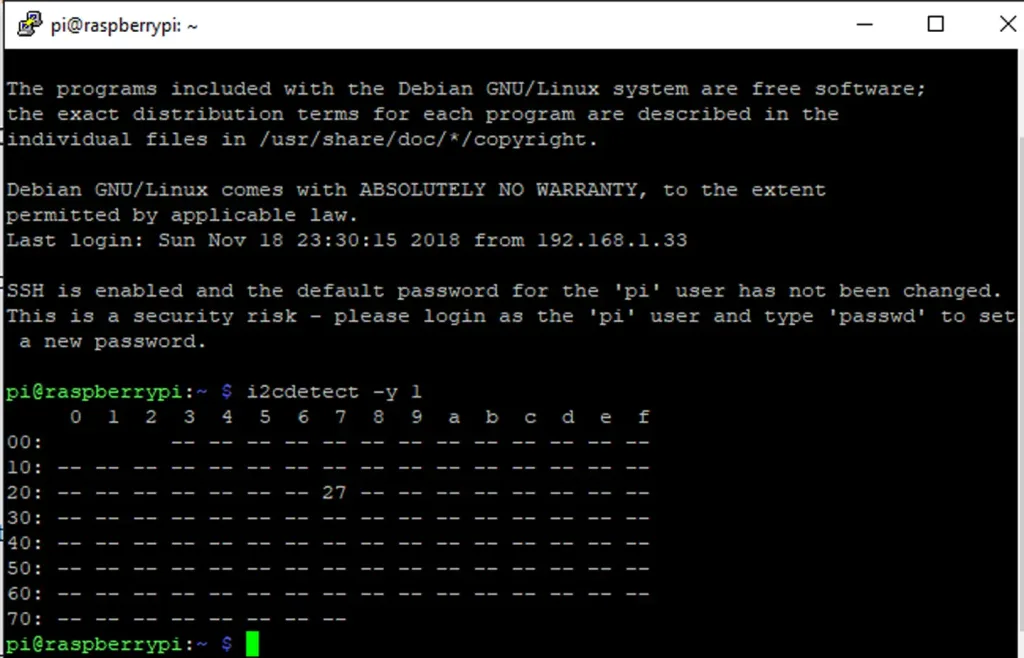
sudo apt-get install python-smbusRestart the Pi and run this command to find the I2C address.
i2cdetect -y 1This will return a table full of addresses. Jot down the number used by your LCD screen, mine happens to be 27. Update i2c_driver.py with the address number your screen is using on line 6.
5 – Install the Python i2c driver
Next we’ll need to install this Python i2c driver. On the GitHub repository for this project, we’ve added a driver that you can use! It’s basically just a refactor of a driver provided by DenisFromHR on GitHub.
Installing the driver is pretty simple. Just make sure you’re in your home directory and use wget.
cd ~
wget https://raw.githubusercontent.com/Howchoo/smart-alarm-clock/master/i2c_driver.py
6 – Install the RPLCD library
Now it’s time to set up the RPLCD library. Begin by installing PIP:
sudo apt-get install python-pipOnce complete, install the RPLCD library package. Run the following:
sudo pip install RPLCD7 – Create a python script to display time
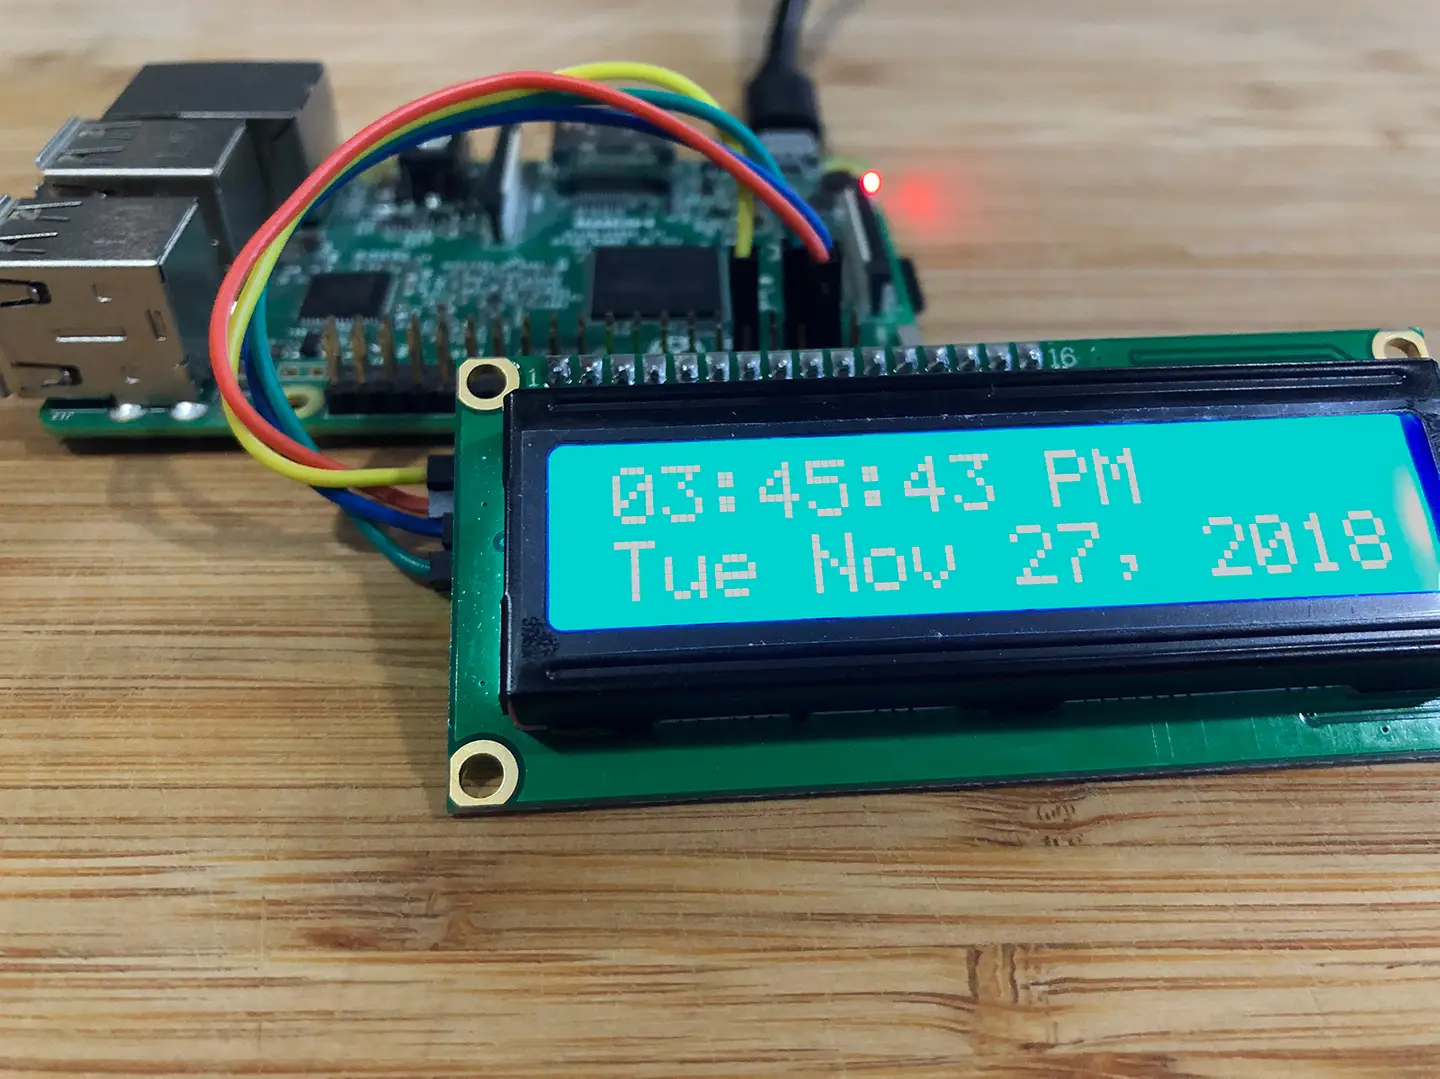
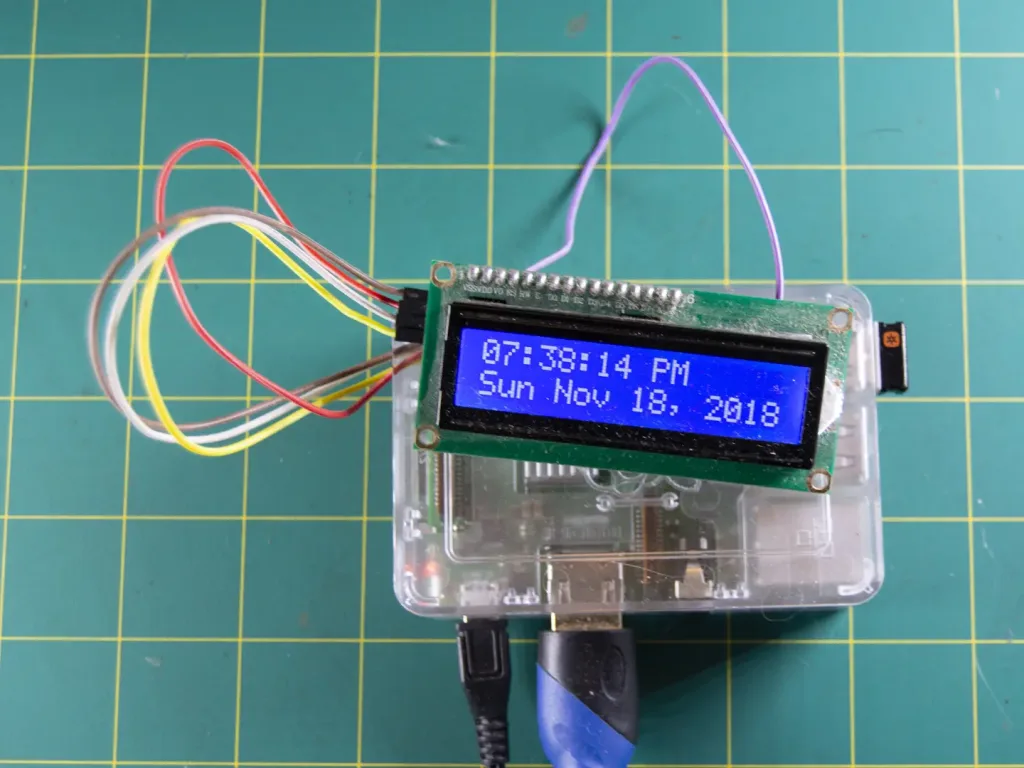
It’s time for the fun part! We need our LCD screen to give us some kind out output. The following script will display the time and date on our LCD screen. You can get creative with output settings.
display.py
#!/usr/bin/env python

import I2C_LCD_driver
import time


mylcd = I2C_LCD_driver.lcd()


while True:
    mylcd.lcd_display_string(time.strftime('%I:%M:%S %p'), 1)
    mylcd.lcd_display_string(time.strftime('%a %b %d, 20%y'), 2)
Save this python script to a file and drop it in /home/pi. I’ve named my file display.py.
Note: I’m from America so I prefer my date with the Month in front. However, you can use this opportunity to adjust the output however you like. Visit this Ubuntu page for more information on clock output customization.
8 – Set the timezone
In our display.py script, Python’s time module will output the current time in whatever timezone is set on the Raspberry Pi. So, in order to see the time in our local timezone, we’ll need to configure the timezone.
We’ve written a detailed guide showing you how to set the timezone on your Raspberry Pi (tl;dr sudo raspi-config).

9 – Test the display script
Test your script by running the following code:
sudo python display.pyNote: Replace display.py with the file name you chose for your python script.
10 – Install the alarm sound
Find a sound to use for your alarm clock. I’m using a file labeled alarm.wav. Drop it in the /home/pi folder.
11 – Create the alarm script
The alarm script requires a scheduler to work properly. Run the following script to install the scheduler:
pip install scheduleCreate a python script to initiate our sound file at a specific time. Below is the script I used to schedule my alarm (for 7:00AM).
alarm.py
#!/usr/bin/env python

import schedule
import subprocess
import time


def job():
    subprocess.call(['aplay /home/pi/alarm.wav'], shell=True)


schedule.every().day.at('7:00').do(job)


while True:
    schedule.run_pending()
    time.sleep(1)
12 – Test the alarm script
Make sure the alarm script is running the alarm when scheduled. Plug in your speaker and run the following script. Replace alarm.py with the name of your alarm script file.
sudo python alarm.pyNote: If you have trouble when testing your alarm, try scheduling it for at least 5-10 minutes into the future. Sometimes the Pi needs a few minutes before will work.
13 – Setup scripts to launch at boot
Open the crontab file with the following command
crontab -eAt the end of the file, add the following two lines of code. Be sure to replace the ‘display.py’ and ‘alarm.py’ with your custom display and alarm scripts.
@reboot nohup python display.py &
@reboot nohup python alarm.py &
Save and close the file. Congratulations! Every time your Pi restarts, it’s going to tell you the time and schedule your custom alarm.
14 – Making a smart clock
Now let’s get to the good stuff. To make our alarm clock a smart alarm clock, we’ll be using AVS. Visit our guide here to learn how to set up AVS on the Raspberry Pi. Using Alexa, you can create commands and even trigger custom python scripts!

Build Your Own Raspberry Pi Amazon Echo
Hello, Alexa Voice Service.
Here are a few example ideas to get you started:
- Set alarms using voice commands
- Check the weather
- Program reminders for future events
15 – The final product
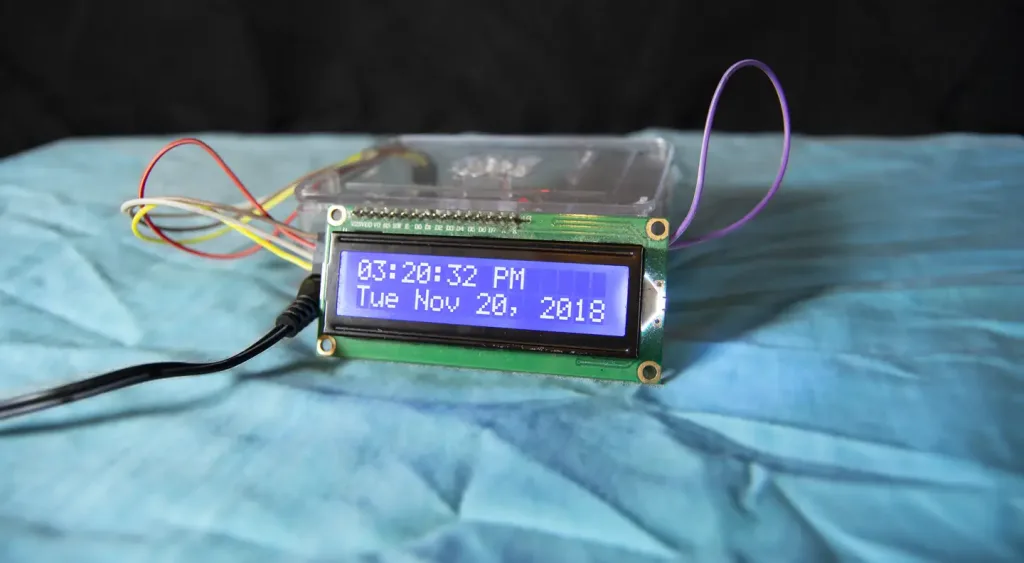
If your Pi has an internet connection (see our guide on setting up WiFi on your Pi), the time should remain perfectly in sync. Where you take the project from here is up to you. Congratulations! Your Raspberry Pi is now a completely functional alarm clock.

How to Set up WiFi on Your Raspberry Pi Without a Monitor (Headless)
No monitor, keyboard, or mouse? No problem.
If you want to get really creative, incorporate it with our awesome Vinyl Record Clock project.


