How to Use Raspberry Pi Imager

Share
Interests
Posted in these interests:

The Raspberry Pi Foundation recently released a new imaging application for writing SD cards for the Raspberry Pi. The new program, known as Raspberry Pi Imager, debuted on March 5th, 2020.
How it works
Raspberry Pi Imager makes the imaging process much easier. It centralizes all of the most common imaging tools and software you need into one package. You don’t even need NOOBs to install Raspberry Pi OS (formerly Raspbian). Raspberry Pi Imager includes Raspbian as well as a few other operating systems. If something isn’t listed, you can use the custom image tool to add your own images.

Raspberry Pi NOOBS: How to Set Up, Configure, and Use NOOBS
Getting started with the Raspberry Pi OS installation program.
1 – How to install Raspberry Pi Imager
Raspberry Pi Imager is free to install from the official Raspberry Pi website. It’s available for MacOS, Windows, and Ubuntu systems.
- Visit the Raspberry Pi download page.
- Download the Raspberry Pi Imager installer for your Operating System.
- Run the installer and follow the prompts to complete the setup.
2 – Write a Raspberry Pi Imager built-in image
You can use Raspberry Pi Imager to write images to SD cards for the Raspberry Pi. Raspberry Pi Imager comes with a few operating systems to choose from, so you don’t have to download anything separately. If you want to install a custom image, you can follow the instructions on the next step.
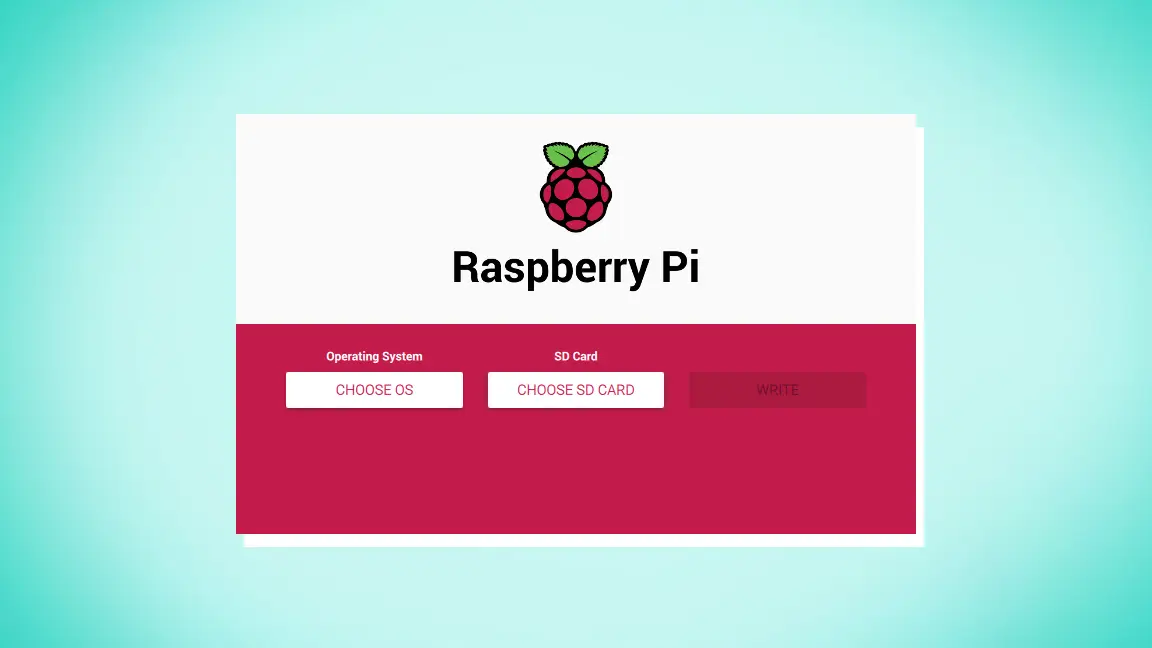
- Launch Raspberry Pi Imager.
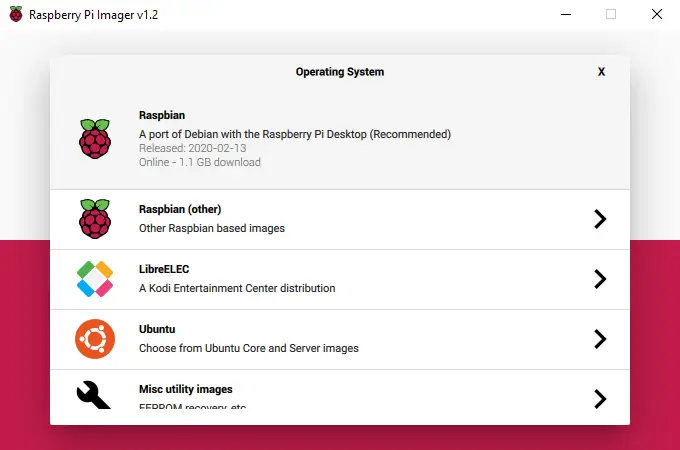
- Click Choose OS. The feature somewhat replaces NOOBS, providing a couple of basic operating systems like Raspberry Pi OS.
- Select an OS from the list.
- Click Choose SD card.
- Select from the list the SD card you want to write to.
- Click Write to begin the image writing process.
3 – Write a custom image
Custom Raspberry Pi image files (like .zip, .img, .tar, .gz, etc) can be written using Raspberry Pi imager. You must download the image file from a third-party source. For example, to install RetroPie you need the image file from the download page on the RetroPie website.
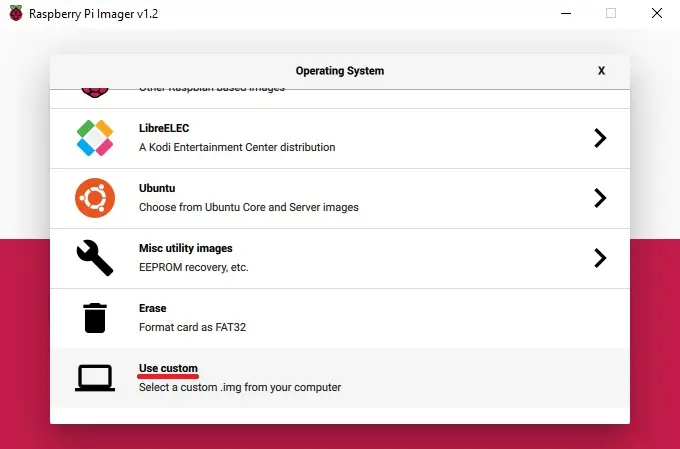
- Launch Raspberry Pi Imager.
- Click Choose OS.
- Select Use custom to write an unlisted image.
- Click Choose SD card.
- Select from the list the SD card you want to write to.
- Click Write to begin the image writing process.
4 – Included operating systems
Raspberry Pi Imager comes with a small selection of operating systems. It doesn’t replace NOOBS, but it does provide a couple of operating systems to choose from. You can even install LibreELEC, an open-source Linux distro for Kodi.
| Included Operating Systems |
|---|
| Raspberry Pi OS |
| LibreELEC |
| Ubuntu |
5 – Additional tools
In addition to operating systems, there are a few tools available in Raspberry Pi Imager under the Choose OS option. These tools include:
- EEPROM Recovery – This is only for the Raspberry Pi 4
- Erase tool – This is used to format SD cards to Fat32.
6 – Raspberry Pi Imager alternatives
If for whatever reason you don’t want to or are unable to use Raspberry Pi Imager, you can opt to use an alternative application. Here are a couple we’ve relied on over the years leading up to the new imager release.
- balenaEtcher – The application runs on Windows, MacOS, and Ubuntu operating systems.
- Win32 Disk Imager – This imaging software is designed for Windows machines.
You may also be interested in our guide on how to install Raspberry Pi OS.

How to Install Raspberry Pi OS on Your Raspberry Pi
Get the new official Raspberry Pi OS on your Pi.


