Official Raspberry Pi 7″ Touchscreen Setup Guide

Share
What you'll need
Interests


Posted in these interests:

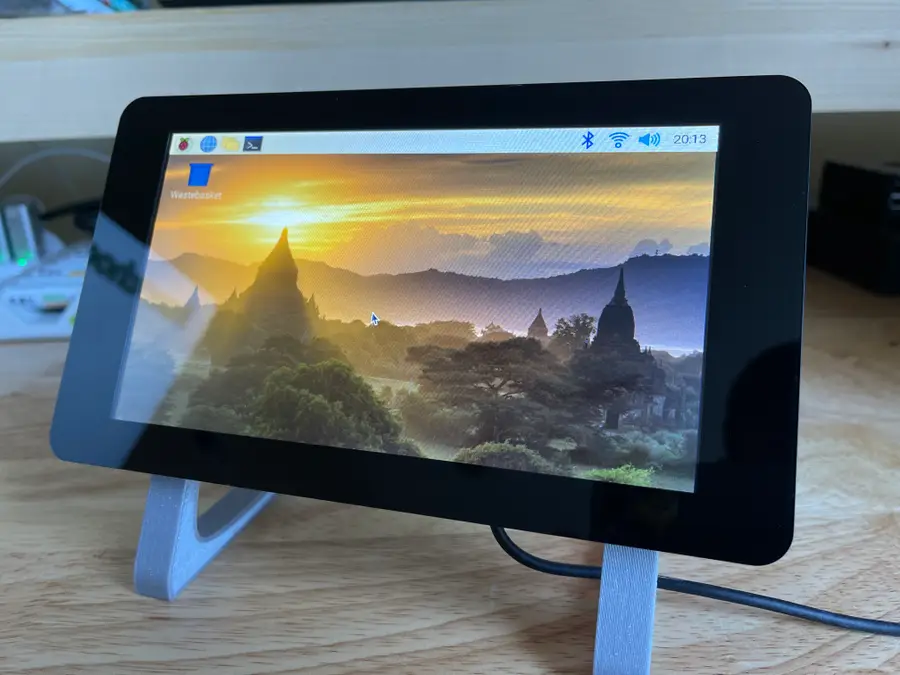
If you’re like me, you’ve got way more Raspberry Pi’s than you have monitors. While I typically use a headless Pi for most projects, there are some that require a display. Recently, I got my hands on the official Raspberry Pi 7″ touch display, and I wanted to get it set up for daily use. In this guide, I’m going to show you how to get the touchscreen display completely set up, as well as a few other tips for using it.
If you’d like to see other great options for touchscreen displays, check out our guide to the best touchscreen displays for the Raspberry Pi.

The Best Raspberry Pi Touchscreens (2022)
An awesome touchscreen > a standard monitor when it comes to Raspberry Pi.
1 – Gather your supplies
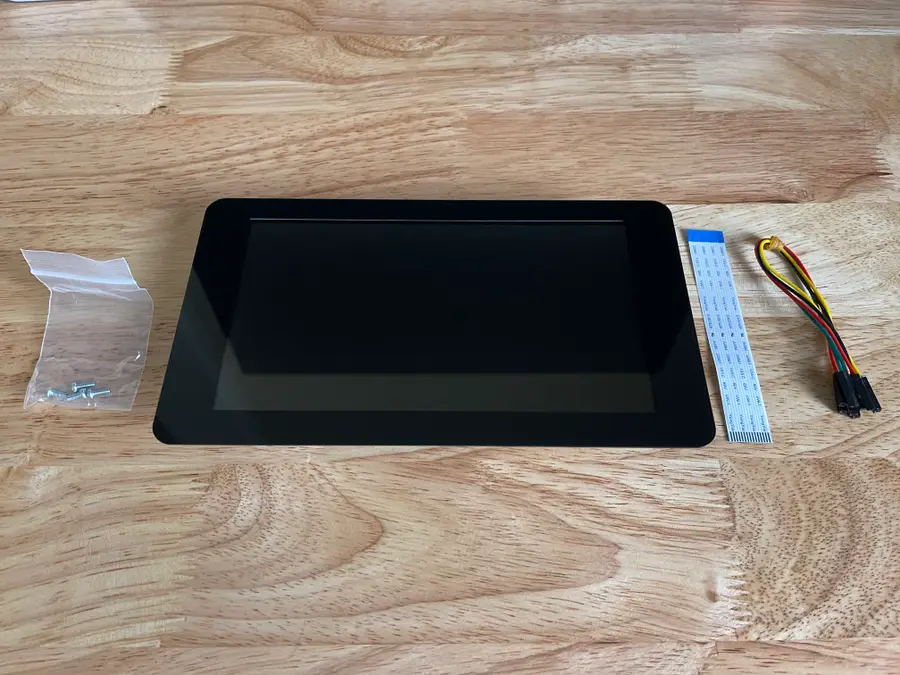
You’ll need to supply your own Raspberry Pi, but fortunately, everything else you need is included with the touch display.
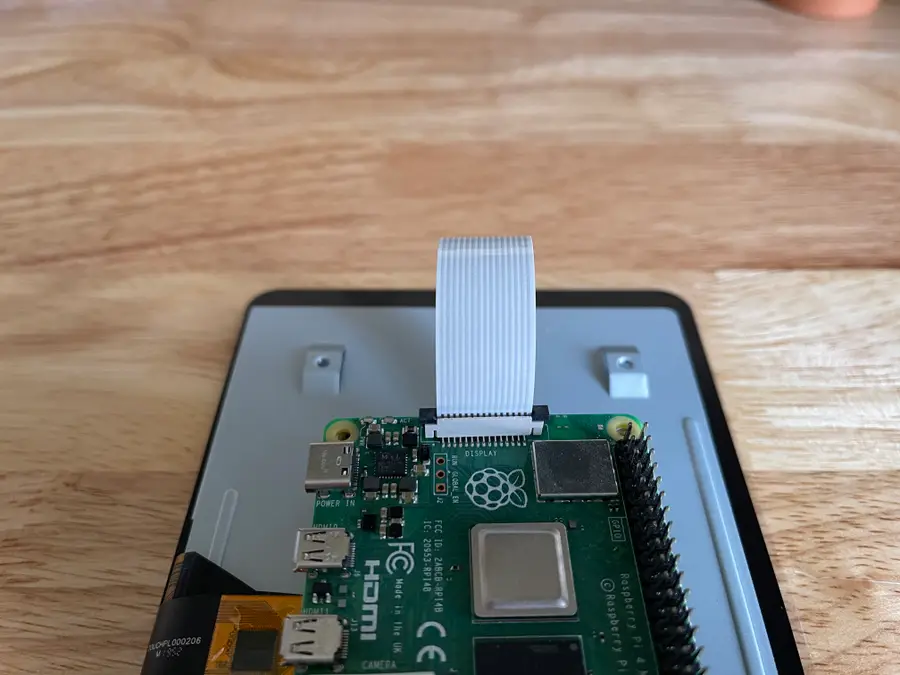
2 – Connect the ribbon cable to the display
We will install the ribbon cable first because it’s much more difficult after the Pi is mounted. The connector is very similar on both the Pi and the display board. Start by pulling the black tabs (one on each side) away from the display board’s connector. Then insert the cable with the blue strip facing down.
After the cable is inserted, press the black tabs back into the connector. This will lock the cable in place.
| 🛈 Be careful when locking and unlocking the cable. The black tabs can break if you use too much force. |
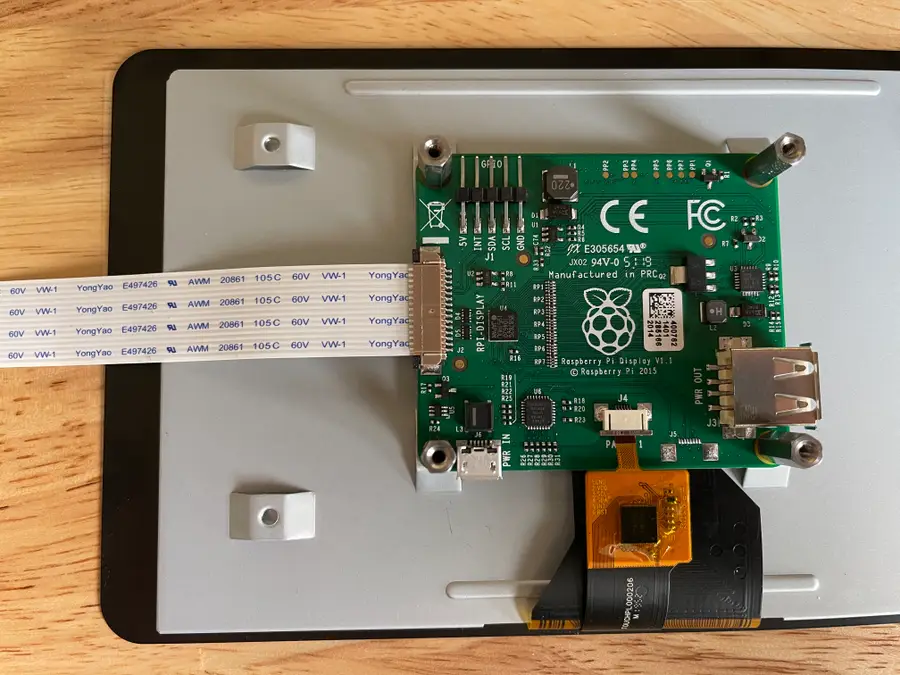
3 – Secure the Pi to the display
The touchscreen display kindly provides standoffs and screws that can be used to mount the Raspberry Pi. Position the Pi on the standoffs (with the display connector on the same side as the ribbon cable). Use a small Philips head screwdriver to fasten the Pi to the standoffs.
A keen eye will notice that the image shows the ribbon cable already connected to the Pi. Yes, I assembled this in a slightly different order, but I wanted to re-order things for this guide because it makes more sense to connect the cable after the Pi is secured.
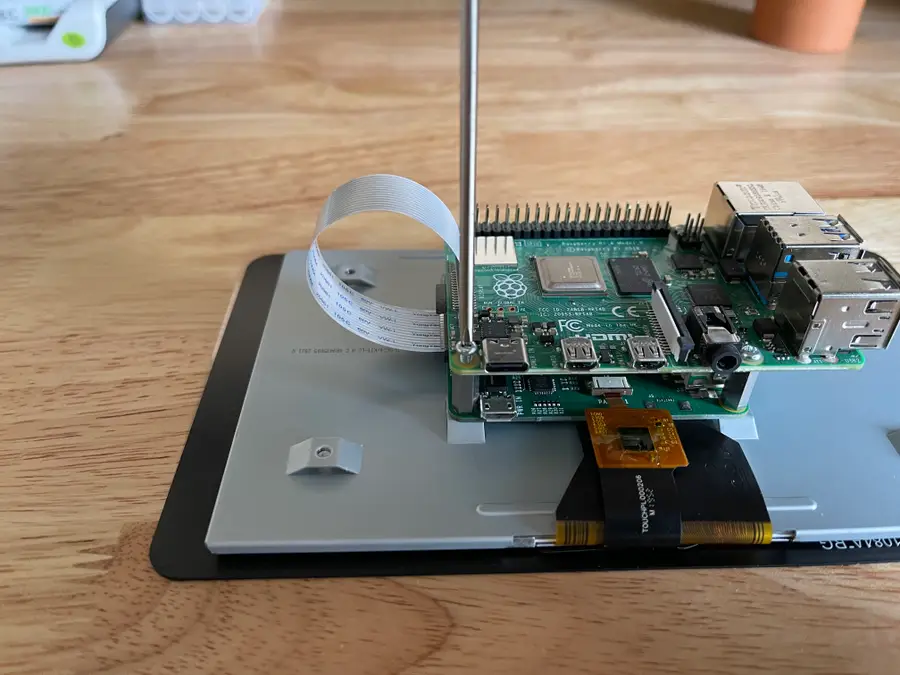
4 – Insert the ribbon cable on the Pi
With the Raspberry Pi in place, go ahead and insert the other end of the ribbon cable. You attach this cable the same way you did on the display board. Pull the black tabs out, insert the cable with the blue side facing away from the board, and push the black tabs back to lock it in place.
5 – Connect the jumper cables to power the display
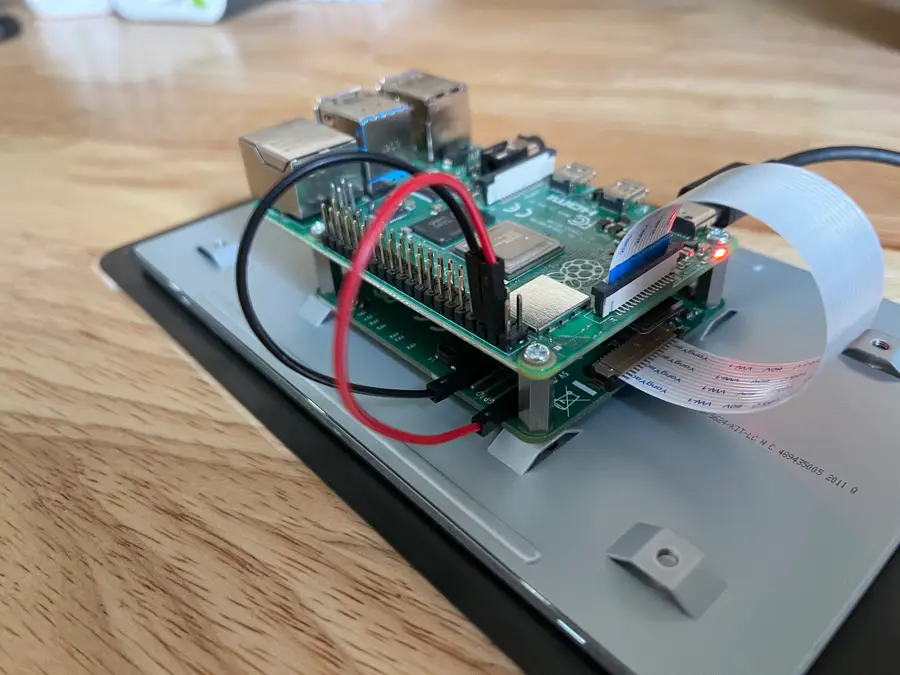
There are a few options for powering the Pi and the display. If you wanted, you could power the Pi and the display using separate power adapters, but we’re going to power the Pi directly, then use jumper cables to supply power to the display board.
The kit comes with four jumper cables, but, for a Raspberry Pi 4, you need cables for only two pins: 5V and GND. Connect one cable to the 5V pin on the Pi and the 5V pin on the display board. Then connect to a GND pin on the Pi and the GND pin on the display board. See the image for details.
6 – (Optional) Use a case or stand
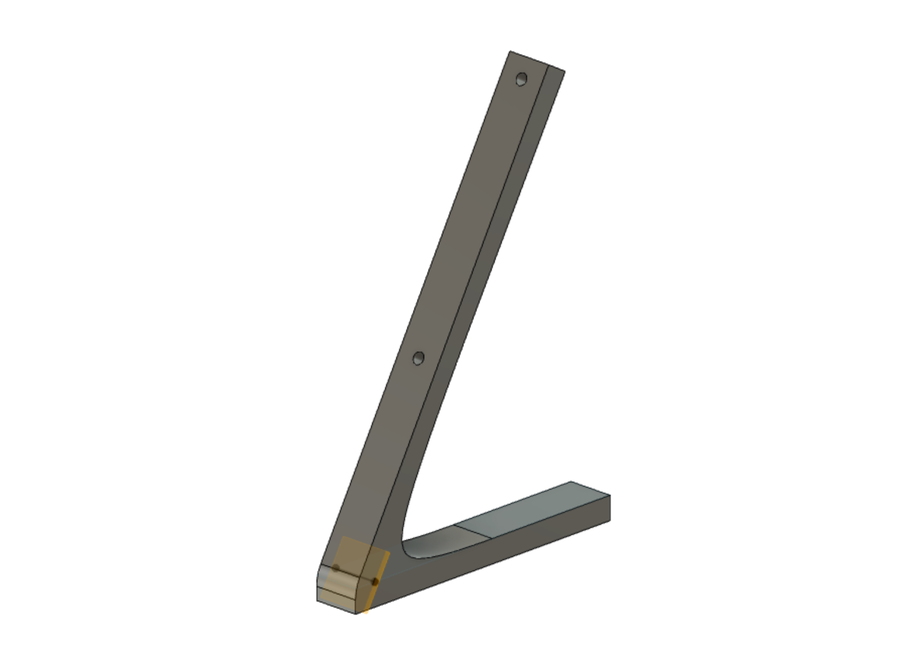
There are many options for cases and stands, and what you need depends entirely on your use case. I’m going to keep my Pi and touchscreen display at my desk, and I don’t mind the boards and wiring exposed (I think it looks cool), so I designed and printed a minimalist stand. If you’ve got a 3D-printer and want to print the stand I designed, here’s the model on Thingiverse.
7 – (Optional) Install the on-screen keyboard
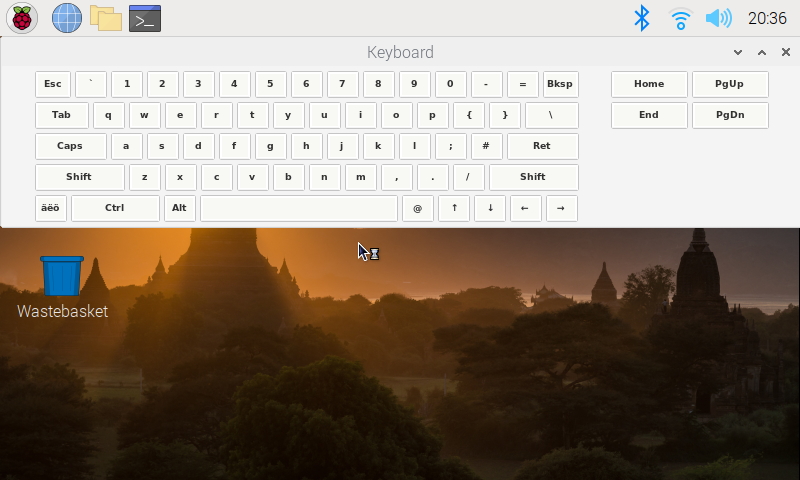
Again, depending on your use case, you might find yourself wanting to type something! To do so, you’ll either need to connect a physical keyboard or install the on-screen keyboard. In this step, we’ll cover how to install and use the on-screen keyboard.
Install the keyboard
Installing is easy. Just connect to your Pi via SSH and run the following:

How to Connect to a Raspberry Pi Remotely via SSH
The preferred (and most common) method of connecting to your Pi to run commands.
sudo apt-get update
sudo apt-get install matchbox-keyboard
Using the keyboard
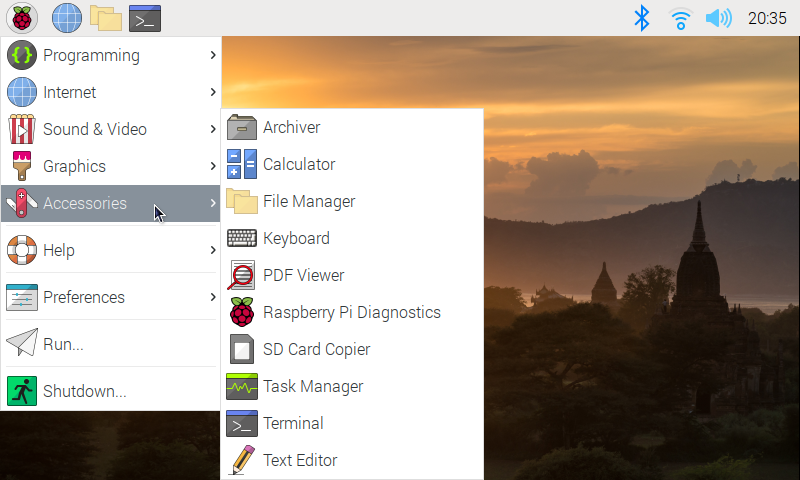
To open the on-screen keyboard, click on the Pi icon at the top left. Then choose Accessories then Keyboard. To close the keyboard, just hit the X at the top right of the keyboard.
8 – Enjoy!
Hopefully, this guide is enough to get you up and running with the Raspberry Pi 7″ Touch Display. If you have any questions or feedback, feel free to comment below!


