The longer you play Minecraft, the more you realize that early-game tools just won’t cut it. Exploring the enchantment feature of Minecraft can be exciting, but also intimidating. Rather than worry about researching enchantments, below are the best enchantments in Minecraft!
To learn how to enchant items, check out this guide!
In this guide, you’ll see a list of Primary Items and Secondary Items. Primary Items can receive the enchantment through an enchanting table, which Secondary Items require an enchanted book applied at an anvil.
Primary Items: None
Secondary Items: All armor, tools, elytra, and weapons.
Max Enchantment Level: 1
Incompatibilities: Infinity
This is the most important enchantment to get, especially once you’ve reached diamond tools and armor. Mending uses XP orbs to repair the item it’s bound to. It can only be found as an enchanted book through chest loot, fighting, raids or villager trading. The rate of repair is two durability per point of experience.
Primary Items: All armor and tools, crossbow, trident, bow, and turtle shell.
Secondary Items: Shears, flint and steel, shield, carrot on a stick, warped fungus on a stick, and elytra.
Max Enchantment Level: 3
Incompatibilities: None
Essentially, the Unbreaking enchantment increases an item’s durability by giving a chance for an item to avoid durability reduction during use. With Unbreaking III, an item’s average lifetime increases by 300%!
Primary Items: Pickaxe, shovel, axe, and hoe.
Secondary Items: Shears (Bedrock Edition only)
Max Enchantment Level: 1
Incompatibilities: Fortune
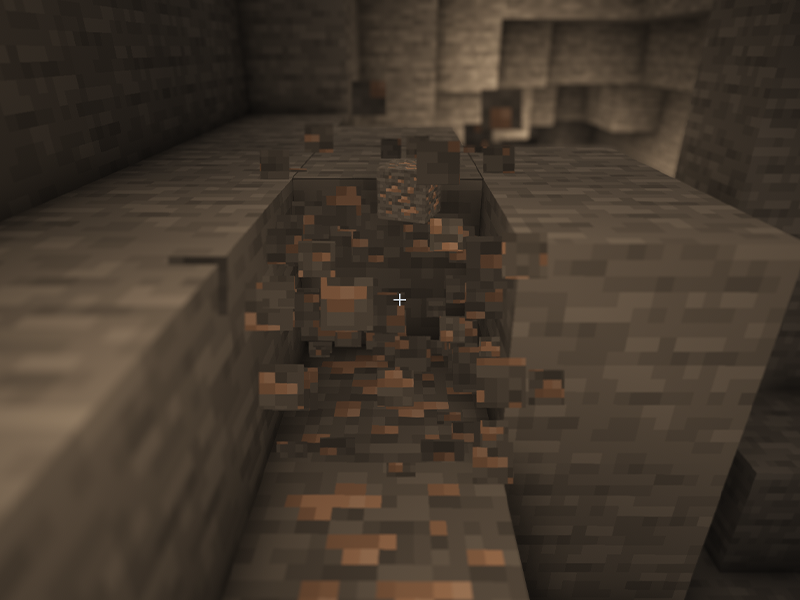
One of the most sought after enchantments, Silk Touch allows blocks to drop themselves rather than their usual items while mined. For example, mushroom blocks and mycelium can only be acquired with Silk Touch.
Primary Items: Sword
Secondary Items: None
Max Enchantment Level: 2
Incompatibilities: None
Players and mobs can be knocked back when receiving damage. The resulting disorientation could be fatal, as it’s possible to be knocked back over a cliff or into lava. The Knockback enchantment increases a sword’s knockback. For each level of enchantment, Knockback adds three blocks distance to the base knockback.
Primary Items: Pickaxe, shovel, axe, hoe
Secondary Items: Shears
Max Enchantment Level: 5
Incompatibilities: None
Simply put, Efficiency increases the player’s mining speed. Stone tools can only receive up Efficiency V by combining two items with Efficiency IV. Diamond tools cannot be given Efficiency V, but they can be found in an end city or bastion remnant chest. The best tools to have Efficiency on is an iron or netherite pickaxe. After all, what’s a better feeling than mining through terracotta like a knife through butter?
Primary Items: Boots
Secondary Items: None
Max Enchantment Level: 4
Incompatibilities: None
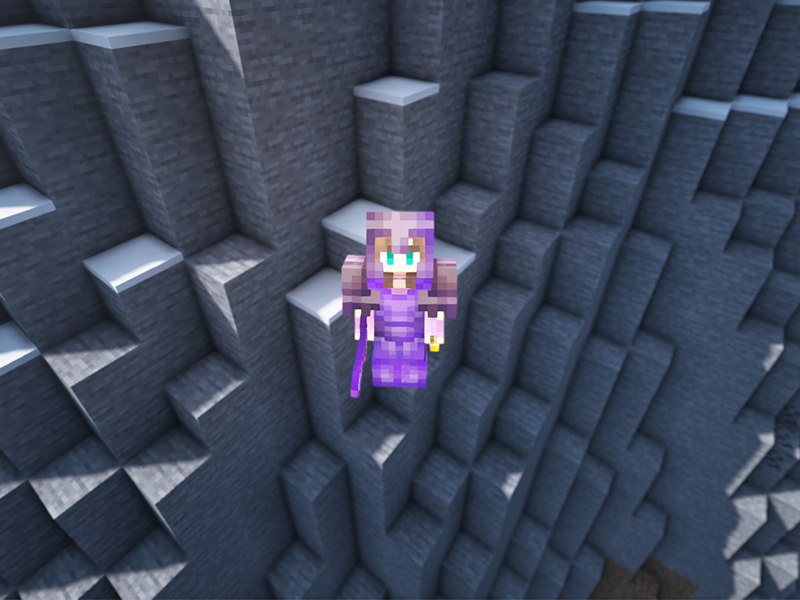
Feather Falling reduces fall damage, which is what makes it so vital for hardcore difficulty players. It’s one of the rarest enchantments, with only a 2.7% chance of Feather Falling IV appearing on boots enchanted with the enchanting table.
Primary Items: All armor and the turtle shell.
Secondary Items: None
Max Enchantment Level: 4
Incompatibilities: Blast Protection, Protection, Projectile Protection
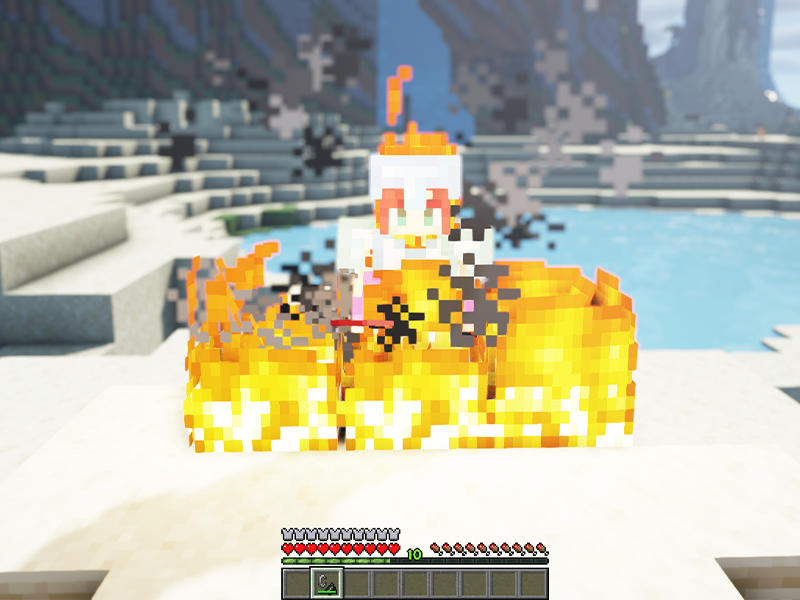
Fire Protection is an armor enchantment that reduces damage from fire. It’s especially helpful to have this enchantment when exploring the Nether. Hypothetically, if all armor a player was wearing was enchanted with Fire Protection, the only way they’d burn is by standing in a fire or lava.
Primary Items: Helmet and turtle shell.
Secondary Items: None
Max Enchantment Level: 1
Incompatibilities: None
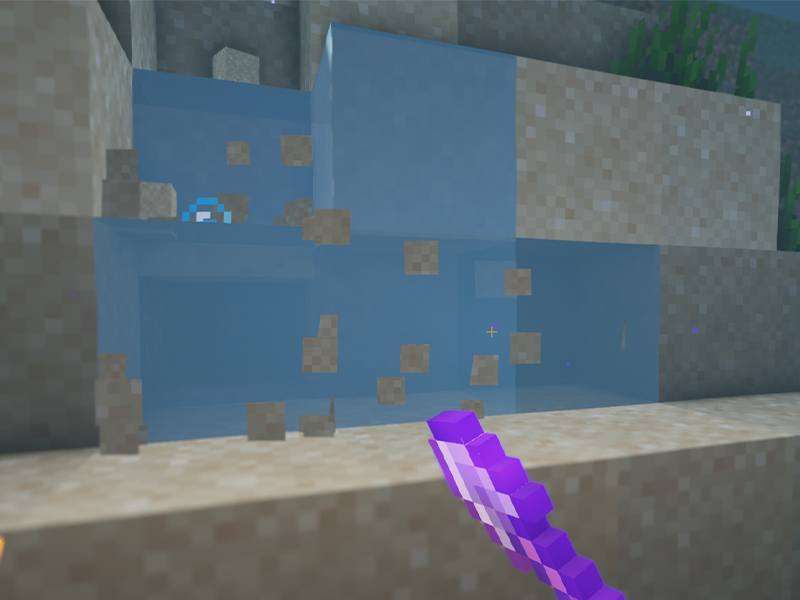
When mining underwater, blocks take five times as long to mine. With Aqua Affinity, players can increase their underwater mining speed. Match this enchantment with Depth Strider for boots, and you’ll be able to mine and move around quickly while underwater!
Primary Items: Sword
Secondary Items: None
Max Enchantment Level: 3
Incompatibilities: None
For anyone who has a mob farm in order to get more item drops, Looting is a perfect sword enchantment to have. The Looting enchantment causes mobs to drop more items and increases the chance of rare drops.
Keep in mind that there are a few restrictions to Looting:
Primary Items: Pickaxe, shovel, axe, and hoe.
Secondary Items: None
Max Enchantment Level: 3
Incompatibilities: Silk Touch
The Fortune enchantment increases the number and/or chances of specific item drops. The best use case for the Fortune enchantment is with a pickaxe on ore blocks. For example, with Fortune II, a nether gold ore could drop up to 18 gold nuggets rather than the standard 2-6!
To learn how to remove an enchantment, check out this guide!
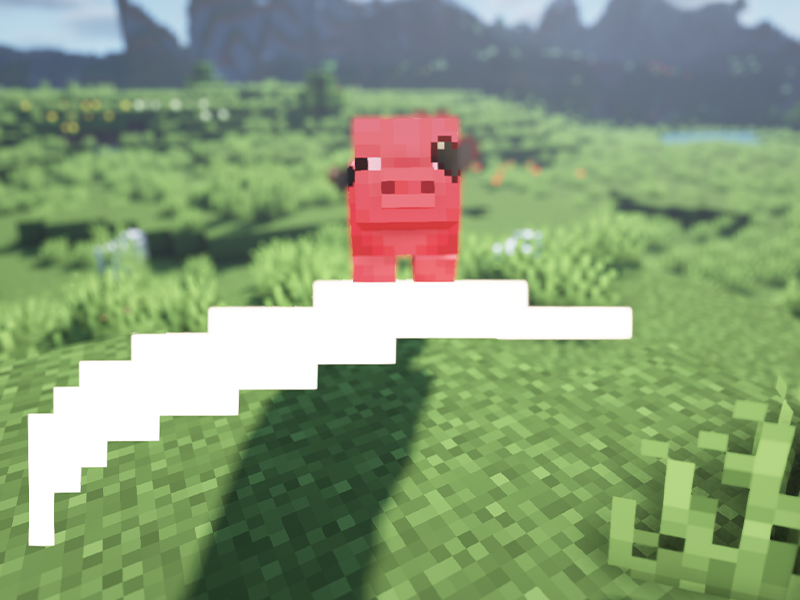
Traveling long distances in Minecraft can be tiresome (both in real life and the game). Thankfully, there are ways to move around faster through the Overworld! Whether you’re a skilled player or not, in the early game of Minecraft you usually don’t have elytra to fly around. But you can have horses!
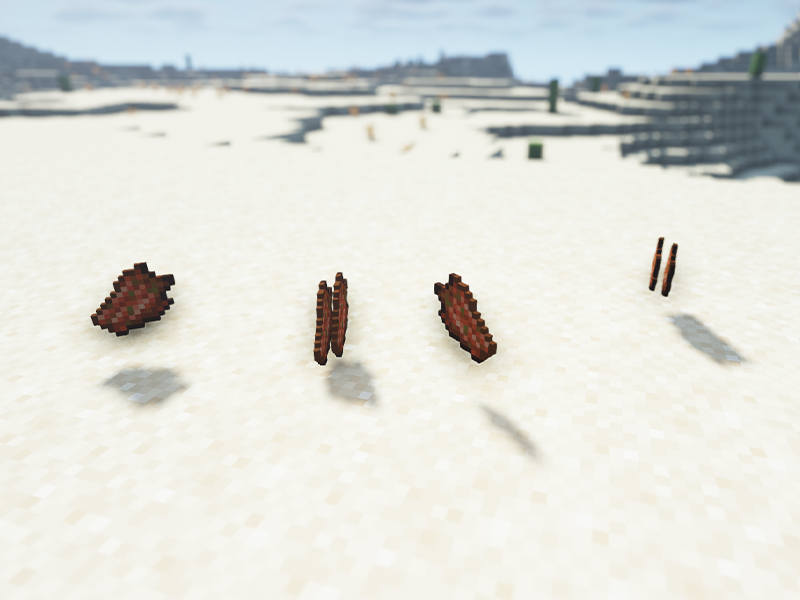
Whether you want to gather leather like YouTuber Smallishbeans…
Or maybe you just want a companion on your adventure? Either way, here’s our guide on how to tame and breed horses in Minecraft!
Fun Fact: This method will also work for donkeys!
Horses naturally spawn around the Overworld in the following biomes:
Make sure you have a spot to keep the horses, since they will wander even if tamed.
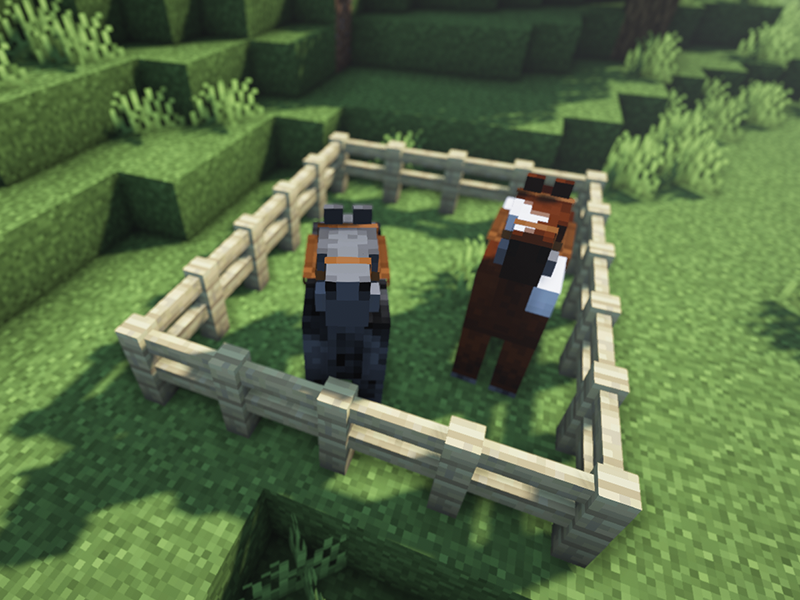
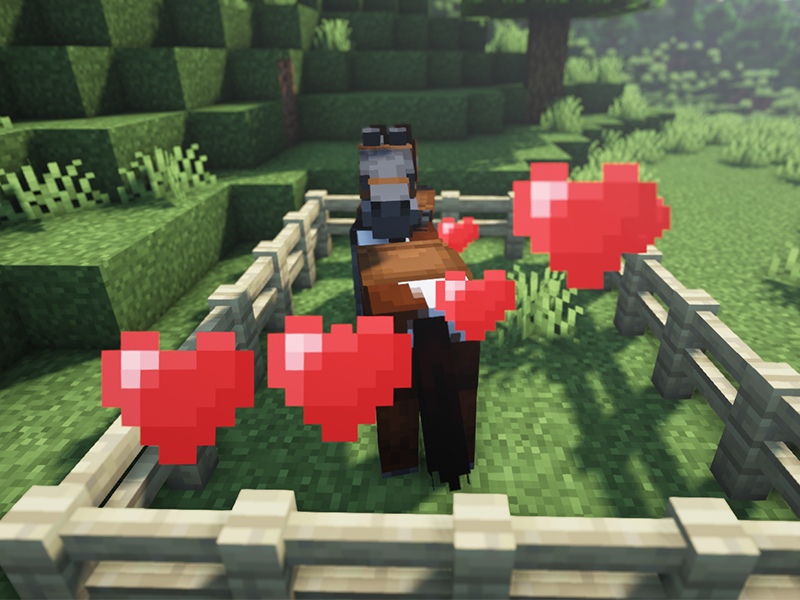
Both horses and donkeys must be tamed in order to breed or even ride. In order to tame a horse, simply right click one with an empty hand. You’ll now be mounted upon the horse until it bucks you off. Repeat this as many times as it takes. You’ll know you’ve tamed the horse or donkey when hearts appear on the screen.
Taming depends all on the horse’s temper. Every horse begins with a temper between 1 and 100 and an assigned random taming threshold. Each time a player is bucked off earns 5 temper and once it reaches past that taming threshold, the horse is tamed.
Now you can add a saddle and armor! However, there are a few more supplies needed before breeding.
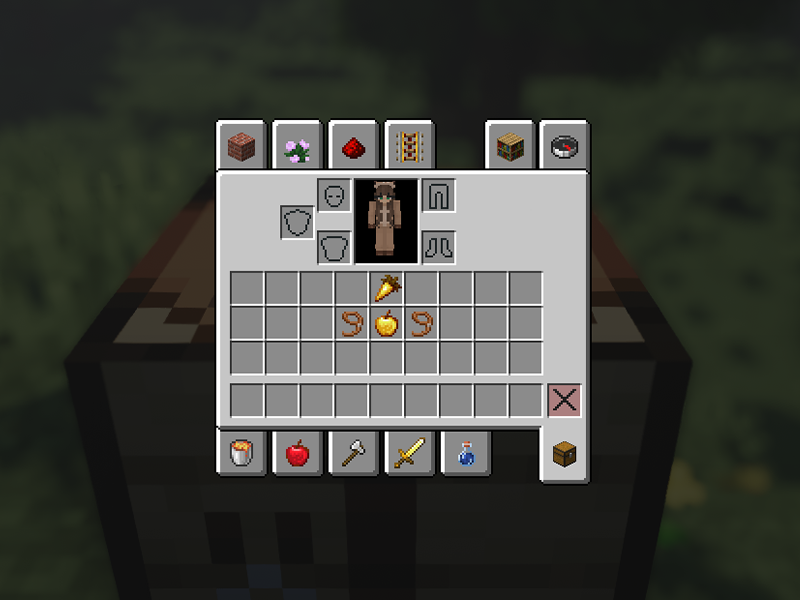
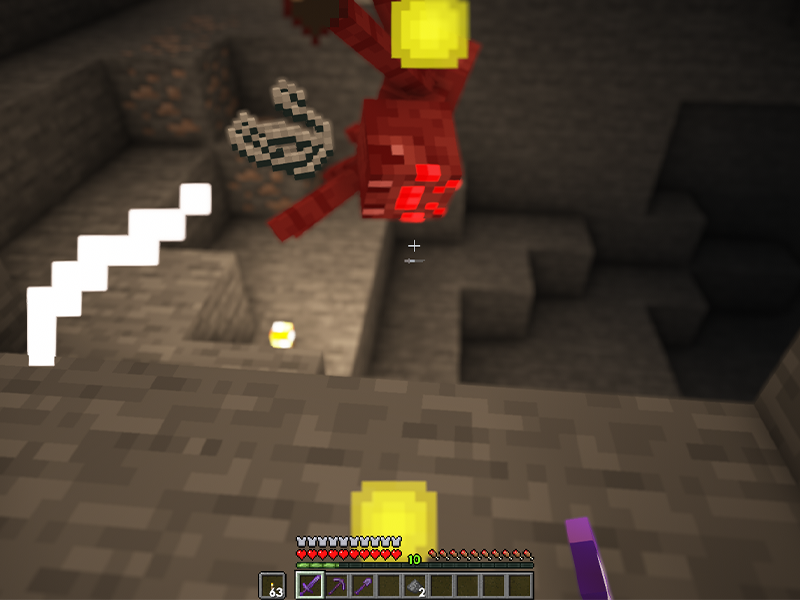
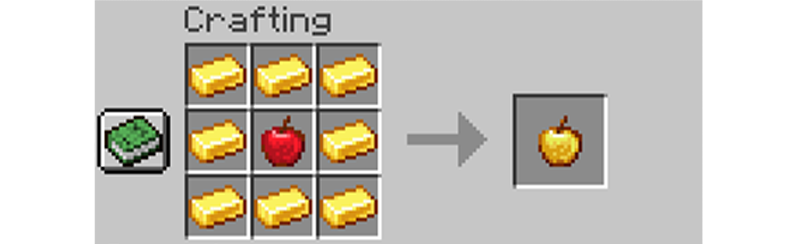
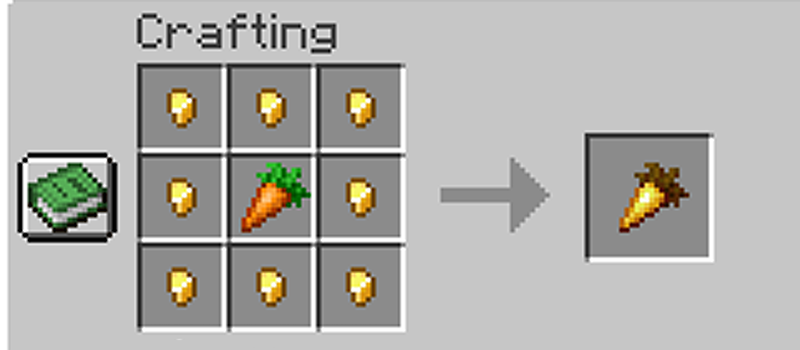
In order to activate love mode (aka breeding) you must feed two horses (or donkeys) either a golden carrot or a golden apple. Both can be crafted or looted!
You can craft a golden apple with 8 gold ingots and 1 apple.
Golden apples also generate naturally in chests throughout the Overworld and Nether. The best places to find a golden apple are in igloos, mineshafts, and desert temples.
You can craft a golden carrot with 8 gold nuggets and 1 carrot.
Golden carrots can be looted from chests in bastion remnants and ruined portals. Bastion remnants have the highest chance of spawning 6-17 golden carrots in a chest.
Mojang call breeding “love mode”. Is that important information? Not really, but it’s still fun to know.
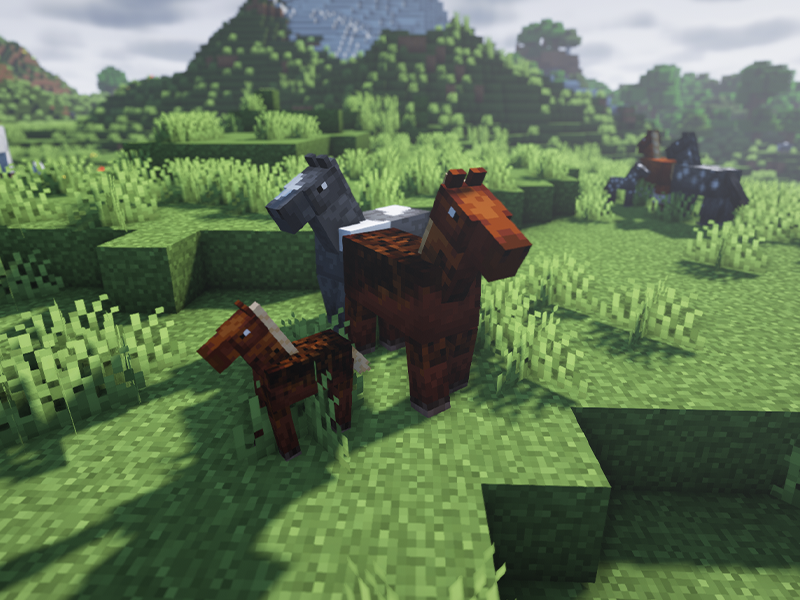
Once you have the above supplies, simply feed the golden carrots or apples to a pair of horses. They’ll enter love mode and produce a foal. Typically, the foal has the color or markings of one of its parents, but there is a ~29% chance for a random variation in color/markings.
If a horse and donkey are bred together, they create a mule foal. Mules can’t breed, but you at least will get an achievement for it!
Did you know that Minecraft actually lets you play pre-release versions of the game? That’s right! You can explore and discover new features coming to Minecraft before the official version is released. This ability is available to anyone who wishes to try!
These versions are generally unstable, so it’s best to not try to use them with existing worlds. Instead, create new worlds that you can mess around in!
It’s actually incredibly easy to download, install, and play a snapshot version of Minecraft. Follow the steps below to learn how!
Be sure to save this zip to a location on your computer that you can easily access later. You can download the latest snapshot from Minecraft’s website or by clicking this link.
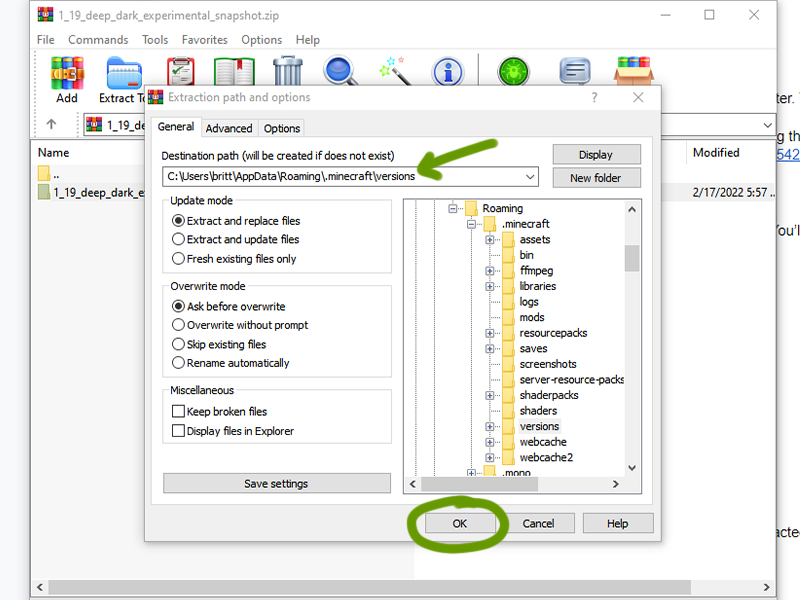
To unzip, you’ll need a program like WinZip to do so. You’ll want to export this file into your .minecraft/versions folder.
To find your .minecraft folder:
Win+R and type %appdata%\.minecraft and press “Ok”~/Library/Application Support/minecraft~/.minecraft or /home/<your username>/.minecraft/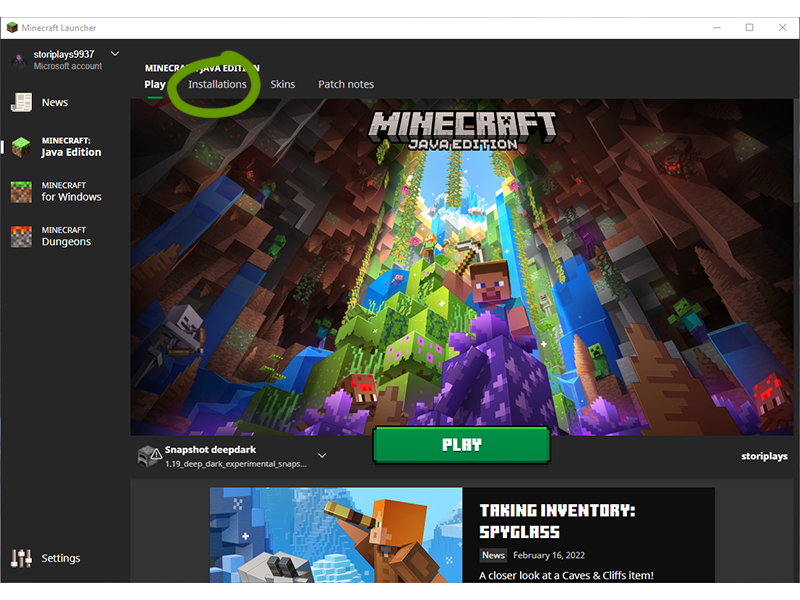
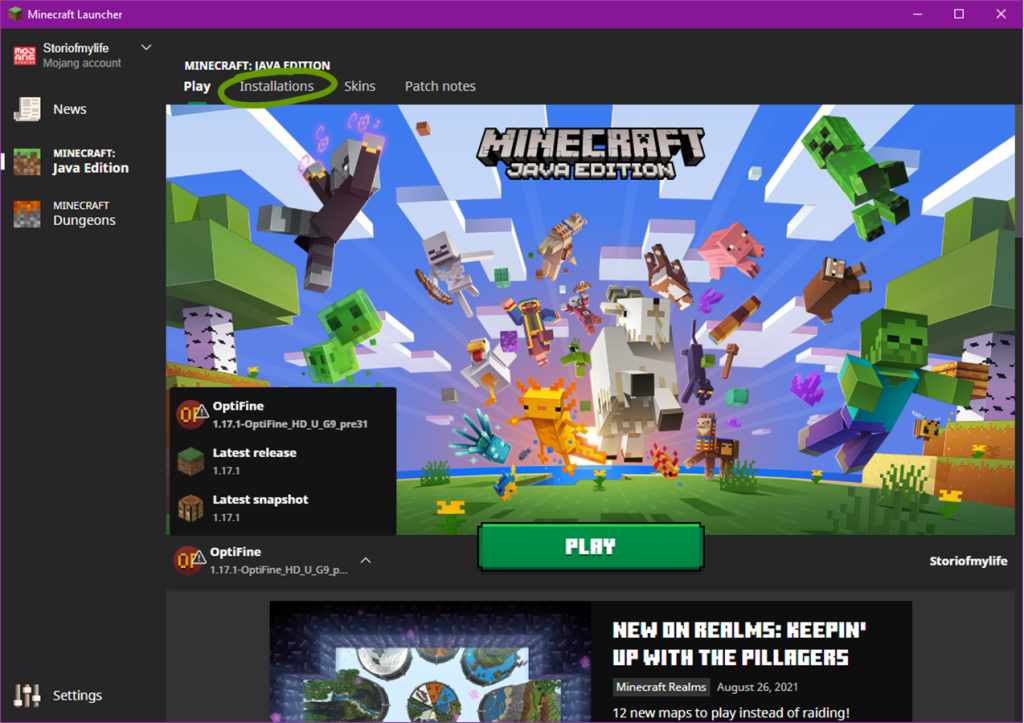
Once the launcher is open, navigate to the “Installations” tab.
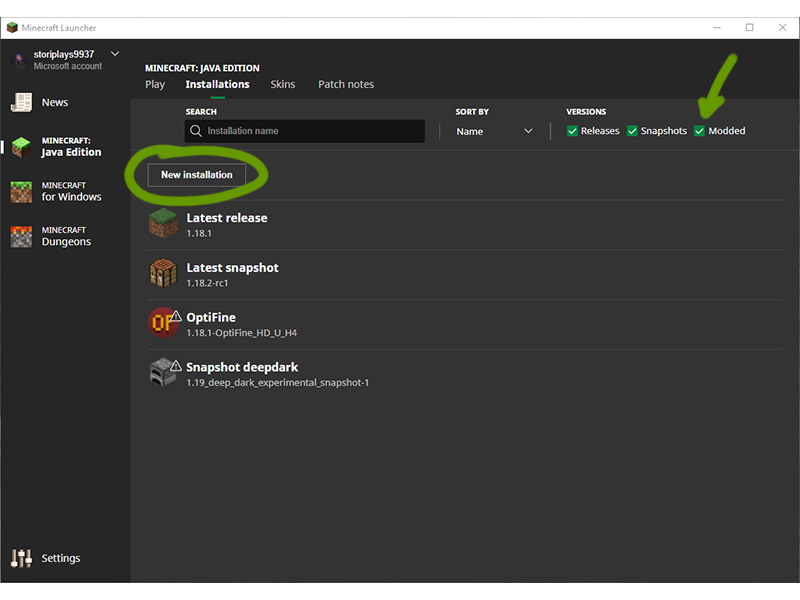
Make sure the box for “Modded” is ticked, then click the New Installations button, as shown above.
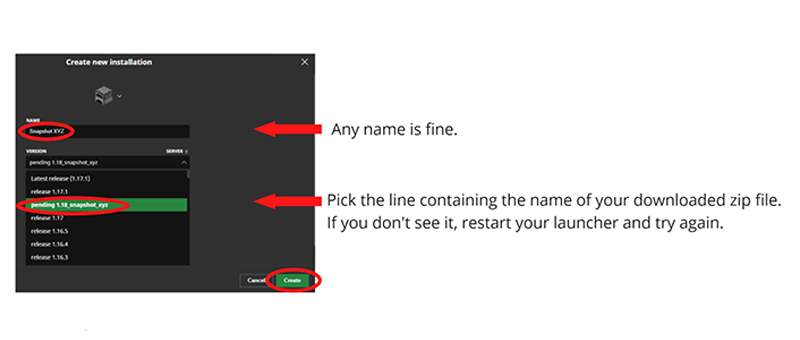
In the new window that appears:
Create when ready.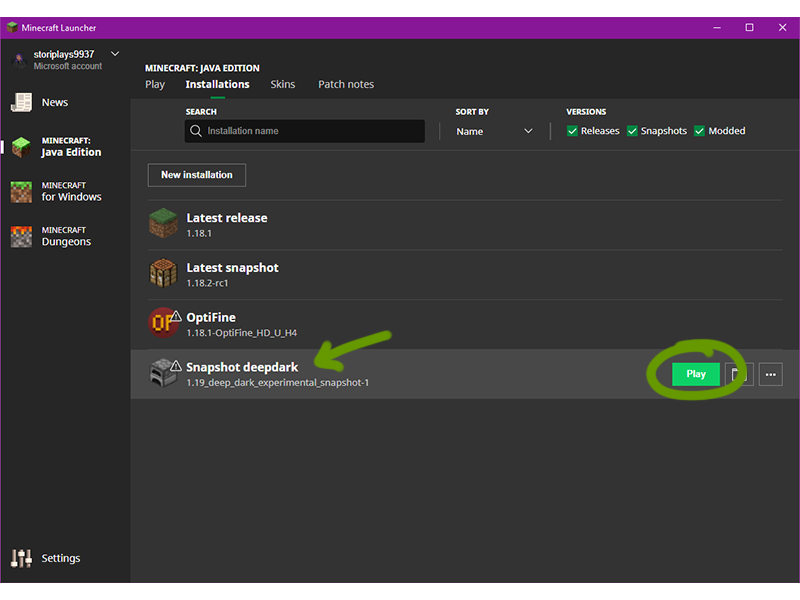
You should now see the created new installation listed in the Installations tab. Press Play to start up Minecraft!
Learn about the first 1.19 experimental snapshot, featuring the Deep Dark Biome!
Sometimes you want to share your Minecraft builds or moments with others, while other times you want to access screenshots of coordinates to the point of interest you promised you’d return to. Thankfully, no matter the need, finding your Minecraft screenshots through the Minecraft launcher is easy!
If you launch Minecraft directly through the launcher, open it up and move on to the next step. If you play Minecraft through CurseForge, follow along with our other guide!
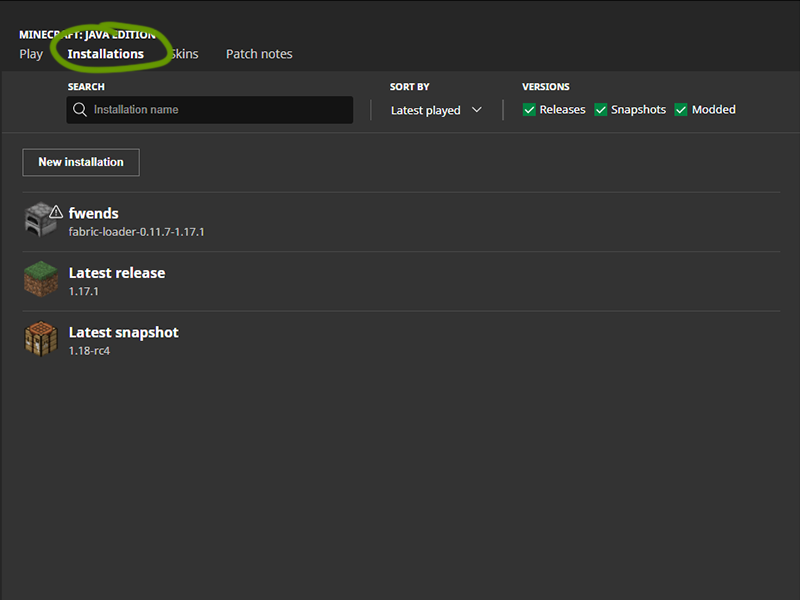
At the top of the window, under the game version, click the Installations tab.
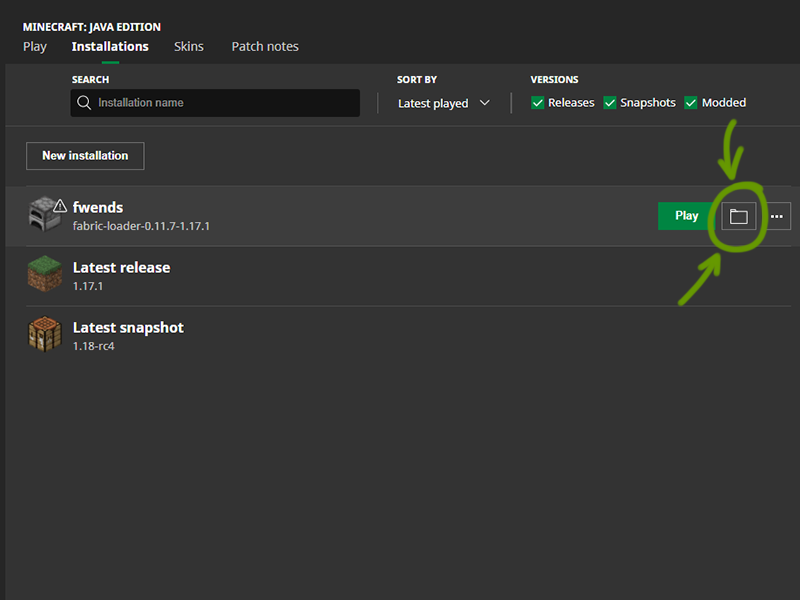
Hover your mouse over the game version you want to find and click the folder icon to the right of the Play button. Move onto the next step when the new window opens.
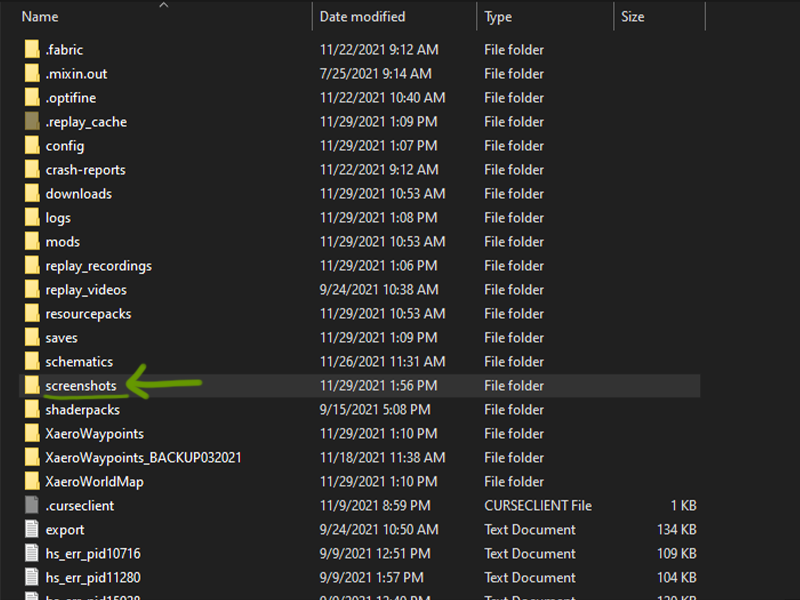
A window will open that shows all the files in the instance you played. Find the Screenshots folder and double click to open it. Within are all the screenshots you made in your worlds!
With the Wild Update, game version 1.19, new items and blocks were added to Minecraft and the recovery compass was one of them! What does it do? Read here to find out.
The recovery compass won’t be easy to make, mainly because of one type of item in the recipe. Follow along on how to craft a recovery compass in Minecraft, version 1.19.
If you’re interested in what else was added with the Wild Update, check out our comprehensive overview!
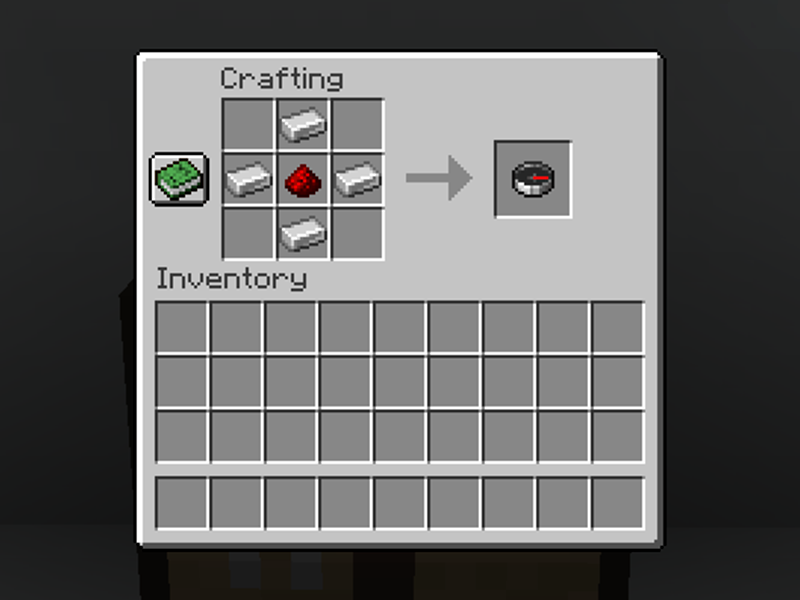
Obviously, the recovery compass will require a compass. You’ll need 4 iron ingots and 1 redstone dust, copy the recipe shown above.
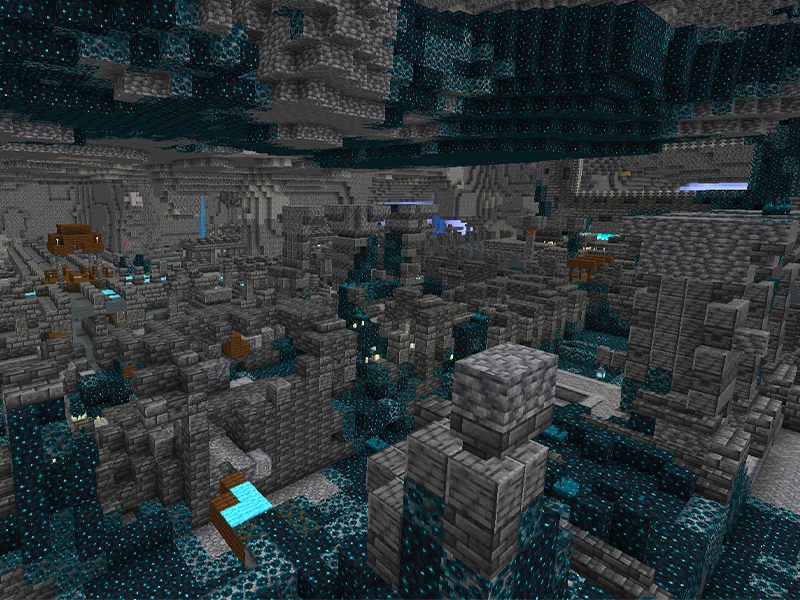
This is the trickier item in the recipe, and you’ll need eight. Echo shards are found only in ancient cities, which spawn in the deep dark biome. You’ll have to travel down to deepslate level to find one.
Once you do find an ancient city, check all chests within it. There’s a 29.8% chance that 1-3 echo shards will be within a chest, in both Bedrock and Java editions.
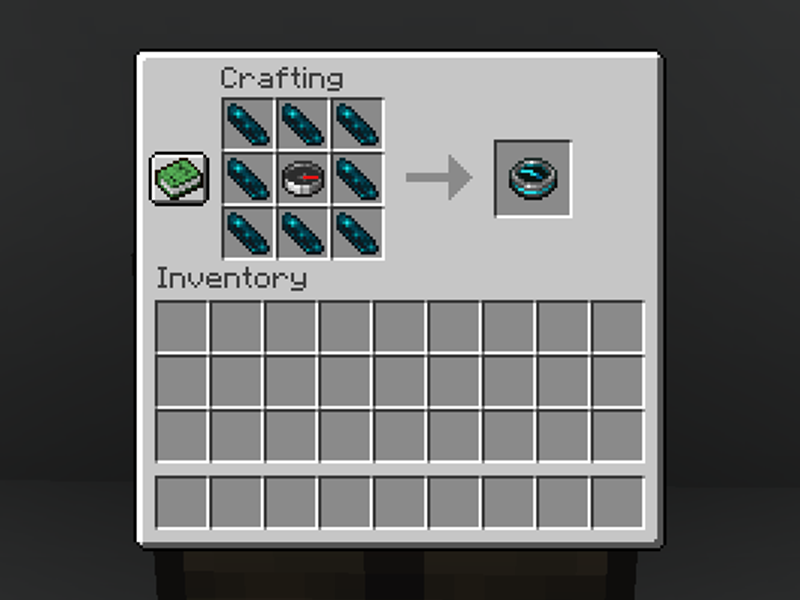
Once you have the compass and eight echo shards, follow the recipe above!
For more information on what else was added to the Wild Update, check out our complete overview!
One of the most versatile blocks in Minecraft to build with is concrete. However, if your entire build is 80% concrete, it can be tedious to turn concrete powder into concrete. If you’ve ever seen an experienced Minecraft player speed through this process in vanilla Minecraft, then you know it’s possible to improve this tedious work.
While you could build a redstone machine to automatically create concrete, this method is simple, and can be used on any vanilla or non-modded world! Below is a guide on how to cut your concrete conversion time in half. Keep in mind, this trick only works in the Java Edition of Minecraft.
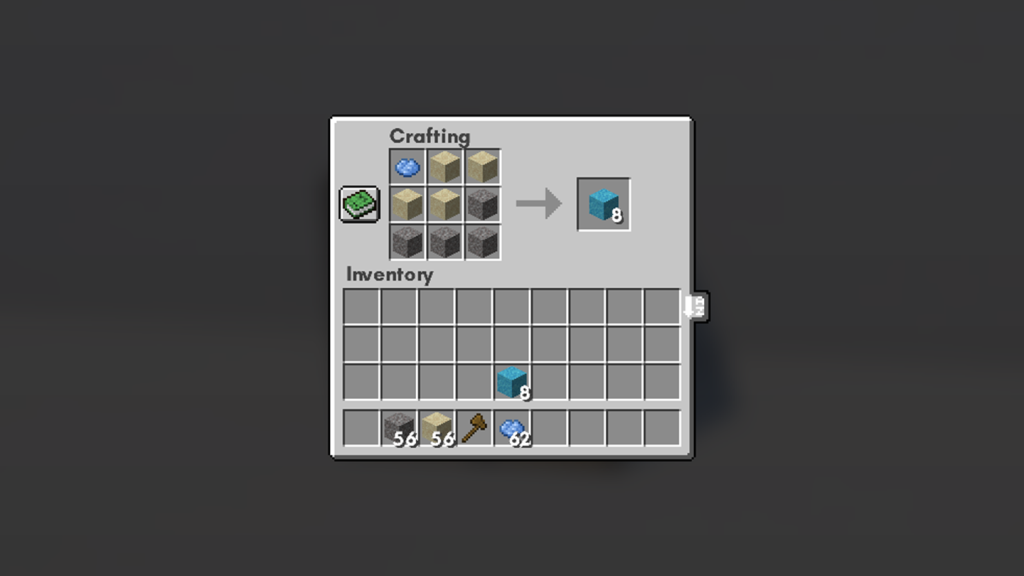
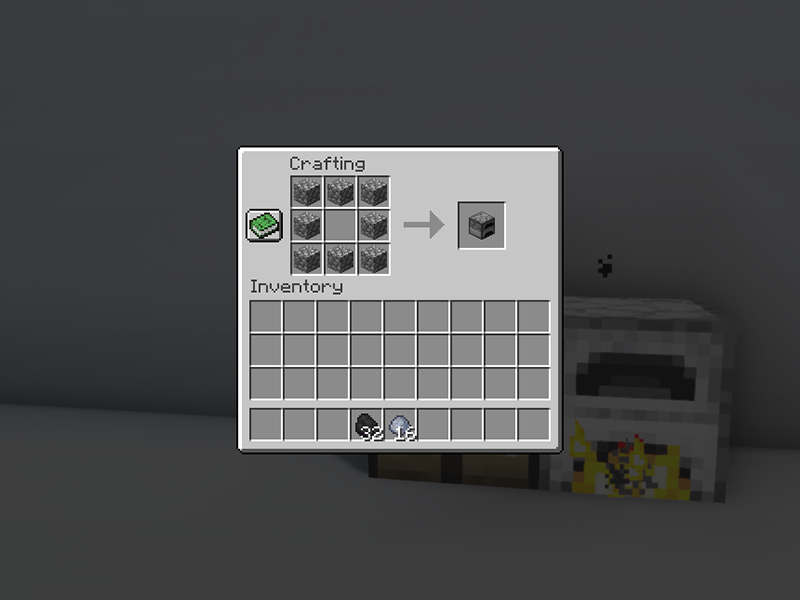
Craft the needed amount of concrete powder using the recipe shown above.
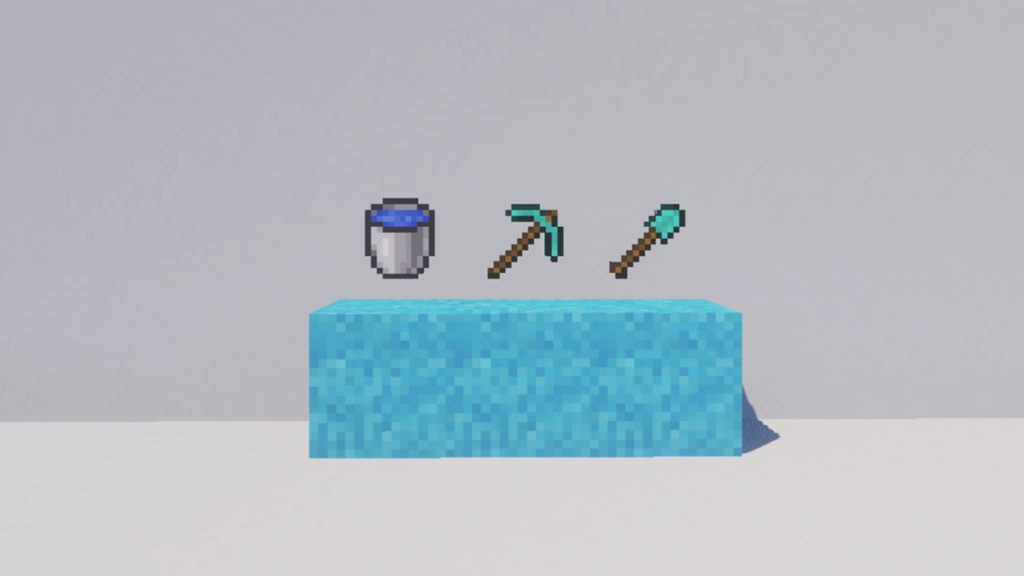
Before you begin, you’ll need to gather the following supplies in order to prepare an area to mine concrete quickly.
Once you have all the supplies, move on to the next step.
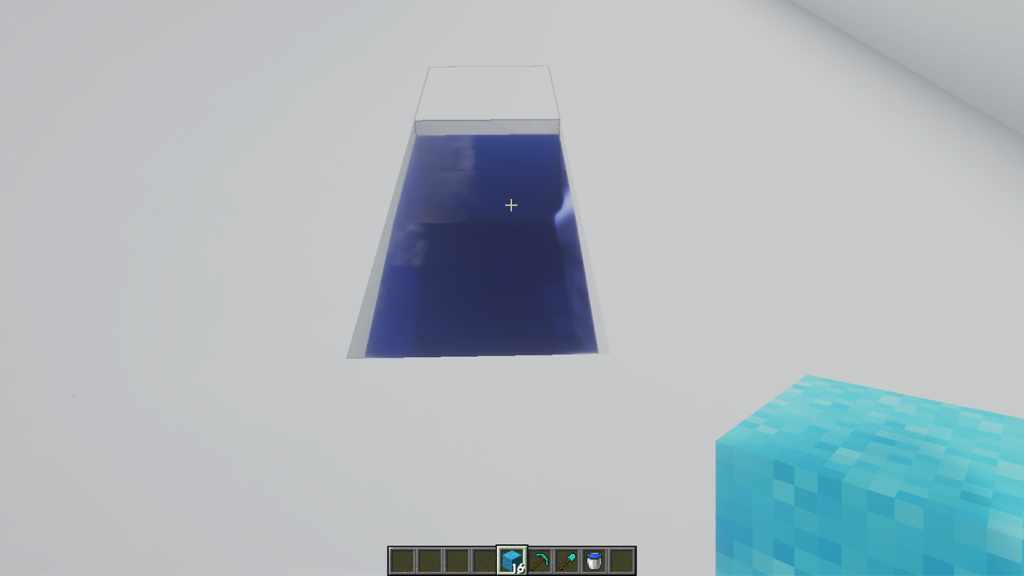
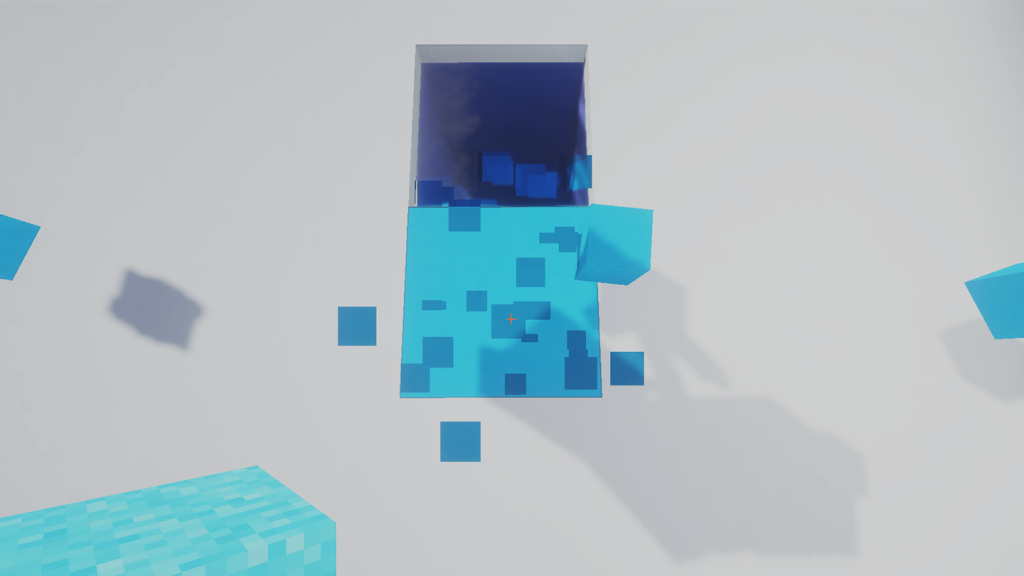
Find somewhere in your world that you can dig. Mine out a 1×2 space and place down a water source on the farthest spot from you. The space closest to you is the one where you’ll place the concrete powder later in this guide.
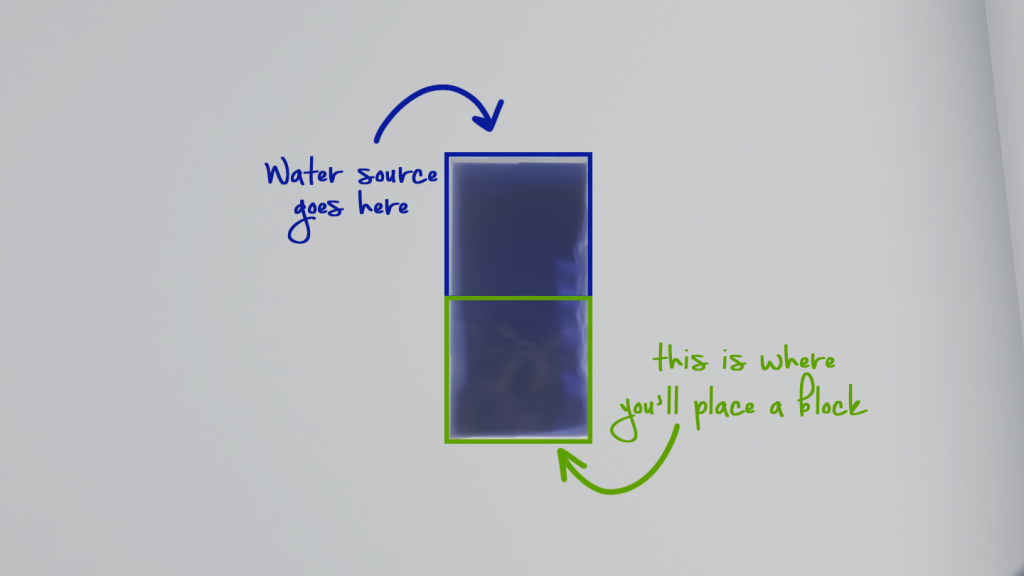
Use the above photo as a reference on how this is meant to look.
There are two ways to do this. The first is to click and drop the concrete powder into the offhand slot. The other option works if concrete powder is in the hotbar. Simply scroll so that the concrete powder is in the right hand, then press the F key.
Now you’re ready for the fun part!
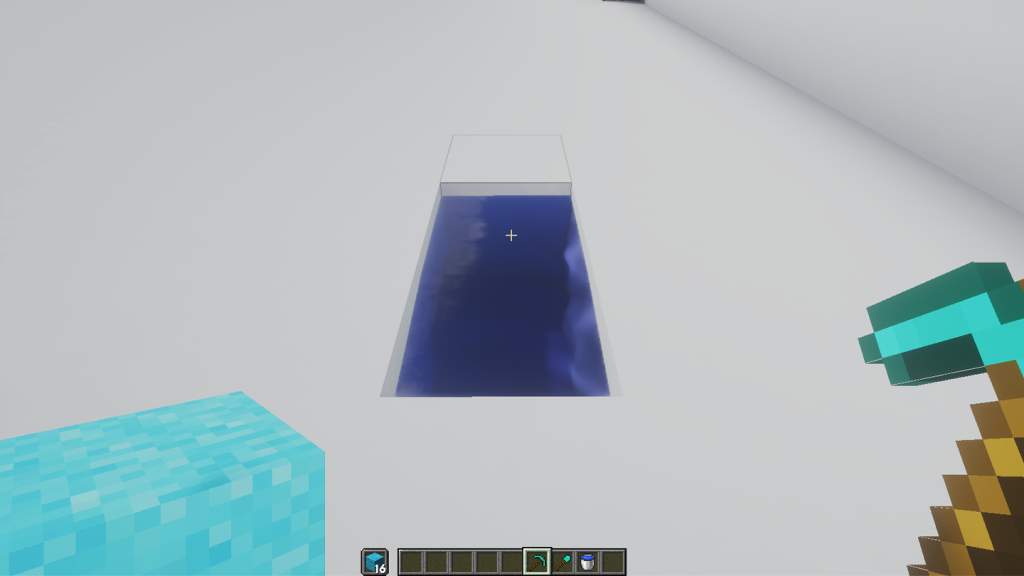
With your pickaxe in the right hand and aimed at the space where you’ll place the concrete powder. Hold down both mouse buttons at once.
While your left hand places a block, your right hand will mine it! Simple as that!
You’ve done so much to acquire a full set of diamond (or even netherite) armor and tools. You’re feeling proud! So you go out exploring the world or risk battling the Ender dragon, when you unexpectedly die, realizing that you’re still too mortal.
If you’ve ever experienced or imagined this scenario, then you should consider enchanting your items before heading towards danger. Minecraft provides special blocks which can bind special abilities, or enchantments, to your armor, tools, or weapons.
The broad categories of items that you can enchant are armor, tools, weapons, and books.
Bonus idea to save you time: If you’re looking to add a specific set of enchantments to an item, enchant books rather than the item itself to save yourself cost and items!
There are three ways to enchant items in Minecraft:
This guide will go through all three ways to enchant items in Minecraft!
Before you can use an enchanting table, you must craft one through a crafting table.
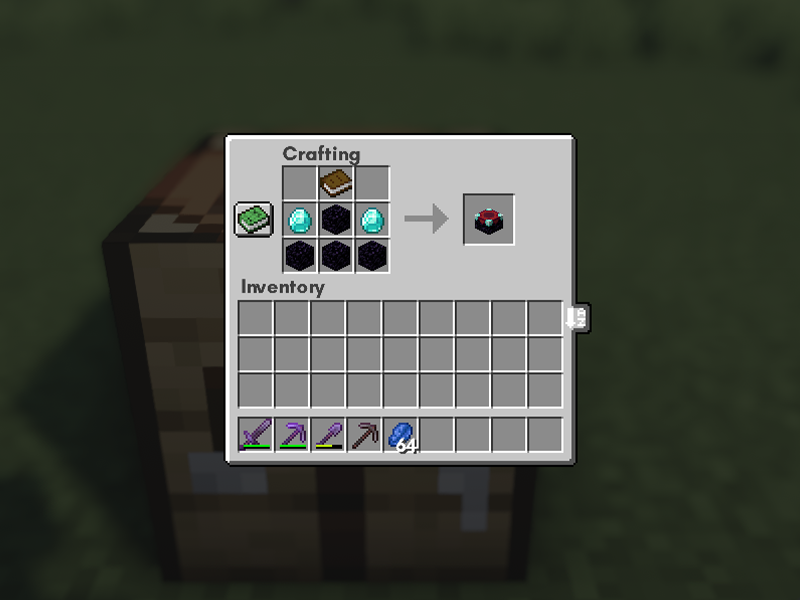
You’ll need four obsidian, two diamonds, and one book. The above image shows the recipe and formation to craft an enchanting table.
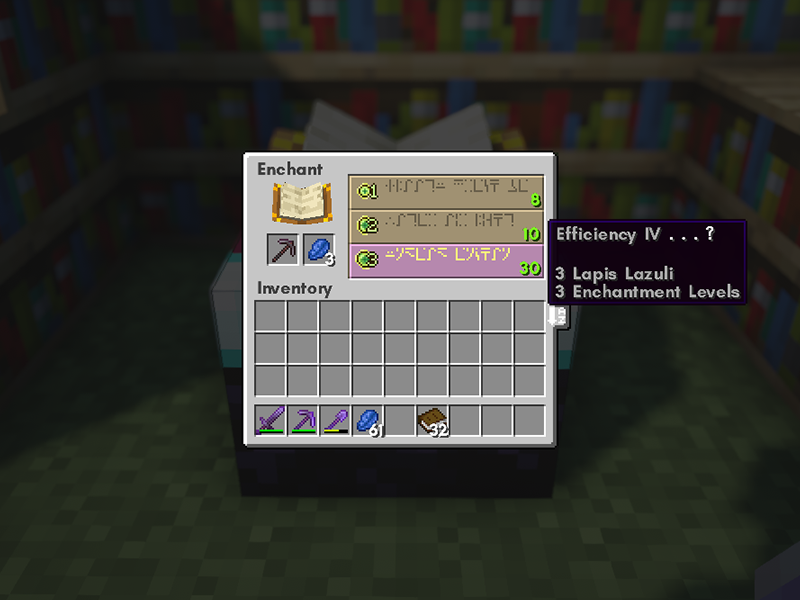
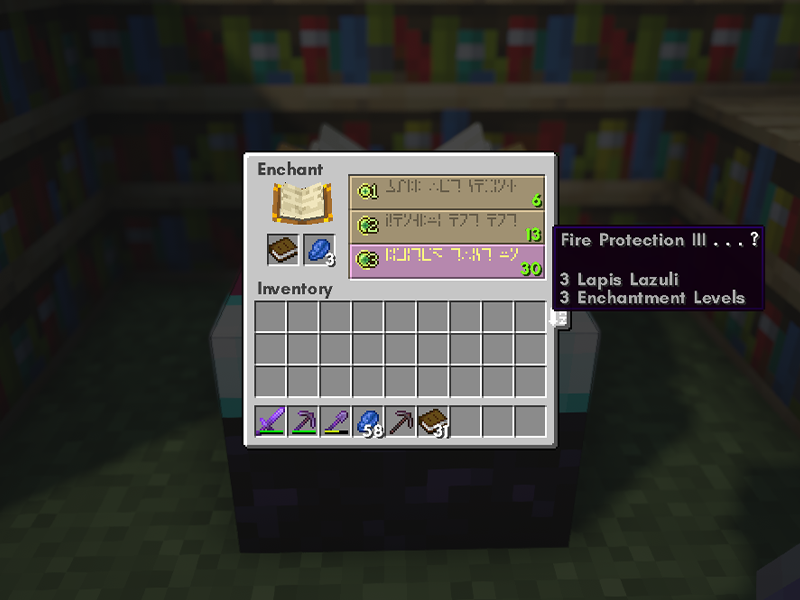
Once placed, right-click on the enchanting table to open up the interface. The above image will show the correct placement of items, as well as an example of what you might see in the GUI.
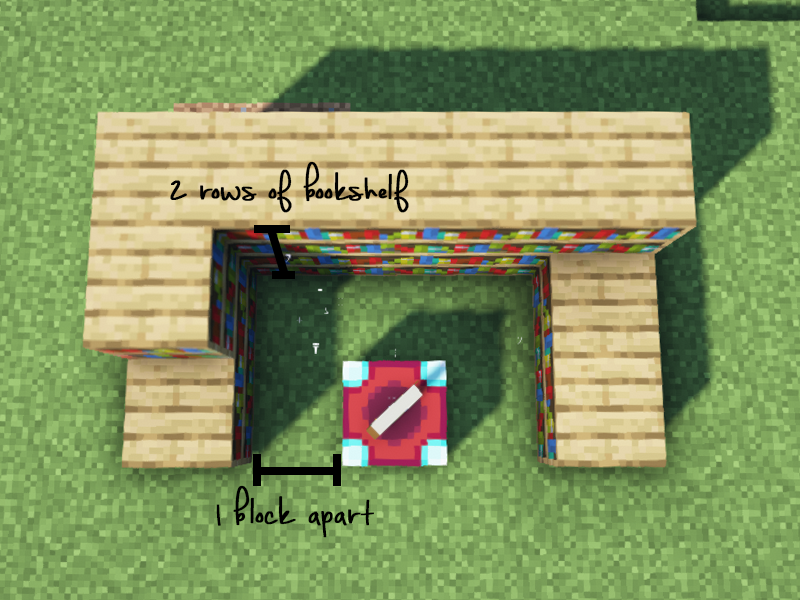
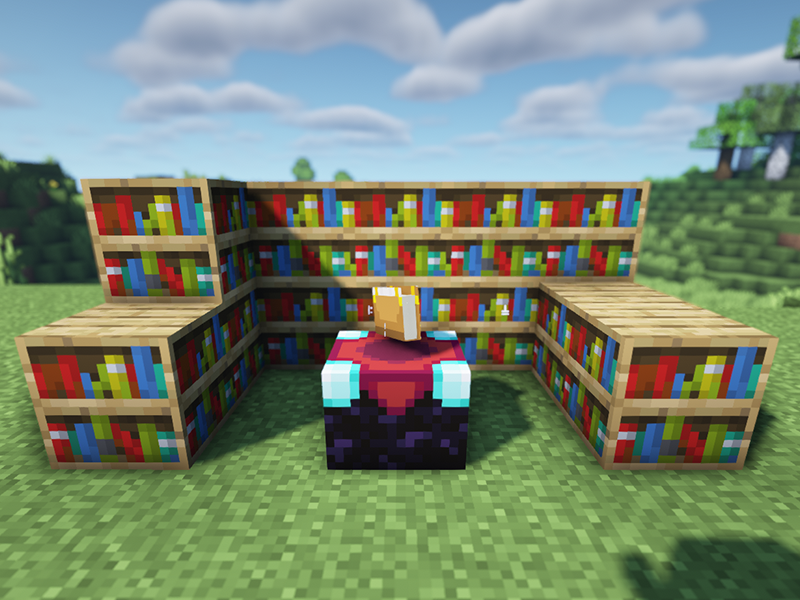
The higher the player’s level, the more enchantments you’ll gain access to. However, to increase the level of enchantment, you’ll need bookshelves! Above is an image showing the proper placement of bookshelves around an enchanting table. The must be a one block space between the bookshelf and the enchanting table in order for it to work. You can also stack bookshelf in a second row to save space.
How to create an enchanted book:
In place of an item like a sword or pickaxe, simply place a book inside the enchanting table. You’ll be able to save this enchantment for later to combine with an item at an anvil!
View our list of the best enchantments to have in Minecraft!
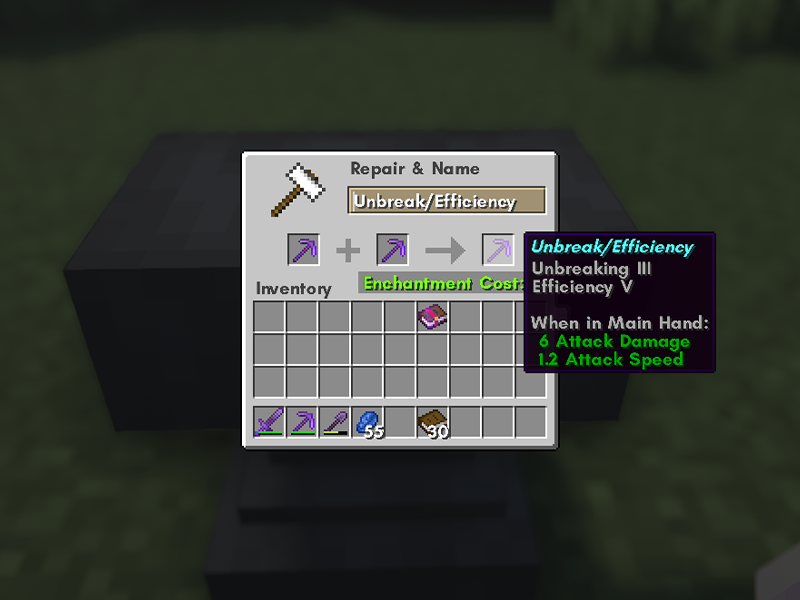
Whether you enchanted a book yourself or you found one in a chest, you can add enchantments to an item by using an anvil.
There are a few enchantments that will not be able to be combined on the same item. Enchantments are incompatible if both are in one of the following groups:
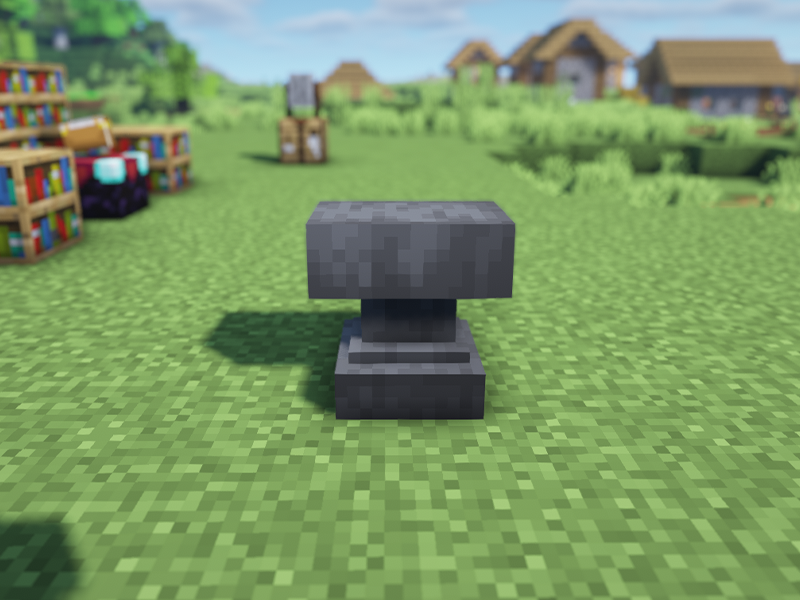
To start, right-click an anvil and follow these steps:
You now have completed the process of using an anvil to enchant items. Note that enchanted books are cheaper than using an enchanting table.
Anvils are handy when you need to not only repair an item, but want to increase the level of an enchantment on an item. You can also combine enchanted books through an anvil to increase their levels as well!
Before beginning, there are some things to keep in mind:
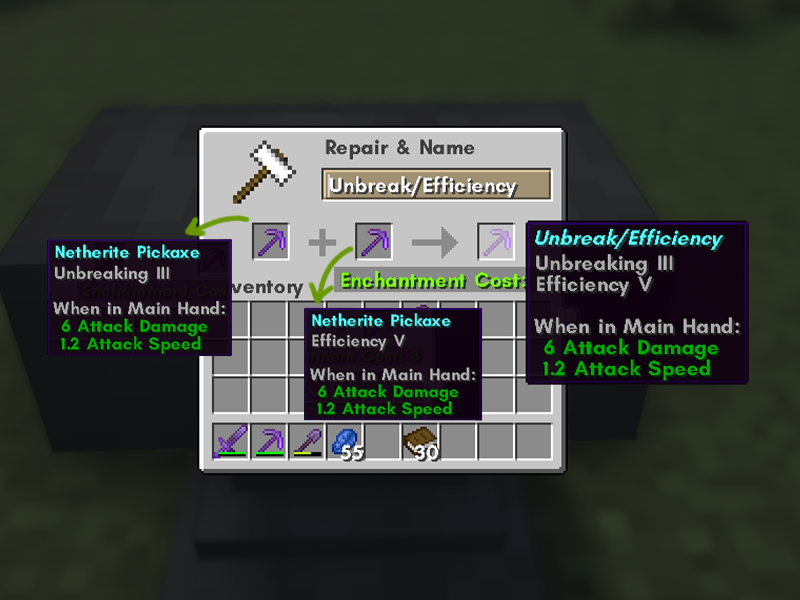
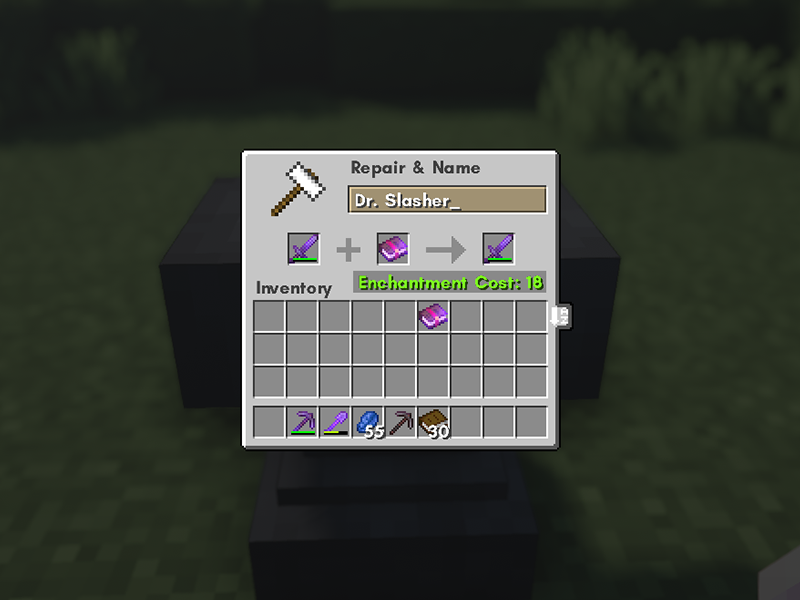
Use the image above to help along with the steps for combining enchanted items on the anvil:
There you have it! Three easy ways to add enchantments to items in Minecraft!
Bricks are a staple block in Minecraft for building. Whether it’s the main feature or an accent block, they’re quite attainable to make even in the early stages of survival worlds. Below is a guide to the simple gathering and crafting of brick in Minecraft!
Clay is commonly found at the bottom of rivers, lakes, and swamps. Mine clay blocks with a shovel or fist to break them into dropping clay balls. Clay balls are the most important part of the recipe!
Next, craft a furnace. You’ll need eight cobblestone to do so.
If you have a furnace already, make sure you have enough fuel for the next step.
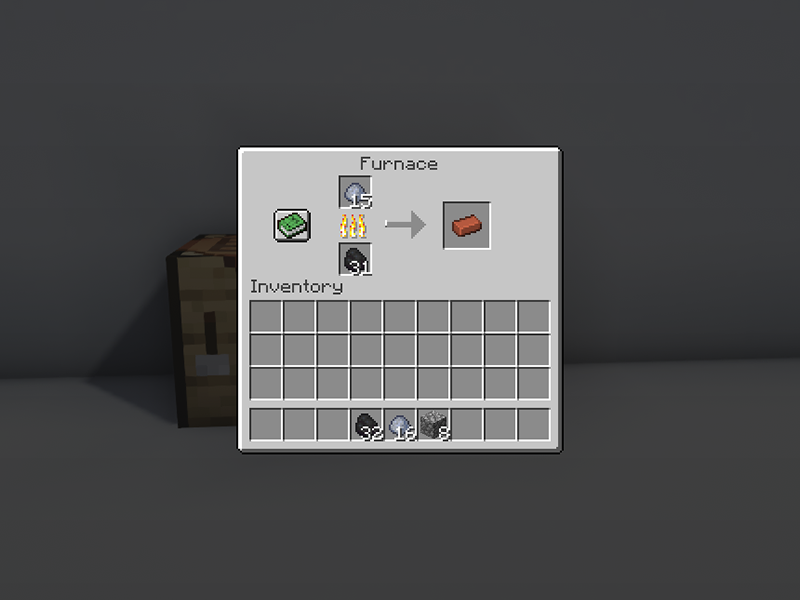
Place the clay ball in the top slot in the furnace GUI and fuel (such as coal or wood) in the bottom slot. With that, the furnace will smelt the clay balls into bricks!
Bricks can then be used to craft brick blocks or flowerpots!
While shaders make Minecraft look pleasing, resource packs are an additional way to change a theme or aesthetic of a Minecraft world. Because resource packs are separate than shaders, you don’t need to install any mods, which makes them so versatile and vanilla-game friendly.
While many use both terms to mean the same thing, there is a fundamental difference between the two. A texture pack is used for 1.6.1 and earlier versions of the game 1.6.1, and they only changed the in-game textures. Resource packs were added in after 1.6.1, and allow players to change sounds, music, and particle effects. They also can modify blocks, items, and entity textures.
Let’s get into our guide on how to install resource packs to Minecraft!
Before moving into the actual installation of resource or texture packs, it’s important to know where your Minecraft game is installed. To do so, follow these steps:
1. Open the Minecraft Launcher.
2. Make sure the launch option is the game version you plan on using.
3. Go to the Installations tab at the top of the window.
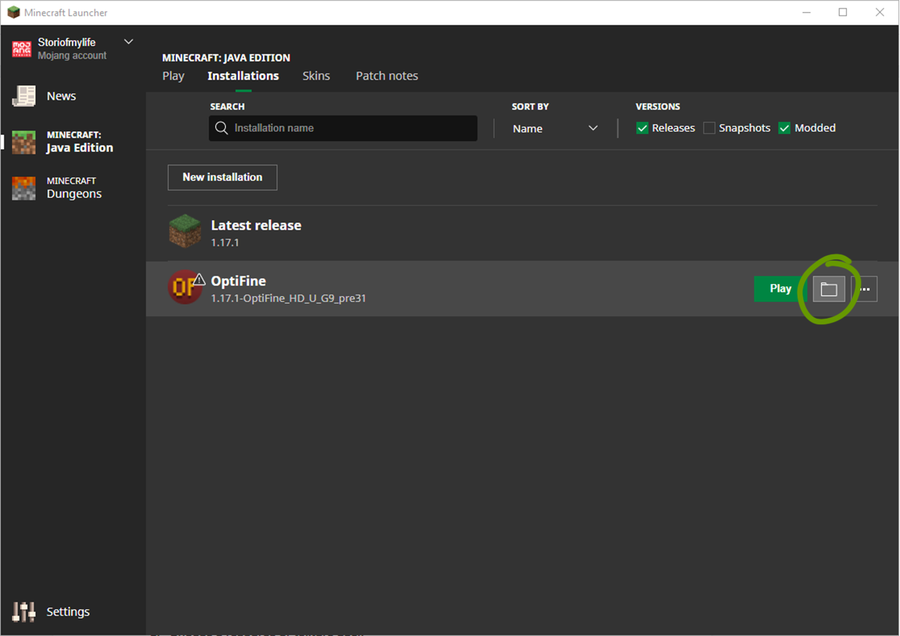
4. Hover your mouse over the game version you want to find and click the folder icon to the right of the Play button. See the image above for help.
5 . Locate the resource pack folder. This is where you’ll place any resource pack you want to use.
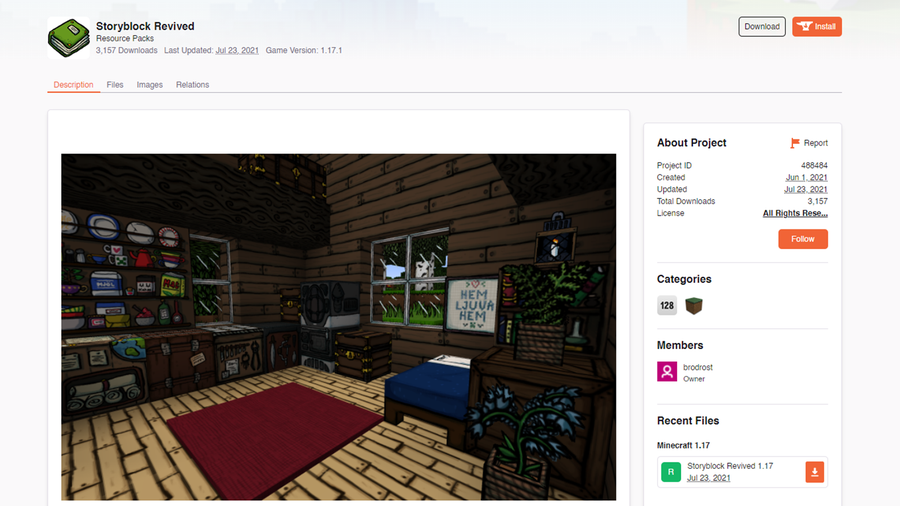
Many websites are available to download resource packs, but some are safer than most. We recommend CurseForge or ResourcePack.net. Alternatively, you can download directly from a developer’s website as well!
Make sure it’s compatible with your Minecraft game version and then move on to the next step!
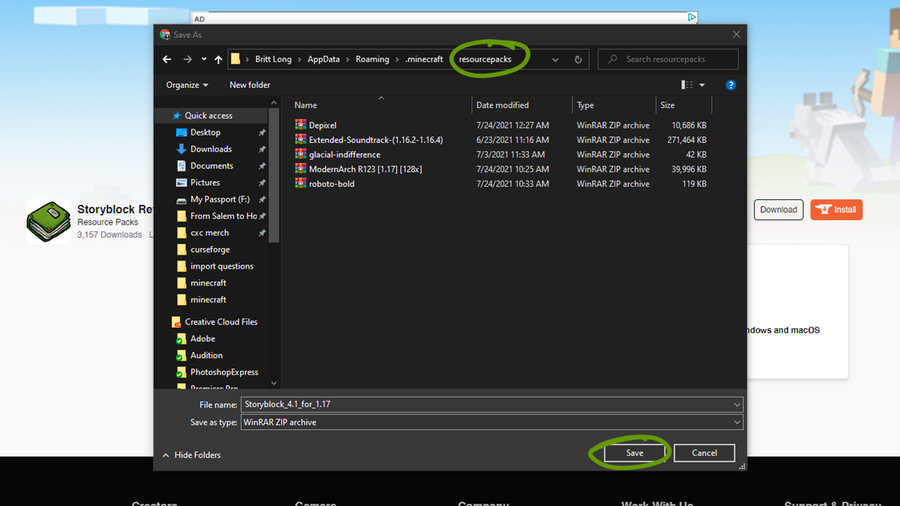
Download the correct game version of the resource pack you’ve chosen and place it within the Resourcepack folder found in Step 1. Make sure you don’t unzip the downloaded file!
Now it’s time to run Minecraft and turn on your resource pack! Once the game has launched, follow these steps:
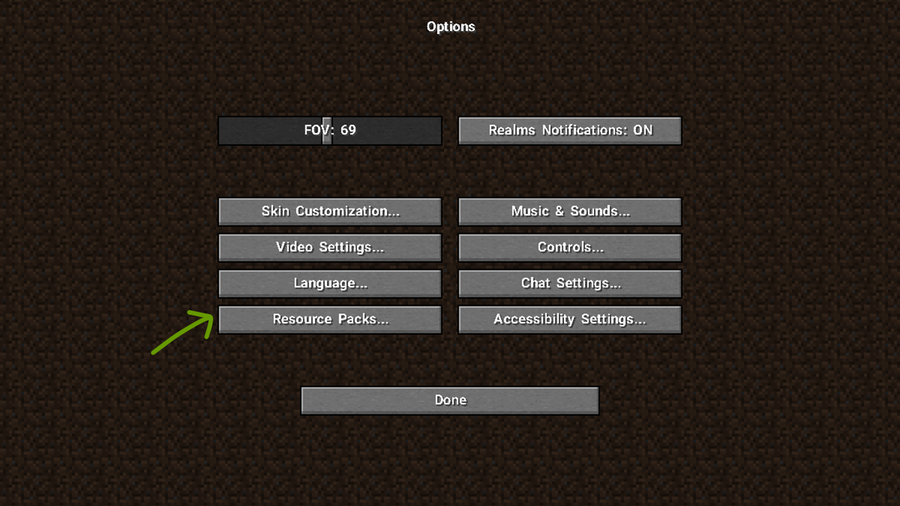
1. Click Options then Resource Packs.
2. Click arrow button that appears over the resource pack’s icon to move it to the right Selected column, as shown in the image below.
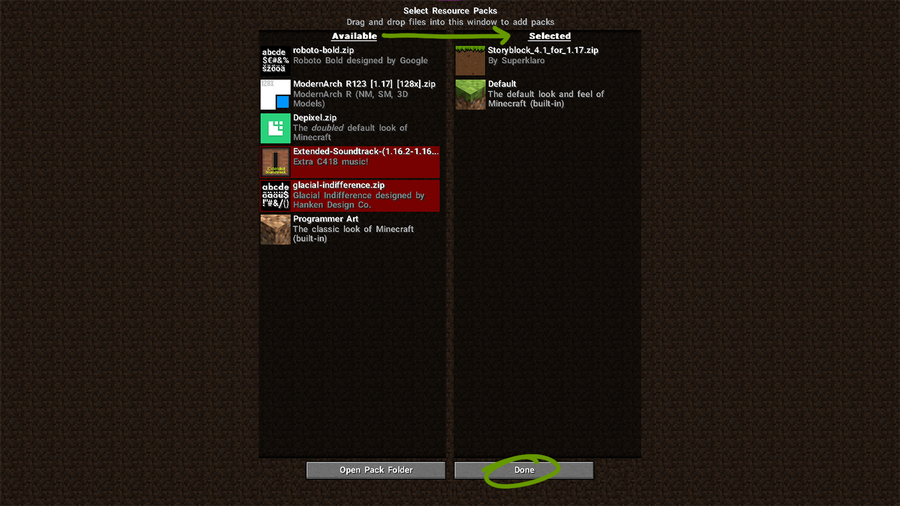
3. Click Done and a loading screen will appear and return you back to the Options menu when it’s finished rendering.
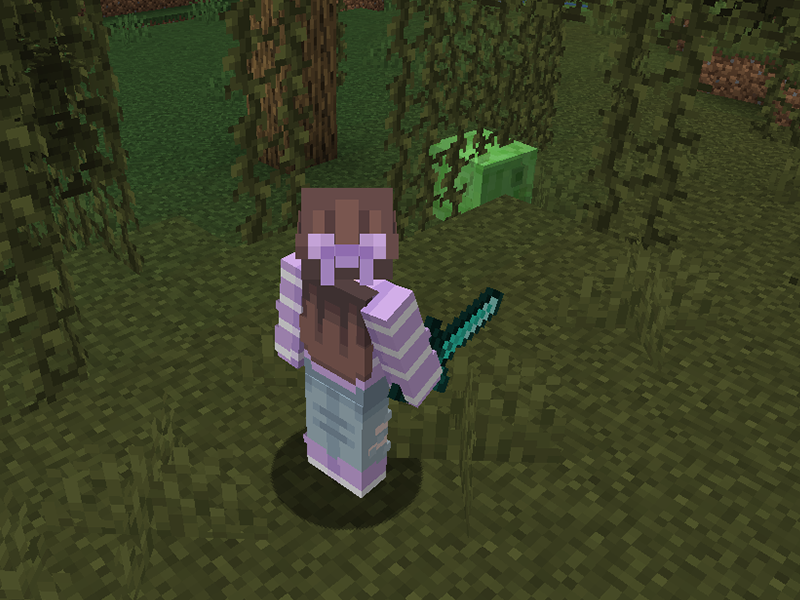
Return back to the main menu and you can start playing Minecraft with a brand new theme! To learn how to install shaders, read our guide to installing shader packs for Minecraft!
While you can’t tame frogs, you can breed them, lead them, and put tadpoles into buckets. Frogs croak, jump, swim, and (slowly) walk on land. They can jump over five blocks and prefer lily pads and big dripleaf.
Generally, they’re just out here living their best froggy lives!
Read on to learn how to find and tame frogs!
To activate a frog’s love mode, you’ll need slimeballs. The easiest way to get them is from slimes! Slimes spawn in the Overworld in specific “slime chunks” below layer 40, regardless of light levels. They can also spawn in swamp biomes between layers 50 and 70 in light levels of 7 or less.
An adorable fact: Baby pandas have a chance of dropping one slimeball when sneezing.
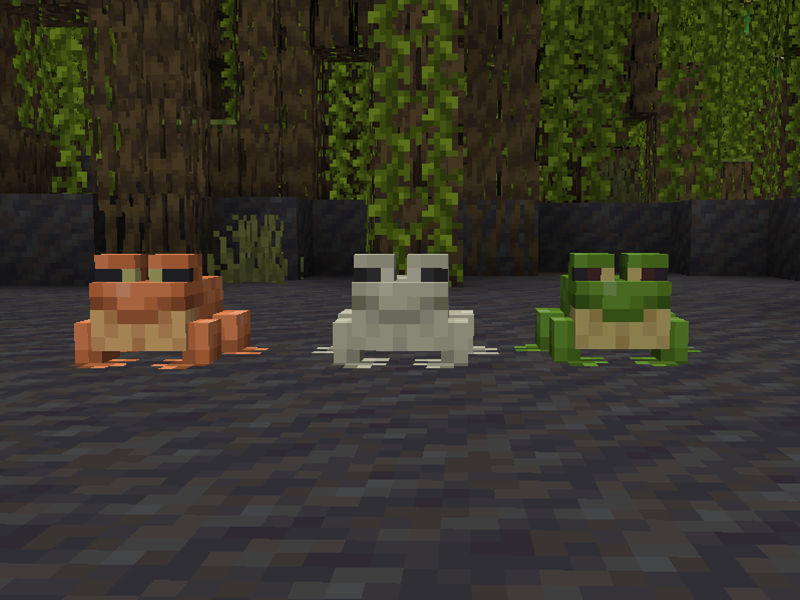
Frogs spawn in swamp and mangrove swamp biomes, in groups of 2-5 frogs. They grow from tadpoles, and their variants are determined by the temperature of the biome the tadpole grew up in.
Frogs have three variants: temperate (orange), warm (white), and cold (green). To get different variants of the frogs, currently the best way is by bringing a bucket of tadpole to a different temperature biome and letting them grow up there.
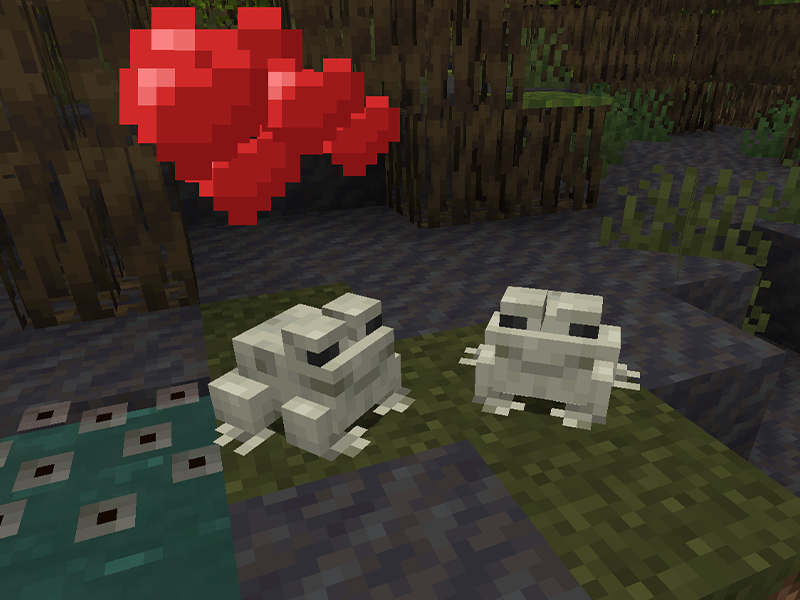
Simply give each frog a slimeball and let the magic happen (aka love mode). One of the frogs will head towards water to lay their eggs. In the case of Minecraft, frog spawn will appear over water (similar to how lily pads or glow lichen appear).
You cannot pick up this block and there’s no collision, so you won’t have to worry about stepping on the eggs as you would with turtle eggs.
If you’d like to know more on what else was included in the Wild Update, check out this comprehensive overview!