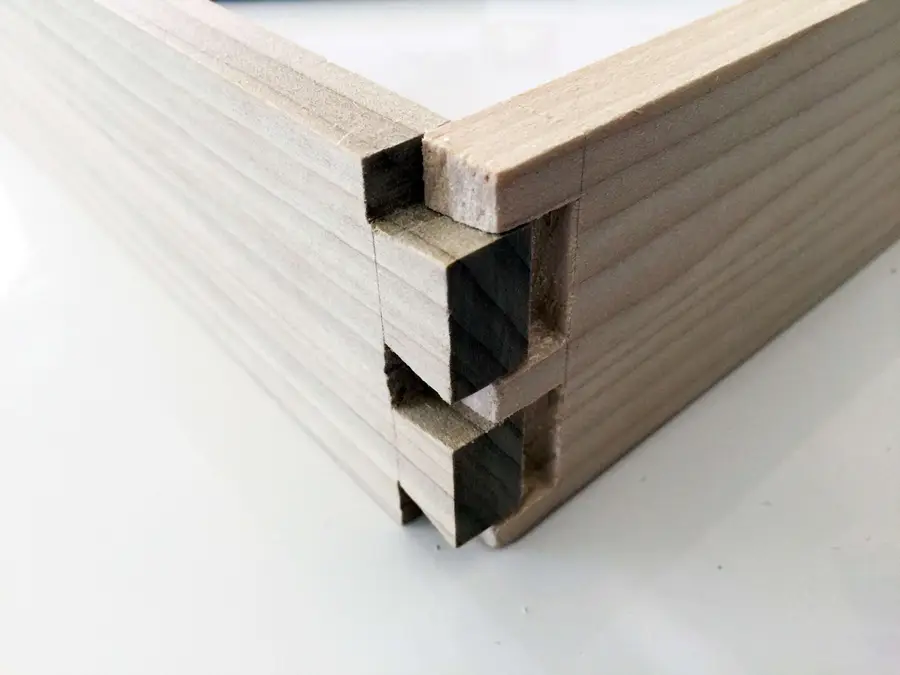
How to Make the Perfect Dovetail Joint Using Traditional Woodworking Tools
Share
What you'll need
Interests
There are plenty of helpful videos on this subject, but I find guides with pictures to be useful with a project like this. I’ve added a lot of close ups for each step so the pictures should help guide you.
1 – Determine which piece of wood will be the tail board and which will be the pin board
The tail board is designed to withstand more pulling tension. If you look at the diagram below you’ll understand why. So it depends on what you’re building as to how you’ll want to situate the pins and tails.
2 – Use your marking gauge to measure the depth of the pin board
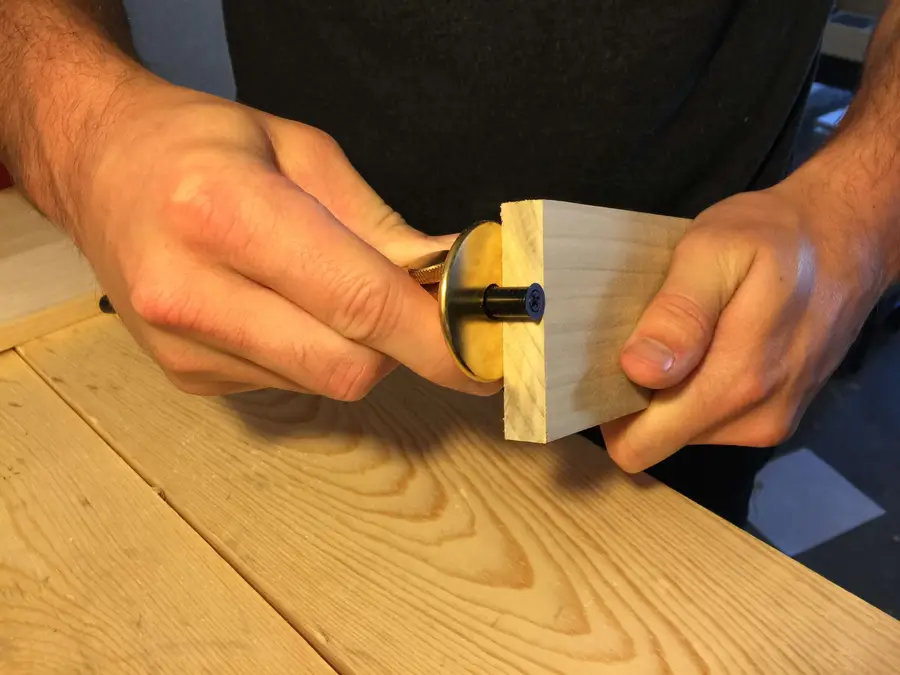
The depth of the pin board matters. Use your marking gauge to take this measurement and adjust it to the thickness of the pin board.
3 – Mark all the way around the tail board with the marking gauge
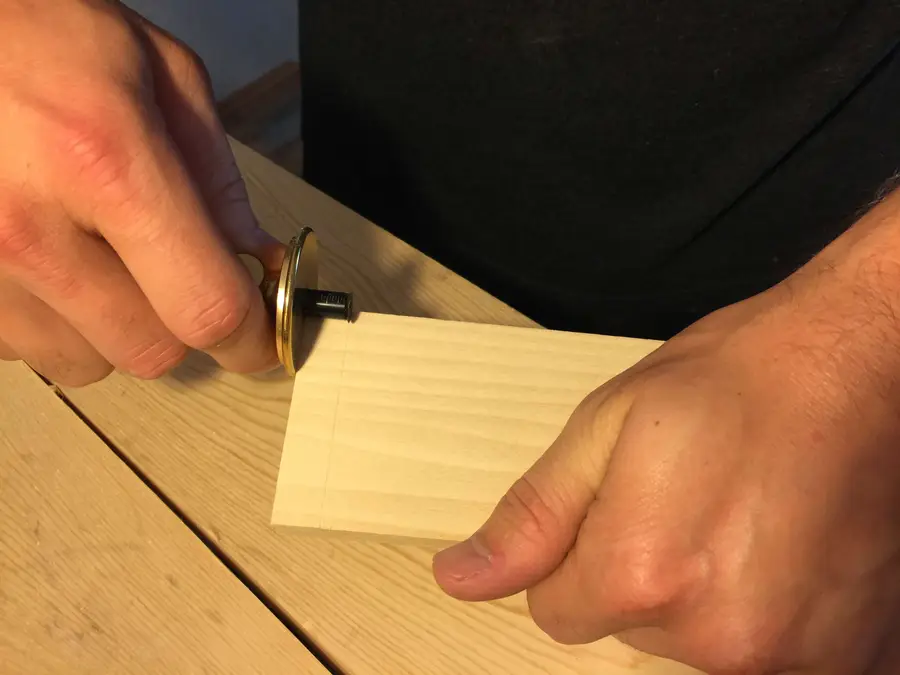
With the depth set from the pin board, make a mark on all four side of the tail board.
4 – Mark and measure the tails
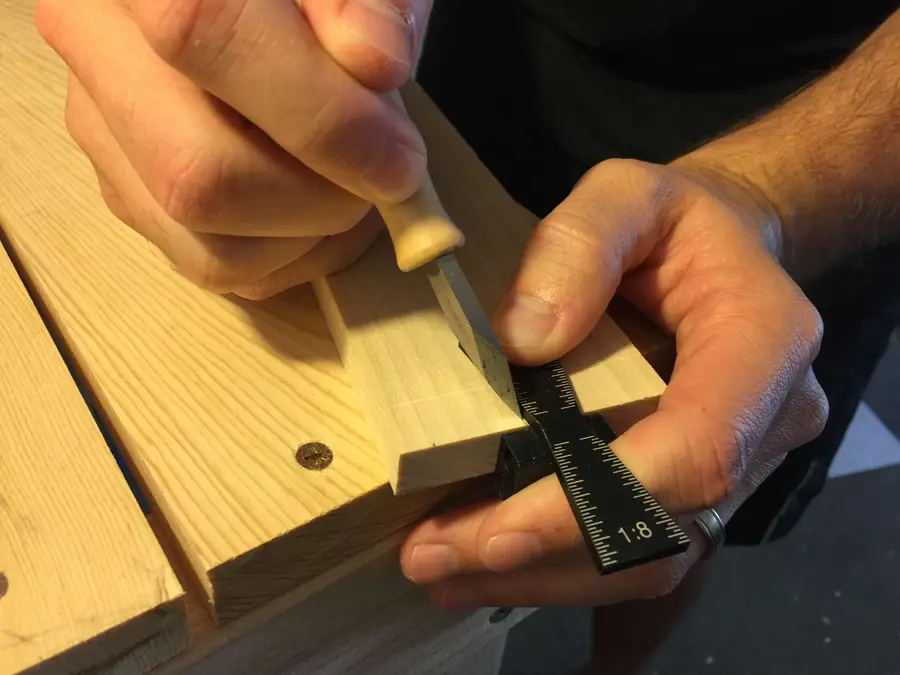
You’ll need to determine the size and number of tails. For this project I’m going to use two tails. I’m also using a handy dovetail marker and a marking knife to mark the angle.
How you mark the tails will depend on the tool you’re using. In my case, I’m going to use a pencil to mark 1/4 inch from each edge. Then, I’m going to find the center and mark 1/8 inch on each side of the center. This will leave 1/4 inch in the center of the board.
Next, I’m going to use the dovetail marker to mark the angles. Start with one side of the board, and use your marking knife to mark down to your depth. Then, mark four lines across the top of the board, and use the dovetail marker again to mark the other side. The picture will be much more helpful than the paragraph above.
5 – Cut the tails starting at the top
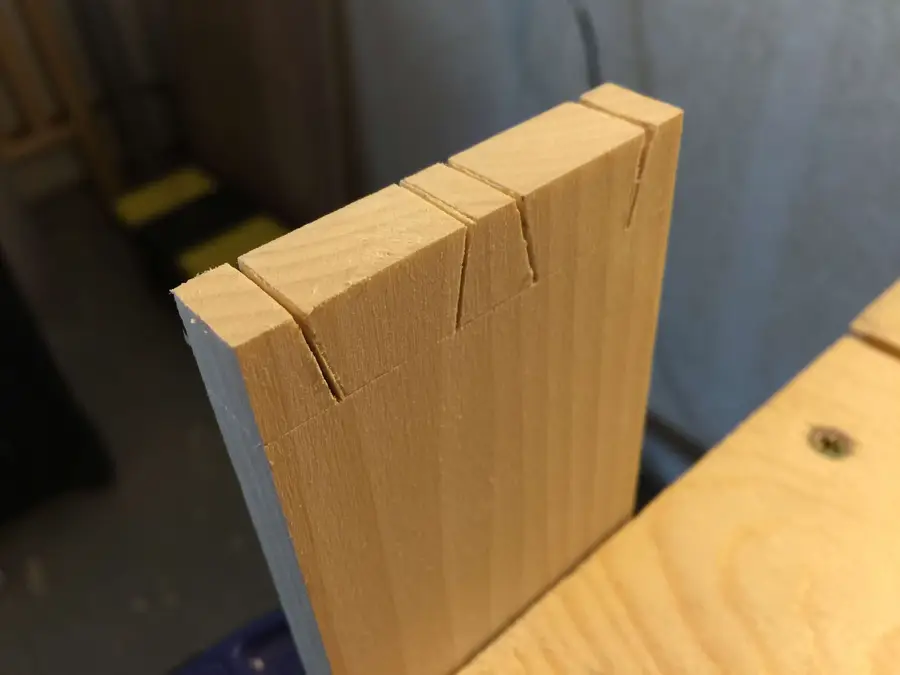
Using your dovetail saw, cut along the line you made with your marking knife. Do not cut past the line you made with your marking gauge.
| 🛈 Make sure you do not cut past the line you made with your marking gauge. |
6 – Cut towards the base of the tails on both sides
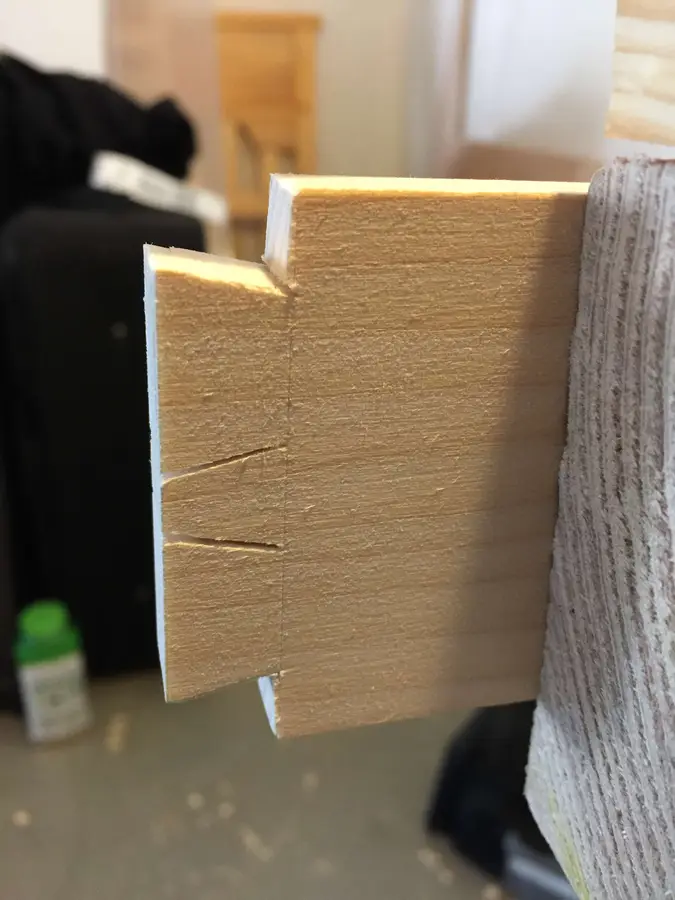
Now we are going to cut away the wood to leave the tails. Use the dovetail saw to cut across the wood to the base of the tail on each side of the wood. Make sure to follow your mark. Do this on both sides.
7 – To remove the wood between the tails, begin by chiseling along your mark
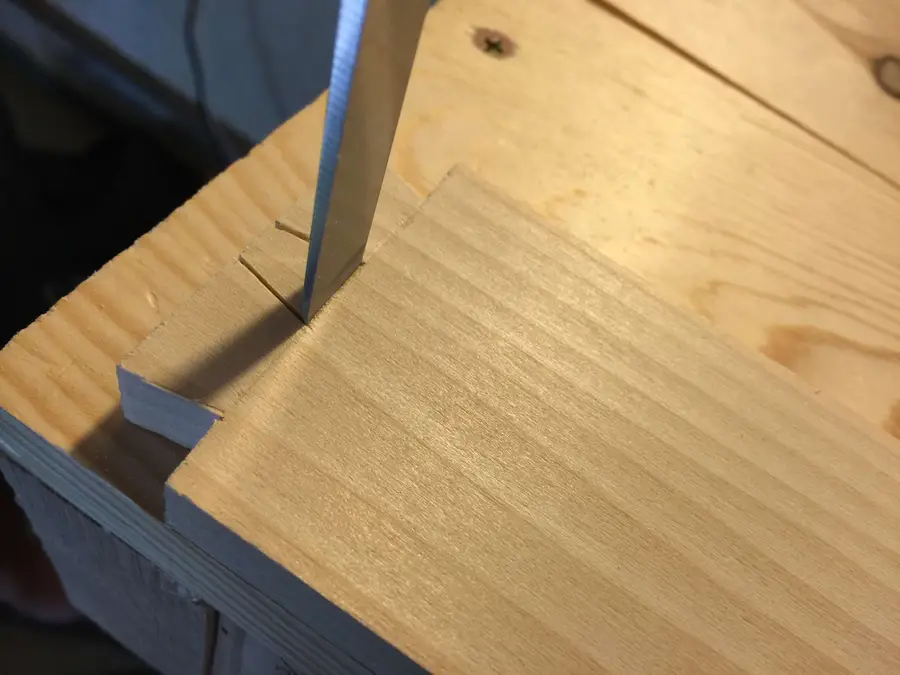
Tap the top of the chisel with a mallet. Don’t try to chisel too much at a time. Four or five soft hits should be plenty.
8 – Chisel away from the front
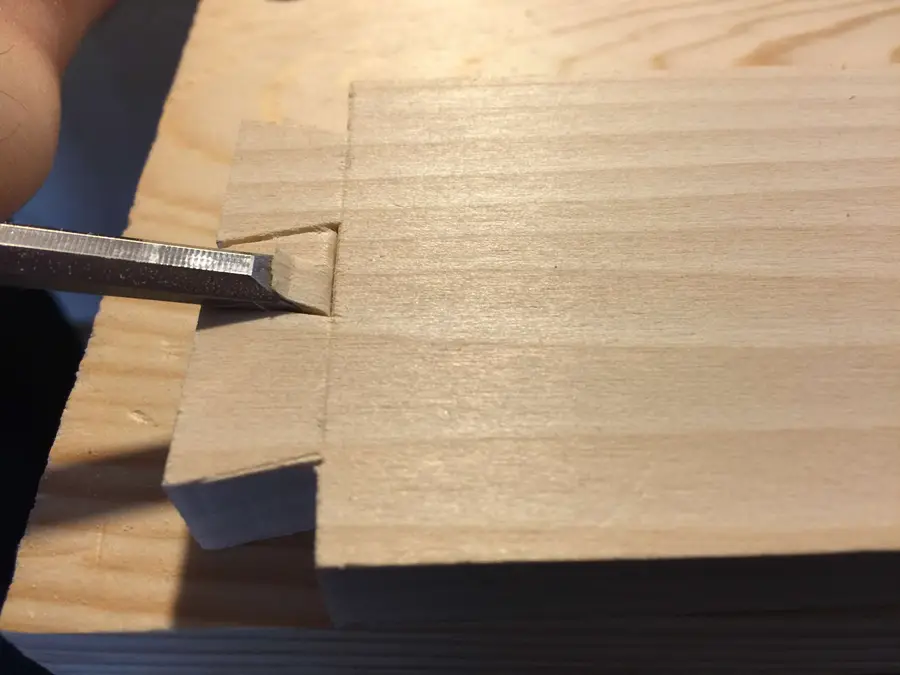
Now chisel away from the front of the wood removing only small pieces of wood at a time. This process will take some time and you shouldn’t try to rush it by chiseling away too much at once. Alternate back and forth between step 7 and step 8 until you’ve reached the center.
9 – Once you’ve reached the center, flip the board and continue
It’s important not to chisel all the way through to the other side of the wood because you’ll risk damaging the other side. So once you reach the center of the board you should flip it over and start again from the other side.
10 – Clean up the tail board
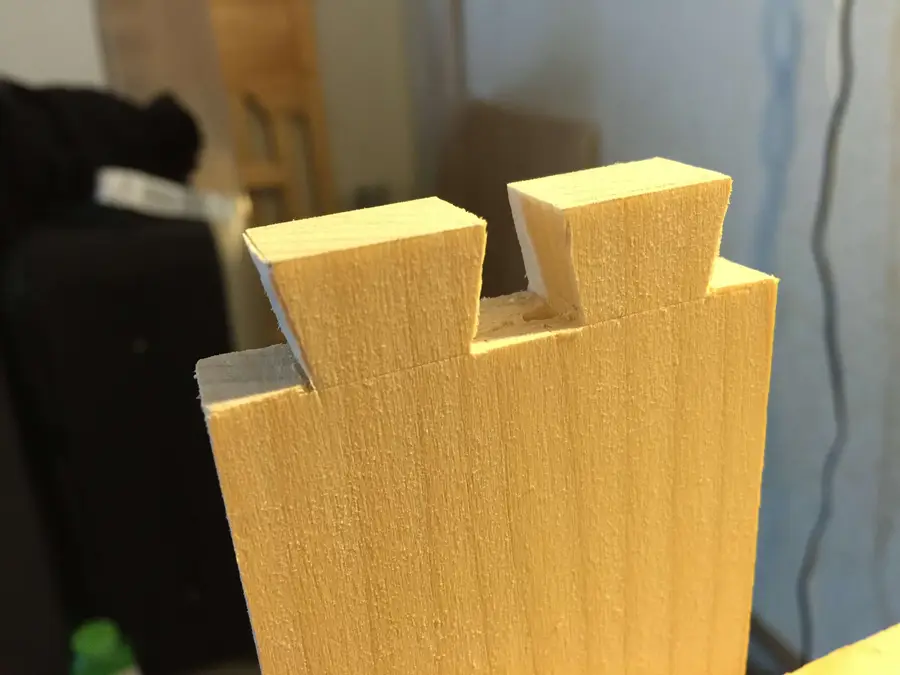
Your tail board is almost finished. You can clean up any uneven or rough edges with a file or sandpaper. You want the edges to be as straight as possible, but don’t remove too much of the wood.
11 – Measure the depth of the tail board and mark all four sides of the pin board
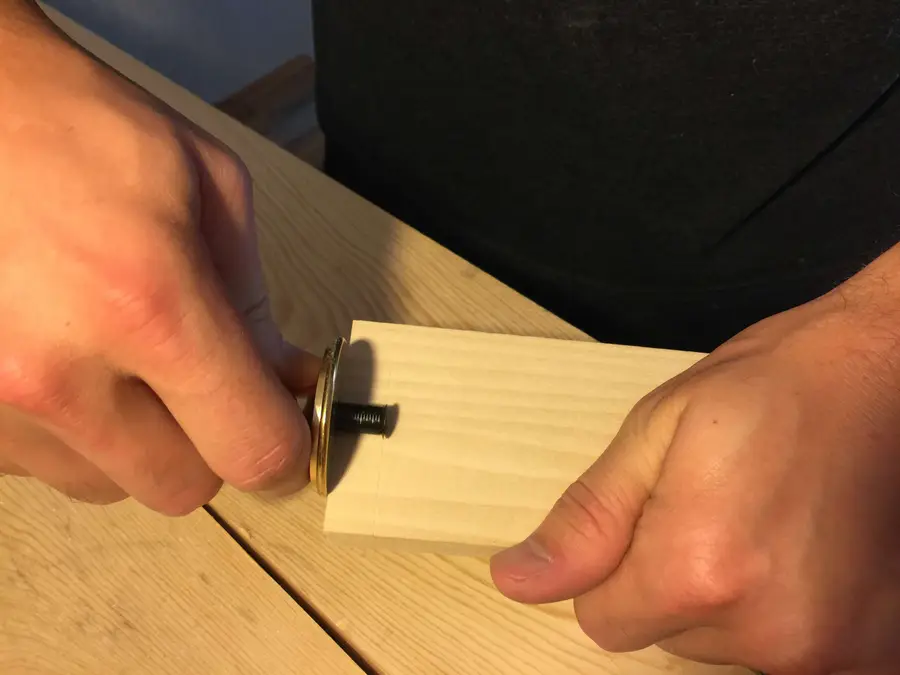
Just as we did with the tail board, we need measure the depth of the tail board and mark the pin board.
12 – Line up the wood to measure your pin board
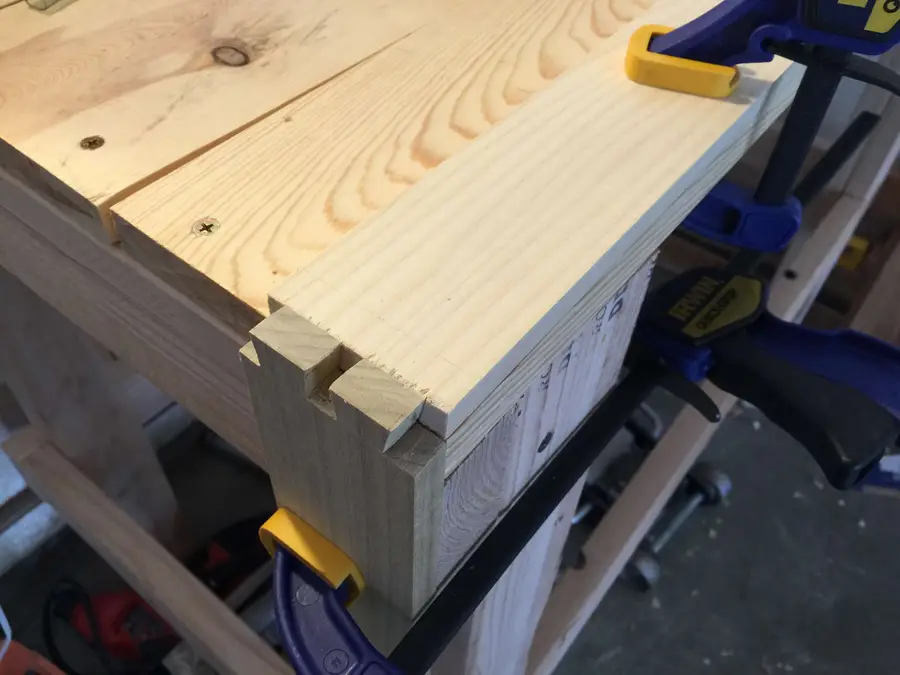
There are many ways to do this, but I like to use clamps to position the boards in place.
13 – With your marking knife, trace the edges of your tail board onto the end of the pin board
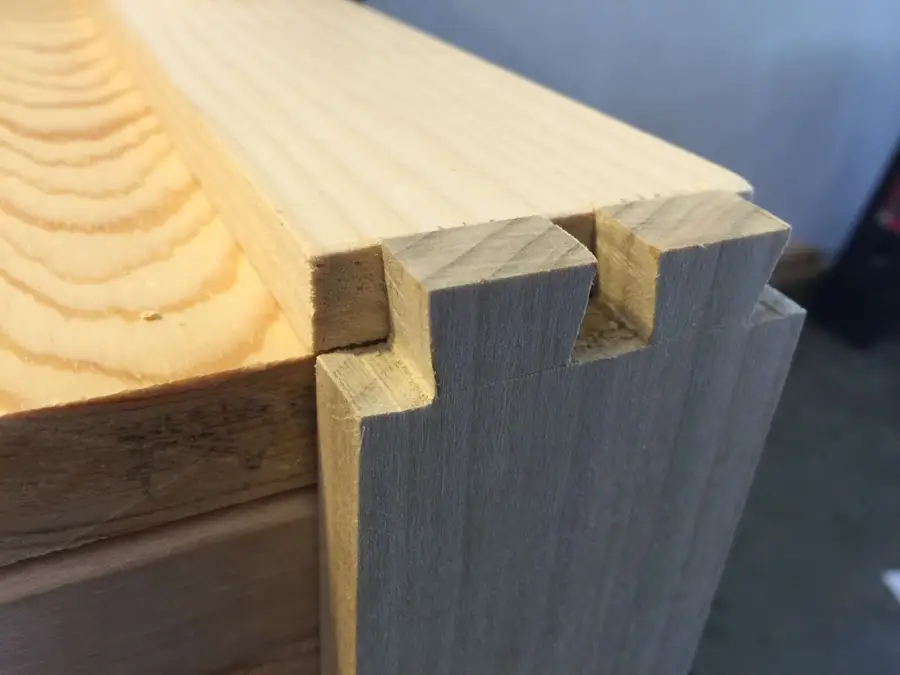
Using your marking knife, trace the edges of your tail board onto the end of the pin board. Using the marking knife leaves a tight, clean line—especially compared to something rough like a pencil.
14 – Mark the edges of the pin board
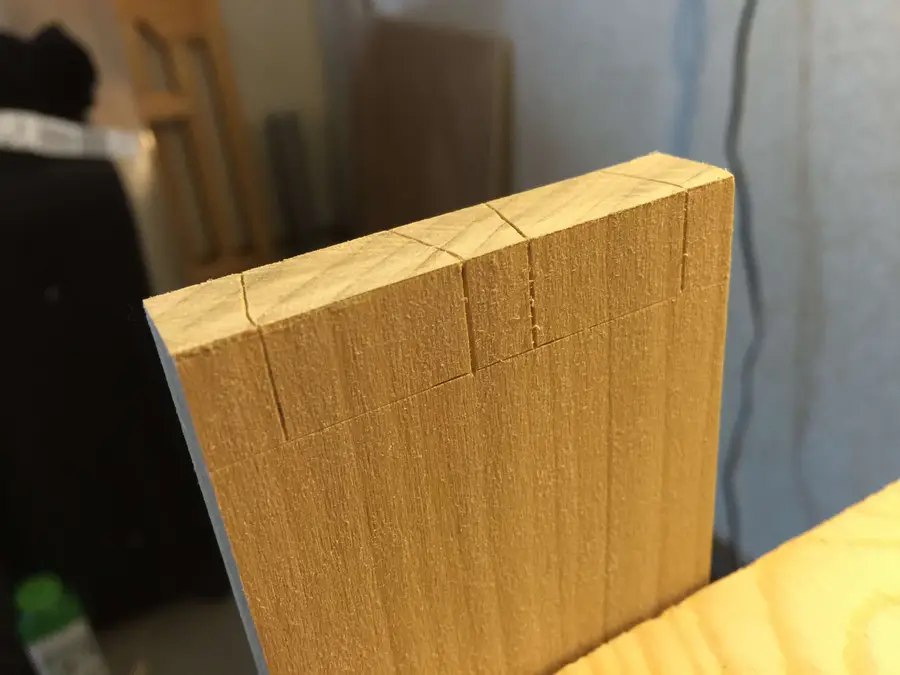
Using the marks along the top of the pin board as a guide, mark straight down on both sides. You’ll want to use a square to ensure the marks are straight.
15 – Cut down the top of the pin board
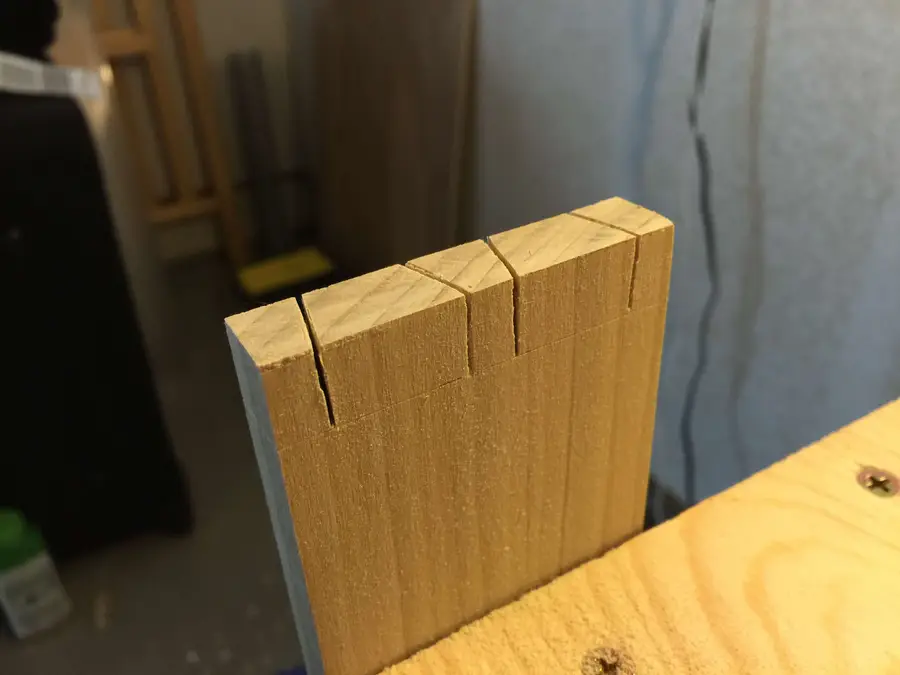
Just as you did with the tail board, clamp the pin board so that you can begin cutting. Use the dovetail saw to cut down the top of the board on all four marks.
16 – Use a chisel to remove the wood in between the pins
You may have noticed the one side of the pin board has wider pins. You’ll want to start chiseling on the side with wide pins. Because the area you’re chiseling is angled, you need to be careful not to chisel into the edge of the pin. Just as you did with the tail board, remove small pieces of wood until you reach the center of the board, then flip it.
17 – Clean up the pin board
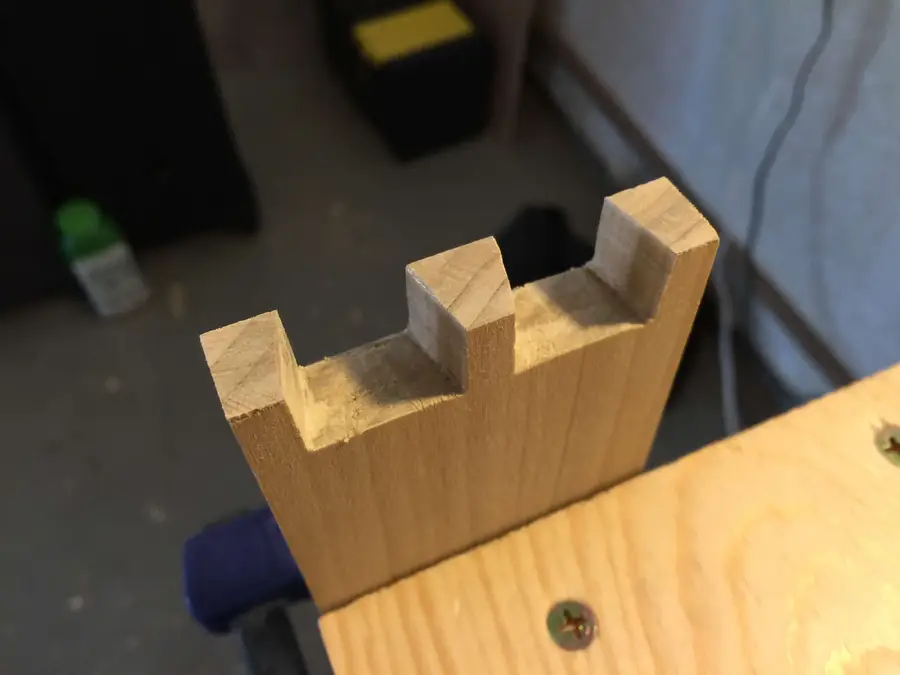
Once you’ve chiseled away in between the pins, you’re ready to clean up the wood. Again use a file or sandpaper to flat uneven edges or remove wood leftover from the saw.
18 – Place your pieces together and admire your work
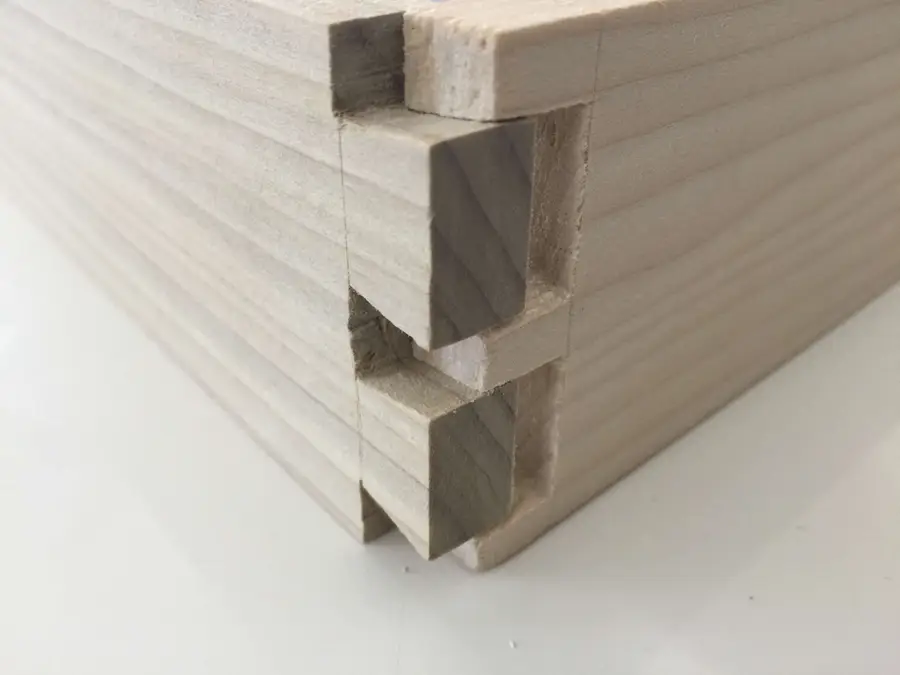
Don’t worry, dovetails require practice. I’m still improving on my technique every time I make one. If the wood doesn’t fit together well don’t force it, but you may need to tap lightly with the mallet in order to make them fit. You may also need to examine where the wood is too tight and fix this with a file or sandpaper.


