How to Control a DC Motor (Or Motors) Using Your Raspberry Pi

Share
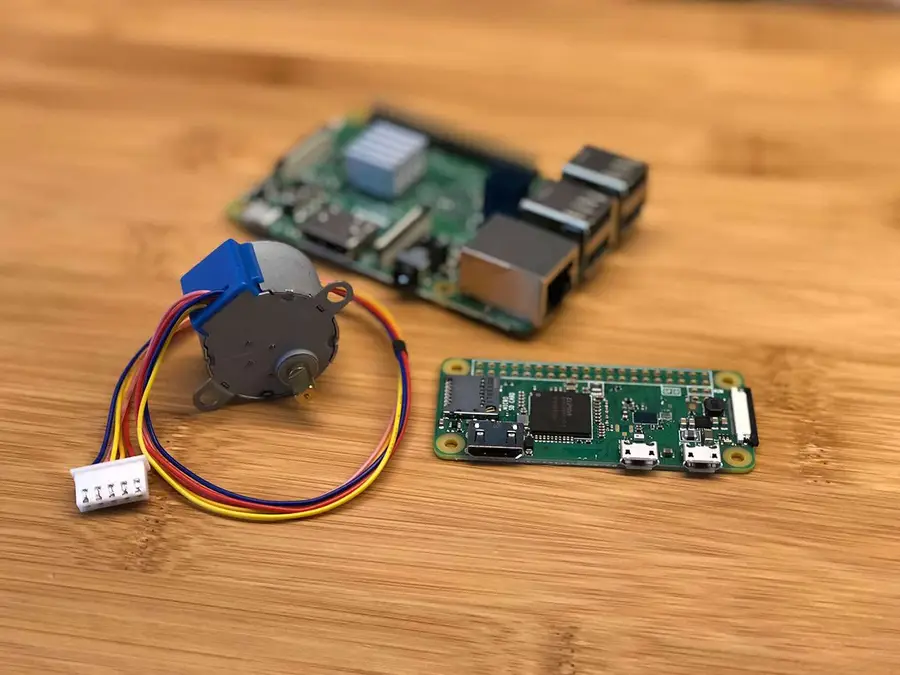
What you'll need
Interests


Controlling DC motors from your Raspberry Pi is quite easy! Whether you want to control a single motor or build a Raspberry Pi NERF tank, the principles are the same — but the hardware needed will vary. You can use any Raspberry Pi for this project (Zero, Zero W, 3, 4, etc.)
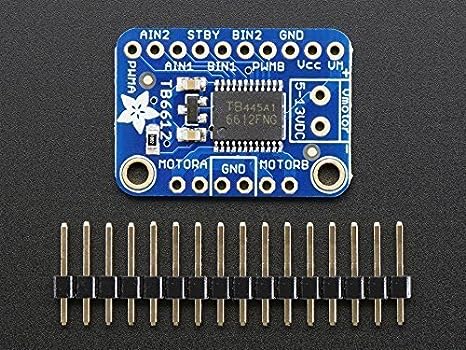
This guide will cover a basic example — using the TB6612 to drive a single DC motor for use in my Amazon Echo Furby project. This little chip is offered by Adafruit (and others), but I prefer the Adafruit version as it includes diodes to protect both the Pi and motors. Some chips require you solder your own diode circuit (such as the Sparkfun TB6612FNG), and I’d rather avoid this.

This little chip can drive either two DC motors or one stepper motor. Also, the chip is only $5. Not bad.
Hardware
There are a few components that make Raspberry Pi DC motor control work:
- Motor driver/controller (TB6612, in this example).
- Motor power supply (e.g. battery).
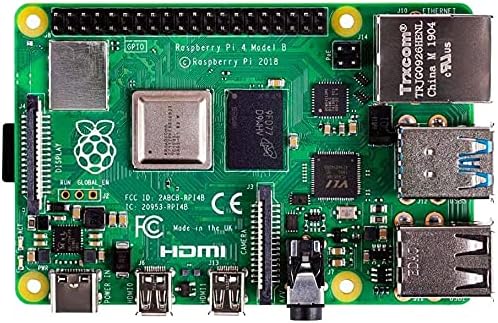
- Your Pi itself.
GPIO and PWM
Basically, your Pi’s GPIO (general purpose input/output) pins connect to the driver board, supplying both board power and data signals that will tell the motor when to run using PWM (pulse-width modulation). We’ll then write a simple Python script that will toggle the GPIO pins HIGH or LOW, thus activating the motor!
Power
A separate power source supplies power to the driver board which gets passed directly to the motors. Thus, there are two power sources in total:
- Power for the motors (provided by an external battery/power supply), and
- Power for the motor driver (provided by the Pi’s GPIO pins).
Anyways, this is a very simple project that’s a great foray into both Raspberry Pi GPIO and PWM. Let’s get started!
1 – Choosing a driver board and motor(s)
For my project, I only need to run one motor. However, if you wanted to build a Raspberry Pi robot or rover of some kind, you might need to drive many motors. In this case, you’ll want to use a driver board that supports more motors (and a larger power supply to drive them as well). For this guide, we’re going to work with the Adafruit TB6612 (same as TB6612FNG).
This board can drive two DC motors or a single stepper motor — with a maximum current of 1.2A. When choosing your motor, be sure you don’t exceed this maximum amperage.
2 – Building the circuit
I recommend using a breadboard to prototype and test your connections prior to soldering.
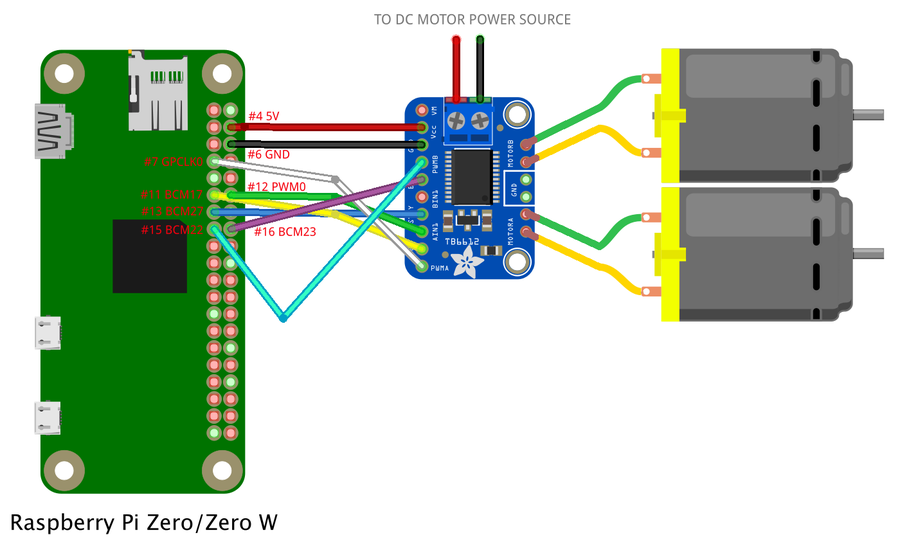
The attached wiring diagram shows the connections you need to make to build your TB6612 driver board circuit. I also created a Fritzing diagram if you’re into that sort of thing.
Remember (per the diagram), the power provided to the motor is different than the power provided to the motor driver’s logic circuit!
STBY = Pin 13 (GPIO #21)

Motor A:
PWMA = Pin 7 (GPIO #4)
AIN2 = Pin 11 (GPIO #17)
AIN1 = Pin 12 (GPIO #18)

Motor B:
BIN1 = Pin 15 (GPIO #22)
BIN2 = Pin 16 (GPIO #23)
PWMB = Pin 18 (GPIO #24)
If you’re only using one motor, simply don’t make the BIN1, BIN2, or PWMB connections.
3 – Writing the code
The following code can be used to drive your DC motors. This sample code will drive the motors clockwise for 5 seconds and then counterclockwise for 5 seconds.
Log into your Raspberry Pi and create a new file:

How to Connect to a Raspberry Pi Remotely via SSH
The preferred (and most common) method of connecting to your Pi to run commands.
sudo nano ~/motor/motor.pyPaste the following code, save, and exit:
Drive a single motor:
#!/usr/bin/env python

# Import required modules
import time
import RPi.GPIO as GPIO

# Declare the GPIO settings
GPIO.setmode(GPIO.BOARD)

# set up GPIO pins
GPIO.setup(7, GPIO.OUT) # Connected to PWMA
GPIO.setup(11, GPIO.OUT) # Connected to AIN2
GPIO.setup(12, GPIO.OUT) # Connected to AIN1
GPIO.setup(13, GPIO.OUT) # Connected to STBY

# Drive the motor clockwise
GPIO.output(12, GPIO.HIGH) # Set AIN1
GPIO.output(11, GPIO.LOW) # Set AIN2

# Set the motor speed
GPIO.output(7, GPIO.HIGH) # Set PWMA

# Disable STBY (standby)
GPIO.output(13, GPIO.HIGH)

# Wait 5 seconds
time.sleep(5)

# Drive the motor counterclockwise
GPIO.output(12, GPIO.LOW) # Set AIN1
GPIO.output(11, GPIO.HIGH) # Set AIN2

# Set the motor speed
GPIO.output(7, GPIO.HIGH) # Set PWMA

# Disable STBY (standby)
GPIO.output(13, GPIO.HIGH)

# Wait 5 seconds
time.sleep(5)

# Reset all the GPIO pins by setting them to LOW
GPIO.output(12, GPIO.LOW) # Set AIN1
GPIO.output(11, GPIO.LOW) # Set AIN2
GPIO.output(7, GPIO.LOW) # Set PWMA
GPIO.output(13, GPIO.LOW) # Set STBY
Drive two motors:
#!/usr/bin/env python

# Import required modules
import time
import RPi.GPIO as GPIO

# Declare the GPIO settings
GPIO.setmode(GPIO.BOARD)

# set up GPIO pins
GPIO.setup(7, GPIO.OUT) # Connected to PWMA
GPIO.setup(11, GPIO.OUT) # Connected to AIN2
GPIO.setup(12, GPIO.OUT) # Connected to AIN1
GPIO.setup(13, GPIO.OUT) # Connected to STBY
GPIO.setup(15, GPIO.OUT) # Connected to BIN1
GPIO.setup(16, GPIO.OUT) # Connected to BIN2
GPIO.setup(18, GPIO.OUT) # Connected to PWMB

# Drive the motor clockwise
# Motor A:
GPIO.output(12, GPIO.HIGH) # Set AIN1
GPIO.output(11, GPIO.LOW) # Set AIN2
# Motor B:
GPIO.output(15, GPIO.HIGH) # Set BIN1
GPIO.output(16, GPIO.LOW) # Set BIN2

# Set the motor speed
# Motor A:
GPIO.output(7, GPIO.HIGH) # Set PWMA
# Motor B:
GPIO.output(18, GPIO.HIGH) # Set PWMB

# Disable STBY (standby)
GPIO.output(13, GPIO.HIGH)

# Wait 5 seconds
time.sleep(5)

# Drive the motor counterclockwise
# Motor A:
GPIO.output(12, GPIO.LOW) # Set AIN1
GPIO.output(11, GPIO.HIGH) # Set AIN2
# Motor B:
GPIO.output(15, GPIO.LOW) # Set BIN1
GPIO.output(16, GPIO.HIGH) # Set BIN2

# Set the motor speed
# Motor A:
GPIO.output(7, GPIO.HIGH) # Set PWMA
# Motor B:
GPIO.output(18, GPIO.HIGH) # Set PWMB

# Disable STBY (standby)
GPIO.output(13, GPIO.HIGH)

# Wait 5 seconds
time.sleep(5)

# Reset all the GPIO pins by setting them to LOW
GPIO.output(12, GPIO.LOW) # Set AIN1
GPIO.output(11, GPIO.LOW) # Set AIN2
GPIO.output(7, GPIO.LOW) # Set PWMA
GPIO.output(13, GPIO.LOW) # Set STBY
GPIO.output(15, GPIO.LOW) # Set BIN1
GPIO.output(16, GPIO.LOW) # Set BIN2
GPIO.output(18, GPIO.LOW) # Set PWMB
Special thanks to Alex Wilkinson for providing the basis for this sample code!
Obscure note: Certain Pi HATs might make use of some of the pins above—so if you have some sort of HAT/board connected to your Pi’s GPIO header, you may need to adjust the pins selected above to output things properly.
For example, I’m using a Pimoroni Speaker pHAT on my motorized Pi; I checked the Speaker pHAT pinout and discovered that GPIO pin 12 is in use by the HAT, so I’m using an alternate pin (16) instead.
4 – Execute the code
To drive your motor(s), run the Python script:
sudo python ~/motor/motor.py


