HeaterMeter: Control your Grill Using a Raspberry Pi!


Share
What you'll need
Interests


With summer right around the corner, it’s time to fire up the grill! But who will watch the grill while you’re beating the heat?
This year, kick things up a notch with your own Raspberry Pi-powered HeaterMeter. Don’t just throw a BBQ, be a part of it. HeaterMeter lets you keep a close eye on your grill and food temperature no matter where you are. Just pull out your phone, check the status of your grill, and make temperature adjustments in real-time.
What’s a HeaterMeter?
HeaterMeter is an open-source BBQ platform. This project uses heat probes to monitor the temperature of your grill and even posts the current status information in a web-based interface.
How does it work?
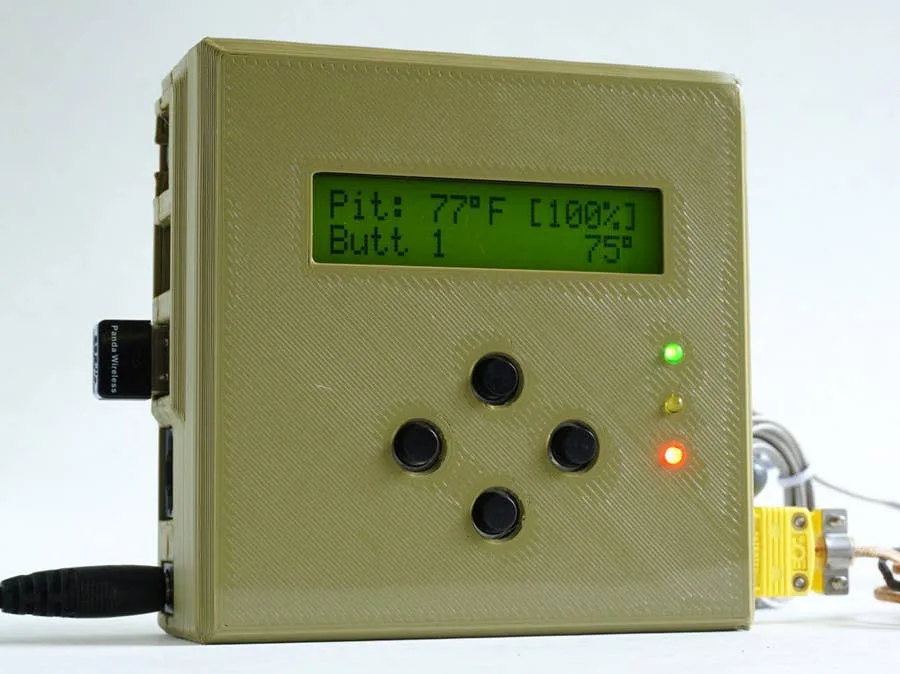
Heat sensors relay information to the HeaterMeter box. This is a 3D-printed box with buttons and an LCD screen. You can use it to check the current temperature status and make manual adjustments to things like fan speed to keep the grill temperature where you want it. You can add additional probes to monitor the meat you’re cooking. More components can be added like a servo-controlled damper.
The Raspberry Pi makes it possible to monitor your food from a distance. You can also trigger custom notifications, texts, or emails when certain temperatures are reached.
1 – The final product: HeaterMeter
This project was created by Bryan Mayland. He’s worked on this project for years, perfecting this heat-sensing project.
Now you can get in on the action. Bryan sells HeaterMeter kits on his website to help others who are interested in the same project. He’s saved us all a great deal of time by consolidating these resources together. More time for grilling, right?
2 – Gather tools
First things first, you’re going to need a couple of tools. Even if you start off with the official Heater Meter kit, you’ll probably need a few extra items.
The kit doesn’t include:
- Raspberry Pi
- Wifi adapter (if you’re not using a Pi 3B or Pi Zero W)
- SD card
- 12V Power supply
- Pit probes
- 3D printed case
3 – Build the pit probe(s)
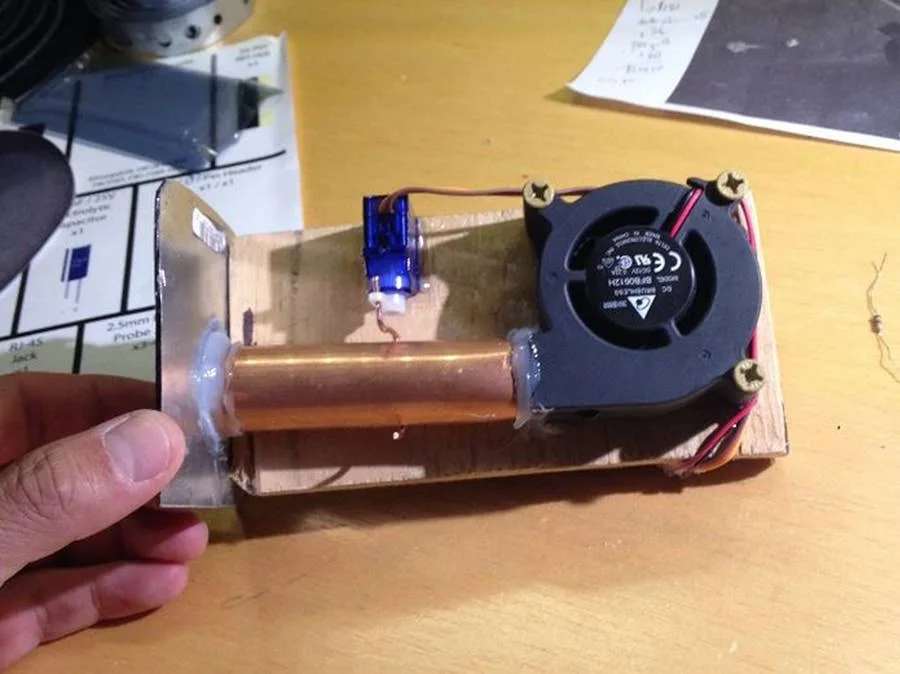
This is where things get hot! Unfortunately, the puns also get worse.
The pit probes need to be built to spec. If you’re not sure where to get started, check out this amazing pit probe tutorial by Dave Selinger. He does a great job walking you through the construction process from start to finish. The pit probes are crucial to the project. Definitely don’t skip over any details.
4 – Install HeaterMeter on your Pi
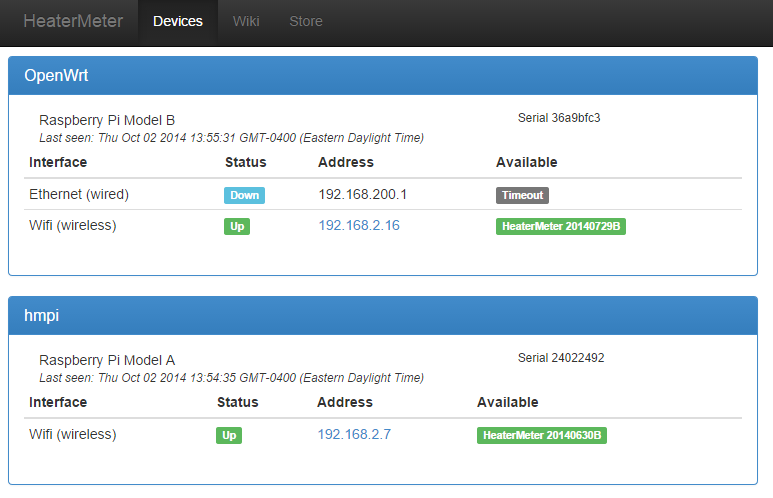
HeaterMeter will run on any Raspberry Pi. But not every Pi is the same, some have serious benefits that make all the difference in a project like this. If you can, aim for a newer model—these often perform better and some come with built-in wifi adapters which are really useful for this project.
To install the HeaterMeter software, visit the HeaterMeter downloads page and find the appropriate image for your Pi. The image needs to be flashed to the SD card with an imaging program like Etcher.
5 – Assemble everything together
Once you have your components created, it’s time to gather them together! Your pit probes should be installed and connected to the HeaterMeter. There are thorough instructions available on the HeaterMeter wiki. I highly recommend this resource, especially if you’re using extra components like multiple pit probes or a damper.
6 – Time to get grilling!

Congratulations! Once everything is assembled, it’s time to fire up the grill.
Don’t worry about what’s going on across the yard, now you can check it out for yourself. This is your time to grill with mobility. Want to check on those steaks you put on a moment ago? Just take out your phone and load up HeaterMeter in the browser. Does it feel like the future yet? I think so.