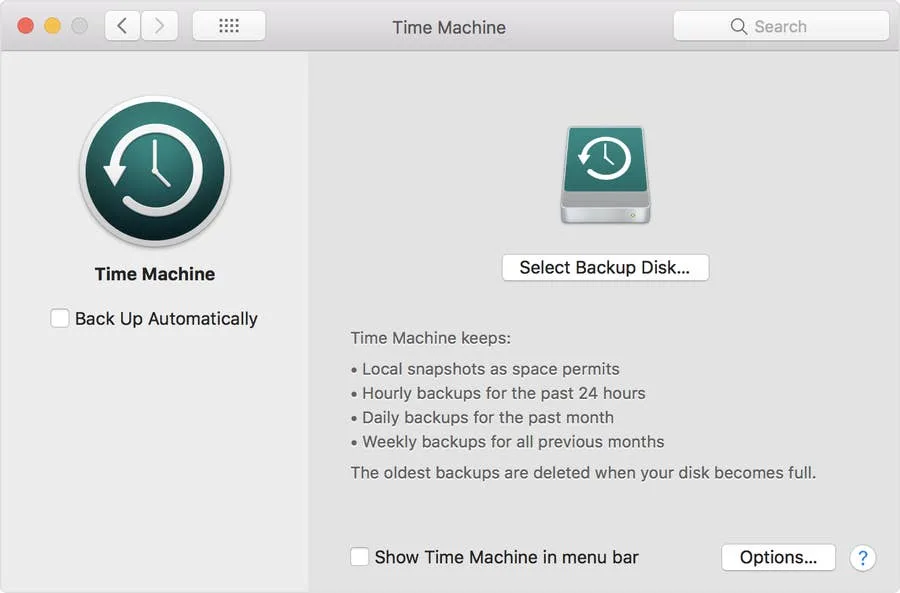
How To Connect Your AirPods With a Keyboard Shortcut in MacOS

Share
What you'll need
Interests
| Note: This guide does not work on MacOS 11 Big Sur. Look out for an updated guide coming soon. |
According to xkcd, if you can shave 5 seconds off of this task each time you perform it, it is worth spending about 12 hours to automate the task (over the course of 5 years):

We’re big fans of automation and time-saving at howchoo! We’ve made shortcut guides in the past, such as showing you how to auto-hide your dock in MacOS and setting up a Mac mail search box shortcut.
And here’s another great one! If you follow this guide closely, it only takes 10 minutes to automate connecting your Airpods with a keyboard shortcut in macOS!
1 – Copy the following script
activate application "SystemUIServer"
tell application "System Events"
  tell process "SystemUIServer"
    -- Working CONNECT Script.  Goes through the following:
    -- Clicks on Bluetooth Menu (OSX Top Menu Bar)
    --    => Clicks on SX-991 Item
    --      => Clicks on Connect Item
    set btMenu to (menu bar item 1 of menu bar 1 whose description contains "bluetooth")
    tell btMenu
      click
      tell (menu item "{{ The name of your airpods here }}" of menu 1)
        click
        if exists menu item "Connect" of menu 1 then
          click menu item "Connect" of menu 1
          return "Connecting..."
        else
          click btMenu -- Close main BT drop down if Connect wasn't present
          return "Connect menu was not found, are you already connected?"
        end if
      end tell
    end tell
  end tell
end tell
Thanks @erebusbat for this applescript!
2 – Open Script Editor

Open Script Editor.
It lives in /Application/Utilities/, but just use spotlight (cmd + space).
Click New Document to get a blank editor.
3 – Paste the code
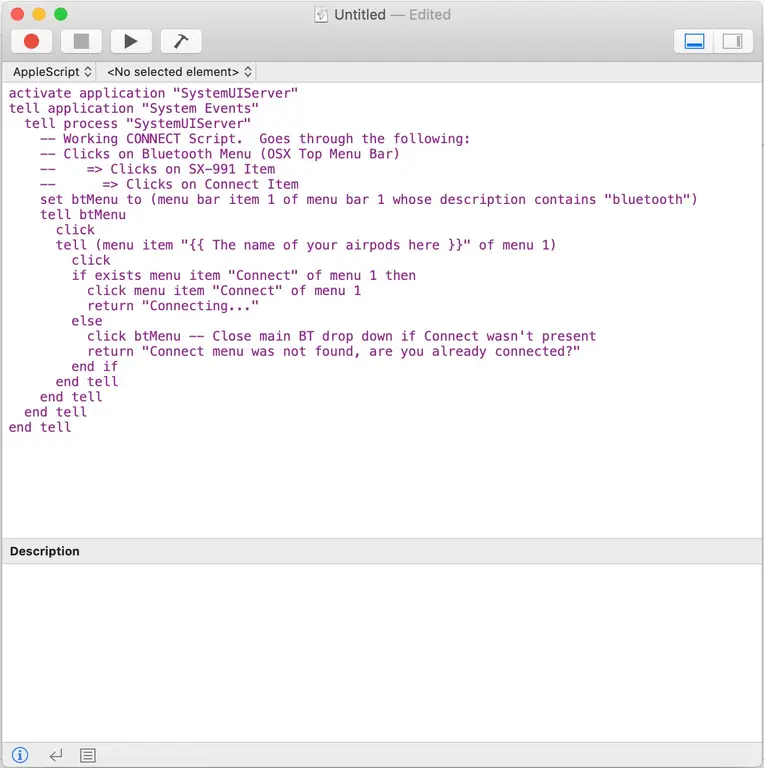
Paste the code into the editor.
4 – Carefully add the name of your airpods to the code
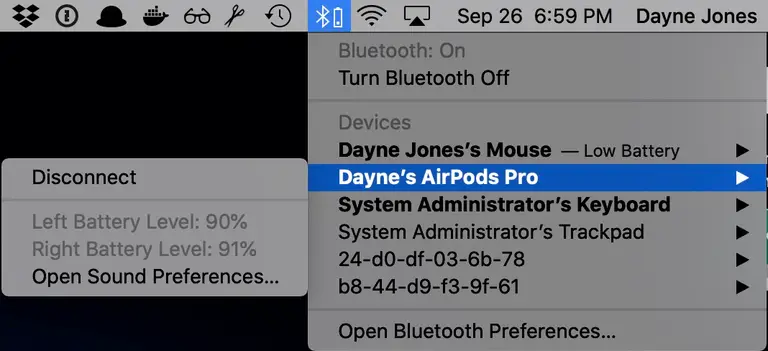
Find the name of your AirPods from your Bluetooth settings. Whatever shows up in the menu is the official name of your AirPods. This name is case sensitive and only allows curly quotes. A curly quote is ’, not '. A curly quote can be entered using shift + option + ]
Find the section that says {{ The name of your AirPods here }} and replace it with the name of your AirPods.
For me, “Dayne’s AirPods Pro” becomes “Dayne’s AirPods Pro”.
See the completed code below:
activate application "SystemUIServer"
tell application "System Events"
  tell process "SystemUIServer"
    -- Working CONNECT Script.  Goes through the following:
    -- Clicks on Bluetooth Menu (OSX Top Menu Bar)
    --    => Clicks on SX-991 Item
    --      => Clicks on Connect Item
    set btMenu to (menu bar item 1 of menu bar 1 whose description contains "bluetooth")
    tell btMenu
      click
      tell (menu item "Dayne’s AirPods Pro" of menu 1)
        click
        if exists menu item "Connect" of menu 1 then
          click menu item "Connect" of menu 1
          return "Connecting..."
        else
          click btMenu -- Close main BT drop down if Connect wasn't present
          return "Connect menu was not found, are you already connected?"
        end if
      end tell
    end tell
  end tell
end tell
5 – Save As an Application
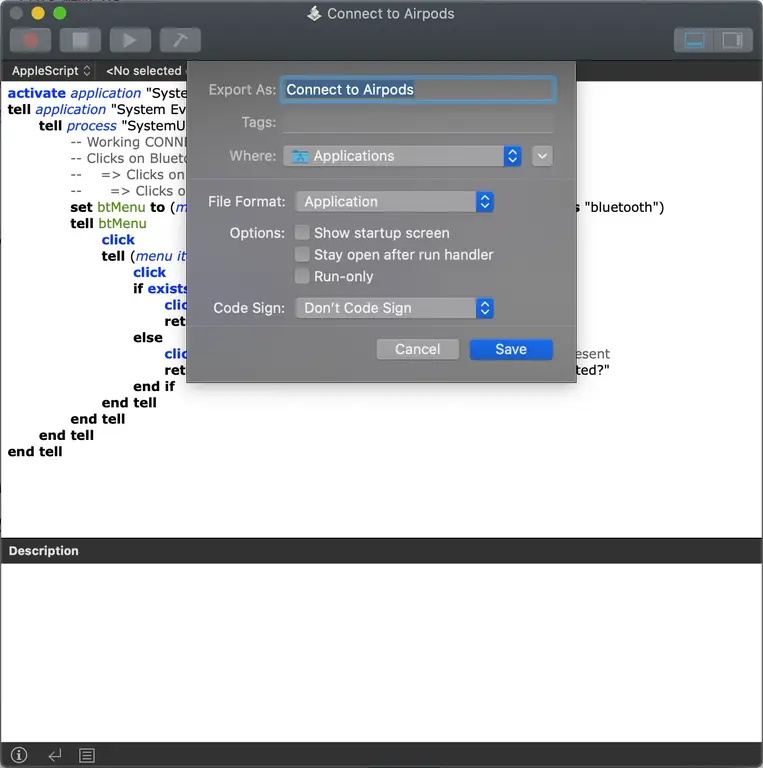
- Hit cmd + S to save.
- Select “Application.”
- Give your application a catchy, memorable name.
6 – Give security privileges to your script
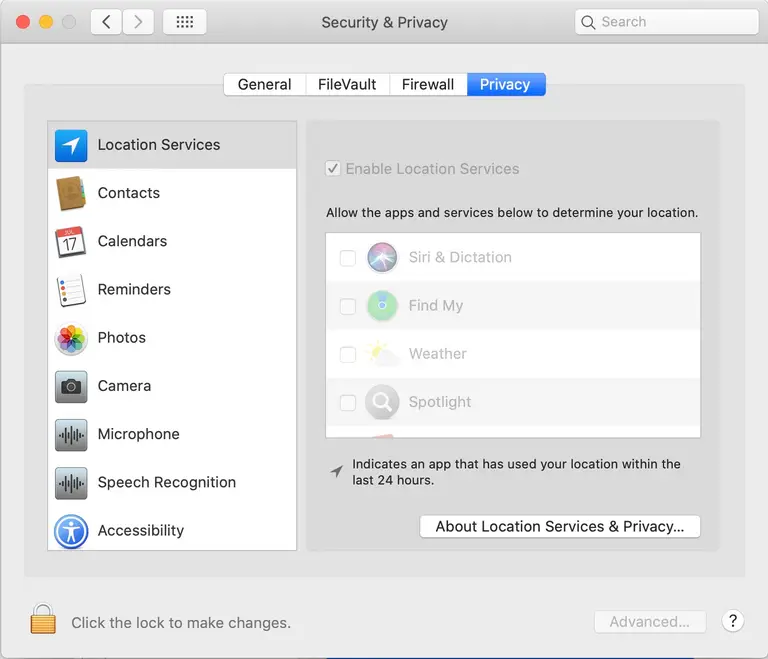
Go to System Preferences > Security & Privacy
If the settings are locked, click the lock at the bottom left and enter your password to unlock it.
7 – Add your new application to “Accessibility”
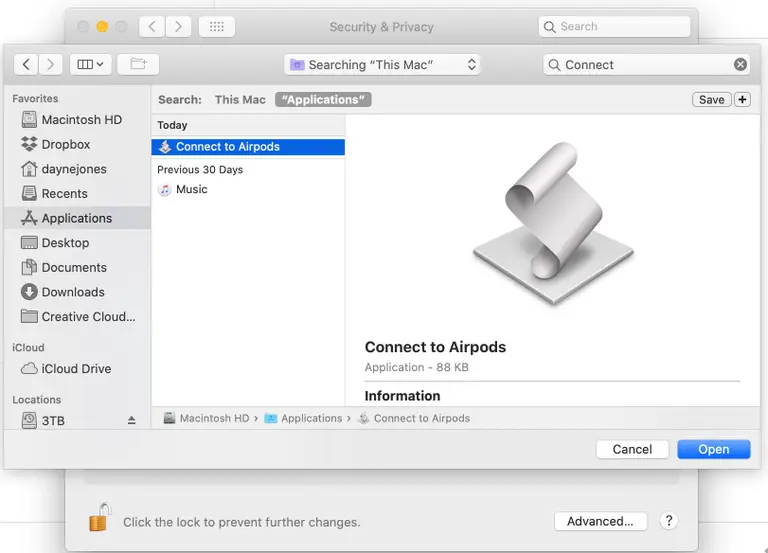
- Select Accessibility on the left side.
- Click the + sign.
- Find the new Application you just created and select it.
8 – Open Automator
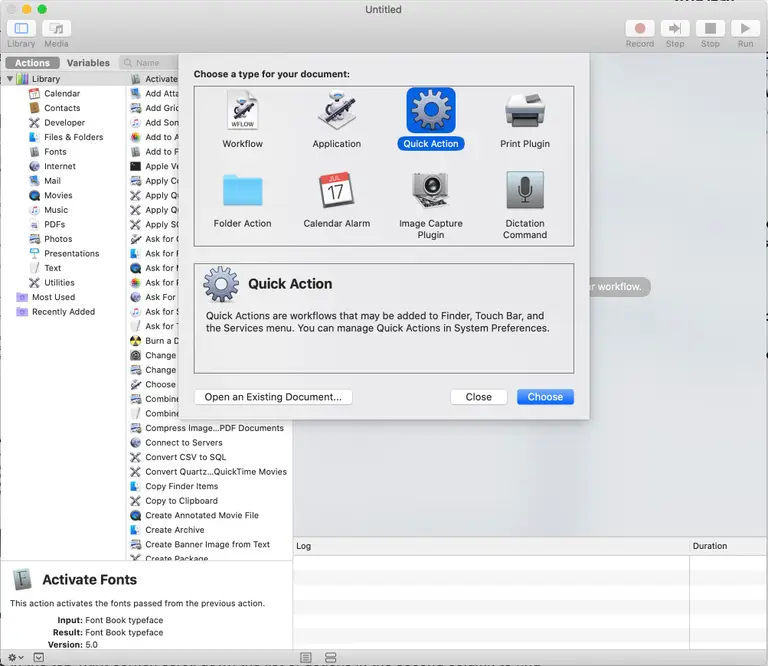
- Open the Automator Application which can be found at
/Applications/Automator, but again, just use spotlight (cmd + space). - Click New Document.
- Select the cog that says “Quick Action” (it may be called “Service” on older MacOS versions).
9 – Select “no input”

In your new Automator action, under “Workflow receives”, select no input. Make sure it reads “Workflow receives no input in any application.”
10 – Select “Launch Application”
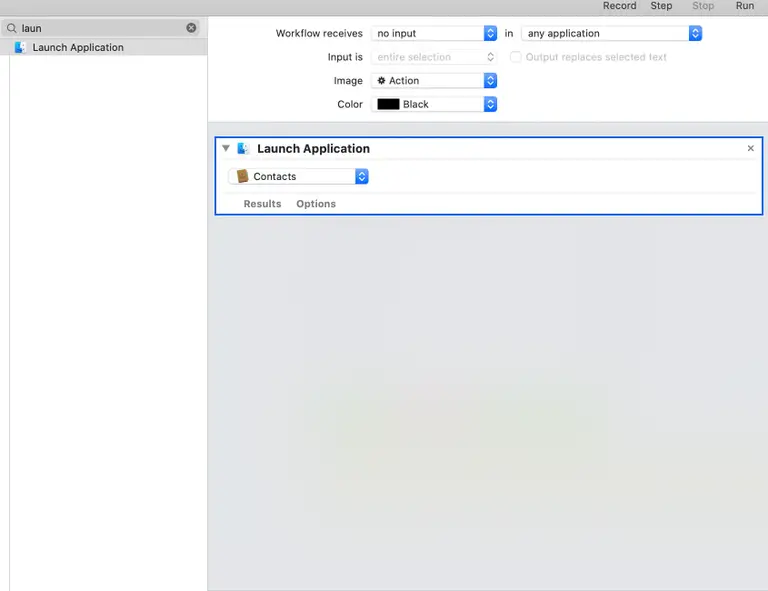
In your new Automator action, under “Workflow receives”, select no input. Make sure it reads “Workflow receives no input in any application.”
11 – Select “Launch Application”
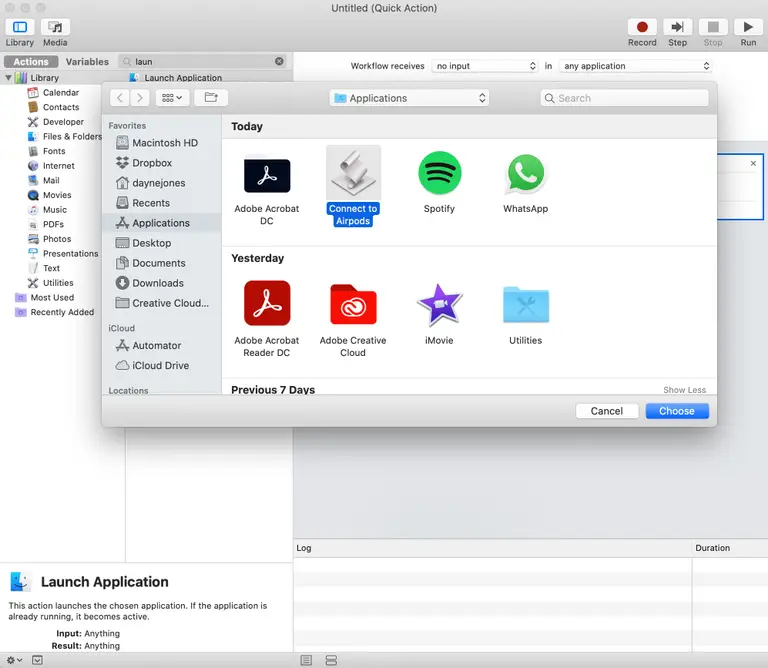
- Click the dropdown, select Other,
- Find and select your new application.
12 – Save your application
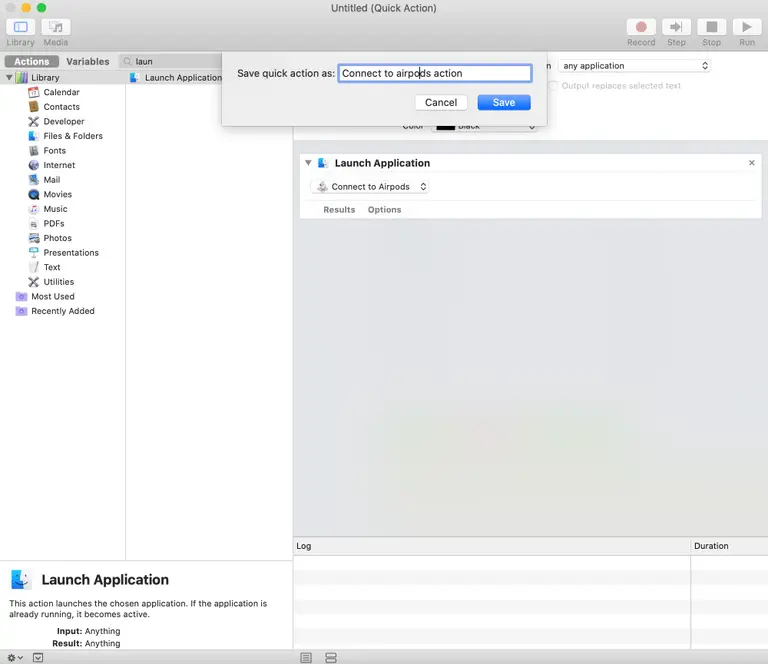
Hit cmd + save and give your action a catchy name.
13 – Go to keyboard shortcuts settings
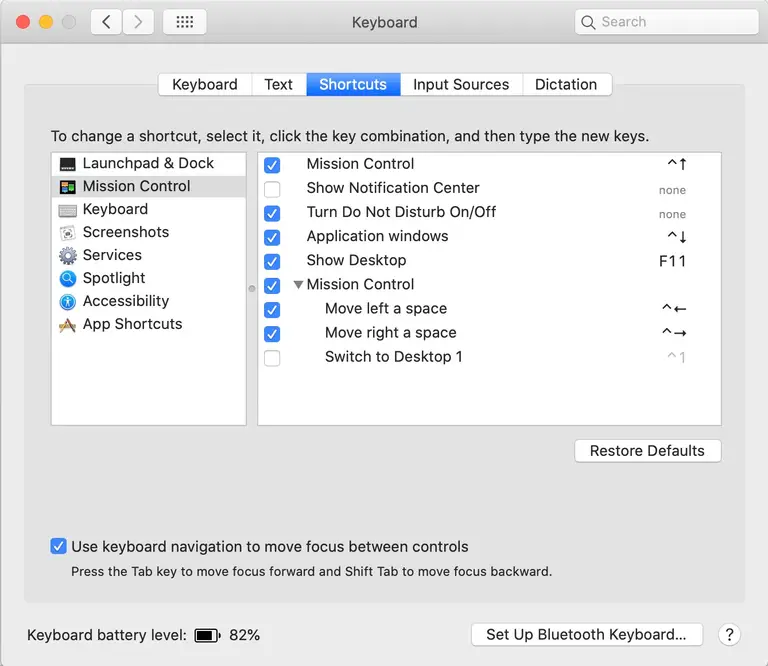
Go to System Preferences > Keyboard > Shortcuts
14 – Find your new action
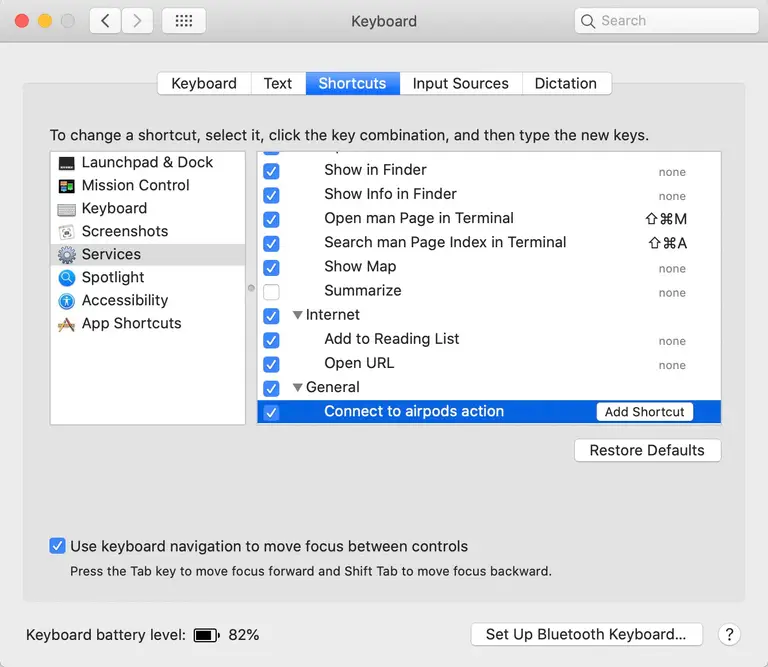
- Click Services on the left side and look for your new action under the “General” section. Mine was at the very bottom.
- Make sure the checkbox is enabled here.
- Click Add Shortcut next to it.
15 – Press a keyboard shortcut
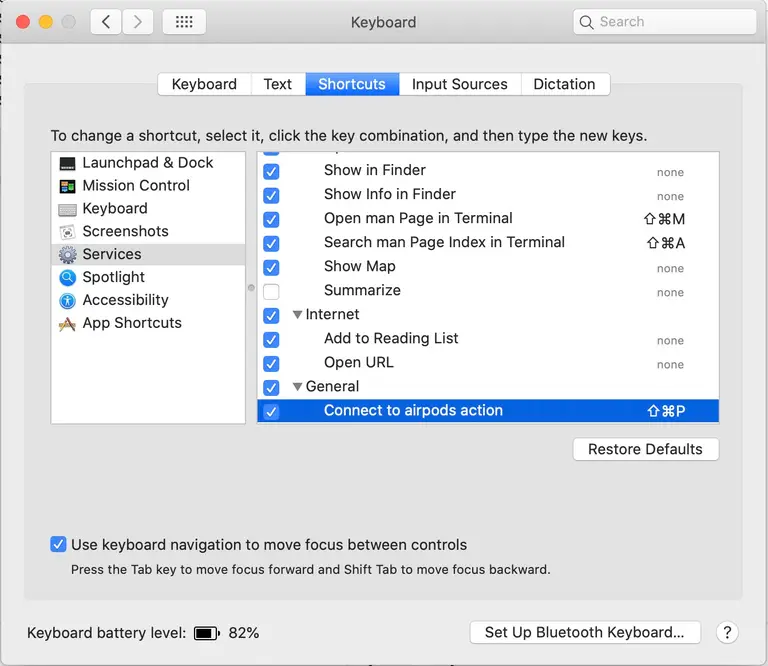
Think of a memorable keyboard shortcut and enter it. It will appear next to the action.
16 – Test it
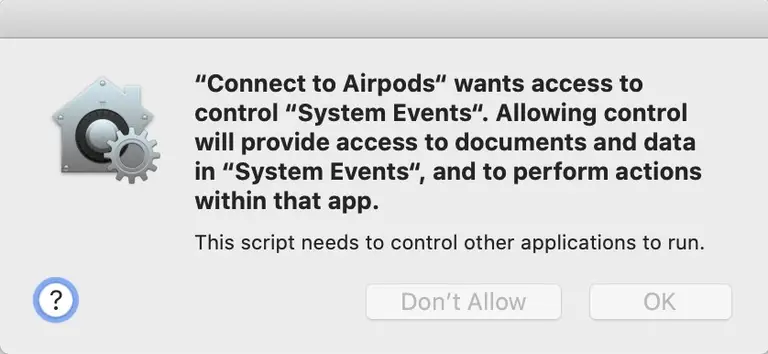
Hit your keyboard shortcut and, voila, things should happen! You may get a security alert the first time you run it, but other than that, you’re all set!


