How to Install Raspberry Pi OS on Your Raspberry Pi

Share
Interests
Posted in these interests:

The Raspberry Pi Foundation recently announced the release of Raspberry Pi OS—a new update and name change for the classic Raspberry Pi operating system Raspbian. Raspberry Pi OS is available for installation immediately and comes with everything you need to support the new Raspberry Pi 4 8 GB module. If you want to install the new OS, there are a couple of ways you can do it.
Be sure to back up your current Raspberry Pi image before you upgrade to the new OS—just in case something goes wrong. You can visit our guides on how to back up your Pi image on Windows or Mac for help with this process.
1 – Install using Raspberry Pi Imager

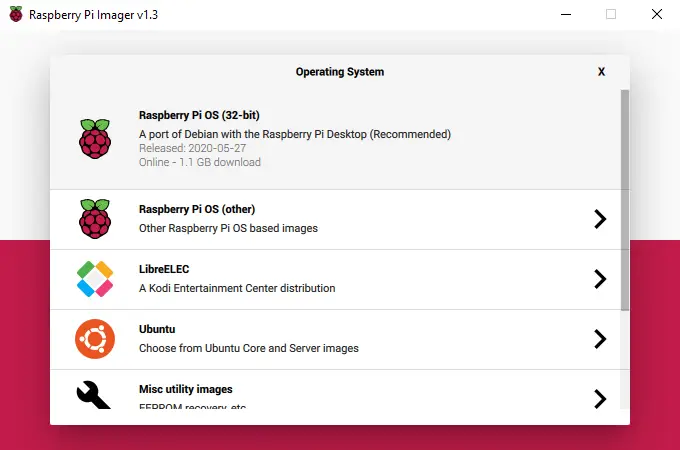
You can easily install Raspberry Pi OS using the Raspberry Pi Imager. This is an official imaging application that makes the microSD card flashing process much easier and more welcoming to new users. You can find a thorough overview of how to use the Raspberry Pi Imager here.

How to Use Raspberry Pi Imager
New official Raspberry Pi imaging software.
- Download the Raspberry Pi Imager installer for your Operating System from the Raspberry Pi downloads page.
- Run the installer and complete the setup by following the prompts.
- Launch Raspberry Pi Imager and click Choose OS.
- Select Raspberry Pi OS from the list.
- Click Choose SD card and choose the microSD card you want to flash the new OS to and click Write.
When the imager is finished, you can connect your microSD card to the Pi and boot it up.
2 – Using third-party imaging software

You can also use third-party imaging software to write the Raspberry Pi OS image to a microSD card. Turn off the Raspberry Pi, remove the SD card, and connect it to your computer.
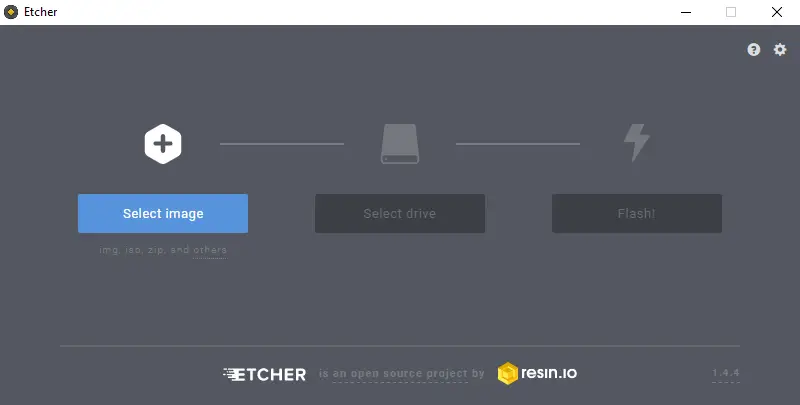
There are several options when it comes to imaging software, a popular application known to work well with Raspberry Pi images is Etcher. This program can be used to flash any compatible image to the microSD card for your Pi.
- Download and install the imaging application of your choice.
- Download the Raspberry Pi OS image from the Raspberry Pi downloads page.
- Point the imager to the Raspberry Pi OS image file and set the microSD card to the one you want to use for your Pi.
- When the image has been flashed, you can test it by connecting it to the Pi and trying to boot.
3 – Troubleshooting
There are a few issues you’re likely to run into while trying to set up the new Raspberry Pi OS.
OS Not Loading
If the Raspberry Pi OS image isn’t booting, format the SD card and try to image it again. If it still won’t boot properly, make sure the SD card is large enough. You may want to revert to Raspbian Buster to determine if the issue is with the OS or the Pi hardware.
Incompatible Software
You may find that some software is completely incompatible with the new OS. You can wait for the developers to update the program to work with the new changes or revert to an older edition like Raspbian Buster.
Imaging Issues
If you receive an error when trying to image the microSD card, research the error verbatim online to determine exactly what the problem is. If you can’t find anything specific to your issue, make sure the microSD card is big enough to support Raspberry Pi OS. You may need to try formatting the card before trying to reimage it.


