How to Build Your Own Raspberry Pi VPN


Share
What you'll need
Interests

Posted in these interests:

If you’re looking to add a little extra security to your network or stream overseas content with a VPN, you will need to install a VPN (Virtual Private Network). This adds an extra layer between you and those you connect to online. VPNs provide a login interface through which only pre-approved machines can connect. In this guide, we’ll cover how to set up our own VPN interface on a Raspberry Pi.
The software we’re using is called PiVPN. It’s based on OpenVPN and works with many OpenVPN clients. You can also use a major VPN provider like NordVPN, which is compatible with all versions of Linux to set up your VPN.
NordVPN Review: Unreal Speed and Security
NordVPN is a great choice for remote work and connecting through international servers.
Note: I’m using a Raspberry Pi 3 B+, but you can experiment with other Raspberry Pis as well.
1 – Install and update Raspberry Pi OS
We’ll use Raspberry Pi OS as a starting point for our project. Download the latest version from Raspberry Pi Foundation. You can also check out our guide for help updating Raspberry Pi OS on the Raspberry Pi.

How to Install Raspberry Pi OS on Your Raspberry Pi
Get the new official Raspberry Pi OS on your Pi.
2 – Install PiVPN via terminal
We need access to the Pi via terminal. You may need to enable SSH on the Pi before you can access the terminal remotely. Visit our guide for steps on how to enable SSH on Raspberry Pi OS. You can log into the terminal using a command-line interface. For more details, check out our SSH Raspberry Pi login guide.

How to Connect to a Raspberry Pi Remotely via SSH
The preferred (and most common) method of connecting to your Pi to run commands.

How to Enable SSH on Raspberry Pi OS Without a Screen
The SSH protocol is disabled by default.
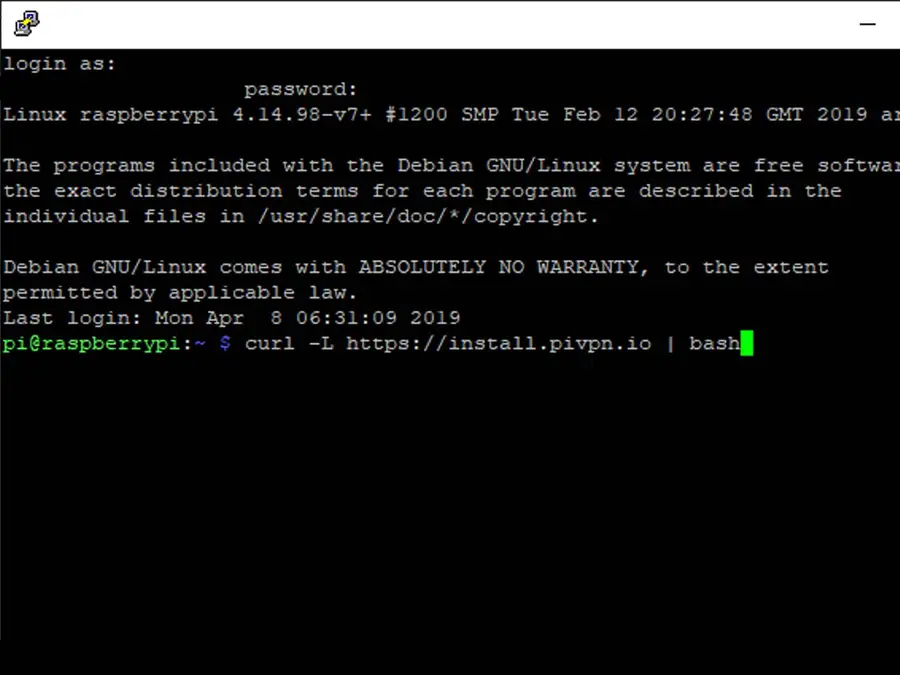
Once you’re in the terminal window, run the following:
curl -L https://install.pivpn.io | bash
The package will begin installation automatically. When prompted with “This installer will transform your Raspberry Pi into an Open VPN server!” Choose OK.
3 – Follow the install wizard
The installation wizard will walk you through the setup process. Here’s a quick overview of each step.
Define a static IP address
You will be prompted to edit your network settings. Our Raspberry Pi VPN needs a static IP address. You can leave the default value or choose one of your own if your ISP supports static IPs.
Choose a user to manage VPN settings
You will see a dialogue that states “Choose a local user that will hold your ovpn configurations.” Select OK and choose an account to use. I’m leaving mine set to the default account, but you can use any account you want here.
Set up “Unattended Upgrades”
The next prompt will ask about “Unattended Upgrades”. This automatically downloads updates, but it won’t reboot your Pi. You’ll have to reboot the Pi manually from time to time. If you want to use these enable them now.
Choose TCP or UDP
You will be asked to choose between TCP or UDP. If you’re not sure what to put here, UDP is a safe bet.
Set a port number
On the next screen, you can set a custom port number or leave the default value of 1194. You will be prompted to confirm the port settings.
OpenVPN settings
If you have clients running OpenVPN 2.4 or later, you can integrate features for it by choosing Yes. Otherwise, choose No.
Choose encryption settings
Choosing what level of encryption to use it up to you. 1024 bit is on the lower end and hardly recommended. 4096 bit offers the greatest security but also causes the most latency. 2048 bit seems to be in the sweet spot for what we want to accomplish.
Server key is generated
Up next, PiVPN will create a server key. This may take a little while, just leave the Pi running while it generates the key. The creator stated this process took up to 45 minutes on his Pi 3B+, however, I experienced a much shorter wait time on mine.
DNS settings
When prompted for DNS settings, you can opt to use a DNS. However, I’ll be using my public IP.
Select the DNS provider
Choose one of the DNS providers from the list or select “custom” to use your own.
4 – Open the PiVPN port on the router

The default port value used by PiVPN is 1194. If you changed this port number, now is the time to open it on your router. You will need to log into your router in order to set up port forwarding. Visit our guide for help logging in and resetting your router password.

How to Change or Reset Your Router Username and Password
There’s got to be some way in!
5 – Create ovpn profiles (add clients to VPN)
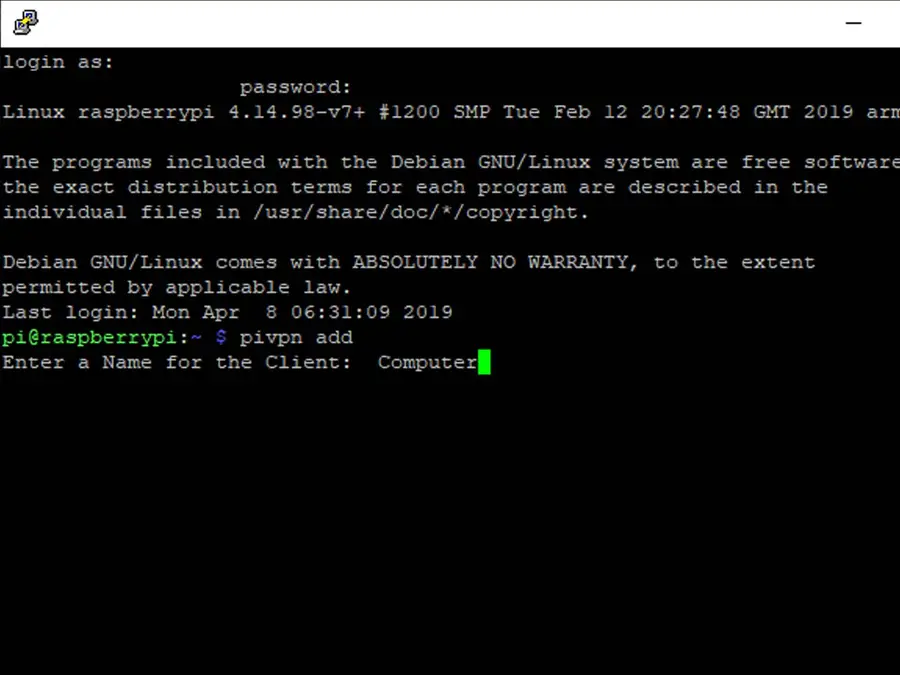
We want to create a whitelist of clients that can use our new PiVPN. To do this, we will create a file known as an ovpn profile. Open a terminal window for the Pi and run the following:
pivpn addChoose a name for the client you want to add and create a password. We can use this ovpn profile file to create a connection.
6 – Transfer ovpn file to the client
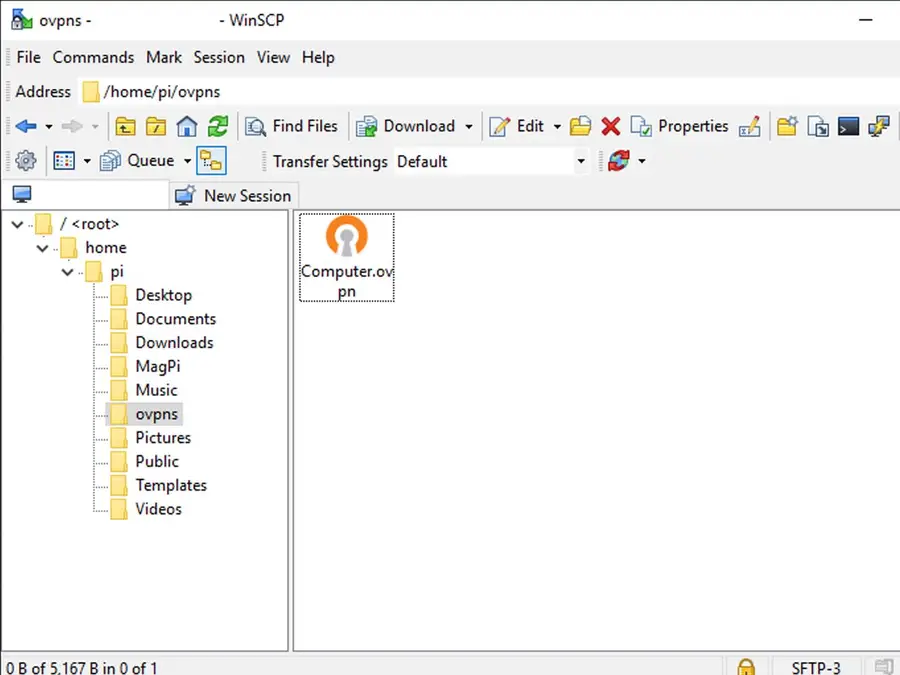
Move the ovpn file we just created to the client (computer, mobile device, tablet, etc) you want to connect. I’ll be transferring the file using WinSCP, but you can use your favorite FTP software.
7 – Connect to OpenVPN
| Operating System | Client URL |
|---|---|
| Windows | OpenVPN Client |
| Mac | OpenVPN Client |
| Android | OpenVPN Client |
| IOS | OpenVPN Client |
| Linux | OpenVPN Client |
To connect the two devices, we need to put software on the client that can read the profile we created. I’ll be installing the Windows 10 OpenVPN desktop client. You can find other versions, check the table to find the client you need.
Once you’ve uploaded the profile into the client, you should be given prompts to connect to your PiVPN setup.
8 – PiVPN help and resources
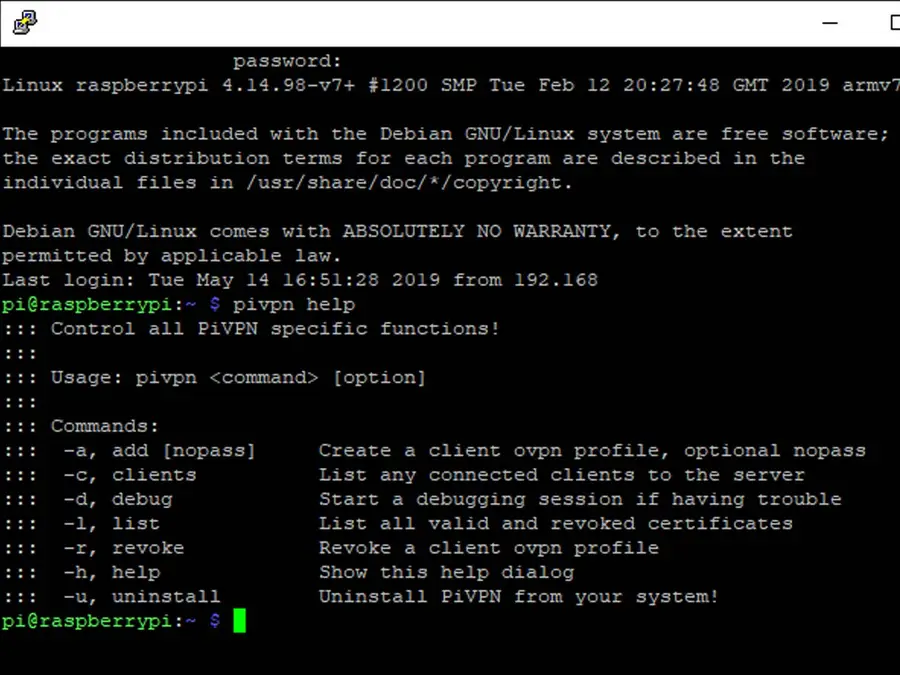
You can find additional help and resources on the official PiVPN website or by entering the following into a terminal:
pivpn helpThis provides a complete list of commands that can be used to configure and optimize PiVPN.
9 – Completing your PiVPN setup
Congratulations! You’re now the owner of a personal VPN. We trust you’ll use your SysAdmin powers wisely. Remember to periodically check to make sure your VPN is actively securing your internet usage.
If you’re looking for more ways to fine-tune your network, why not set up a Raspberry Pi adblocker? Check out our Pi-Hole setup guide to get started. Alternatively, you can use NordVPN on Raspberry Pi to get both their VPN service and built-in adblocker.
Pi-hole: How to Set Up and Configure Pi-hole on Raspberry Pi
Blocking ads just got easier with Pi-hole, a network-wide ad blocker for the Raspberry Pi