How to Run a Bitcoin Full Node on a Raspberry Pi

Share
What you'll need
Interests
Posted in these interests:

This guide teaches you how to run a Bitcoin full node, which is not the same as mining. You won’t earn bitcoins by running a full node. You run a full node because you love Bitcoin and want to support the network.
What is a full node?
The beauty of a fully decentralized currency, like Bitcoin, is that it doesn’t require a financial institution to govern the network. Rather, government happens by consensus. This means that transactions and the full historical ledger of transactions (blockchain) are determined and verified by computers (nodes) attached to the Bitcoin network.
Some nodes, called miners, record new transactions by publishing them in “blocks”. Other nodes, simply called full nodes, verify the transactions and ensure that miners are following the consensus rules. If a miner tries to publish a block that doesn’t follow the rules, it will simply be ignored.
When a miner (or mining pool) is the first to publish a new block, it receives a mining reward. And while mining can be lucrative, it also requires an upfront investment and uses a considerable amount of energy.
In order for the Bitcoin network to operate securely, it requires many additional full nodes to ensure the miners are following the consensus rules and help relay transactions to other nodes in the network.
And since there is no direct financial incentive to run a full node (unlike mining), it requires good Bitcoin citizens to step up and help out.
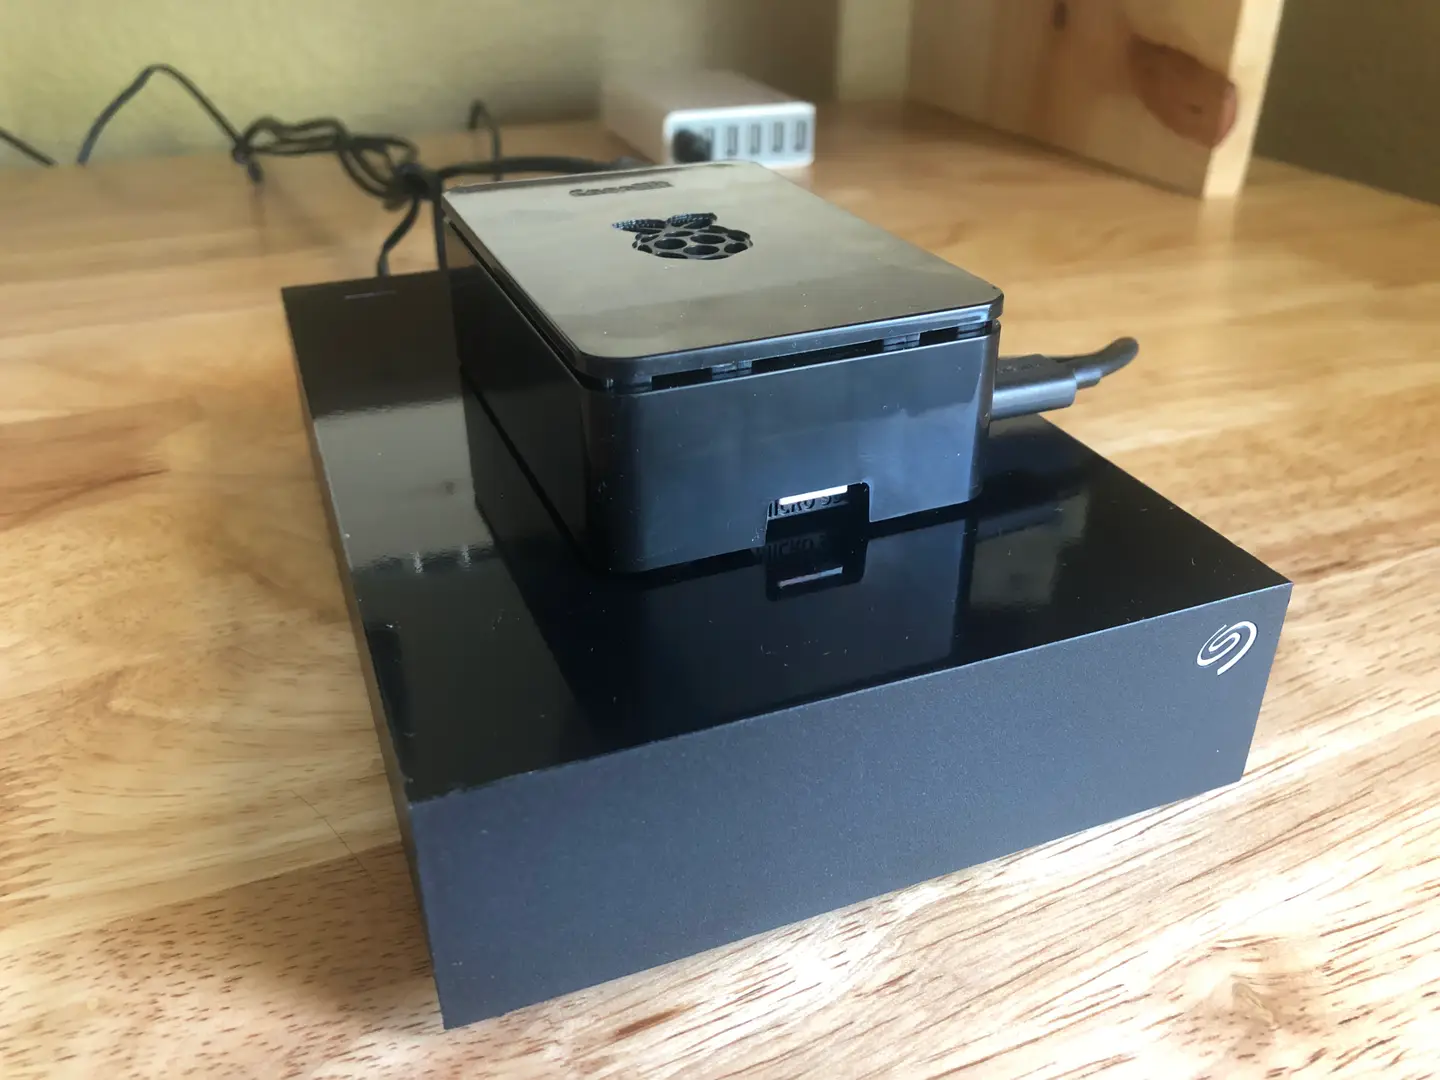
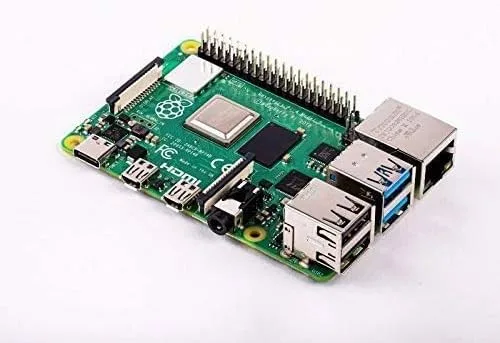
In this guide, we’re going to learn how to run a full node using a Raspberry Pi 4 and an external hard drive.
Why Raspberry Pi?
The Raspberry Pi is small, inexpensive, and meets the minimum requirements for running a Bitcoin full node. A machine running a full node can also be used for other tasks, but because a full node should be connected to the network at least six hours a day (and ideally continuously), it makes sense to use an inexpensive computer dedicated to the task.
One thing you might notice is that the Raspberry Pi doesn’t ship with storage. So generally Raspberry Pi users will run the operating system on a small-ish micro SD card. But because running a full node involves downloading the entire Bitcoin blockchain, which is a few hundred gigabytes (and growing), we’re going to add an external hard drive to the setup. You could also use a high capacity micro SD card or a high capacity thumb drive. Just make sure that with any option you choose, you have over 350GB of available space.
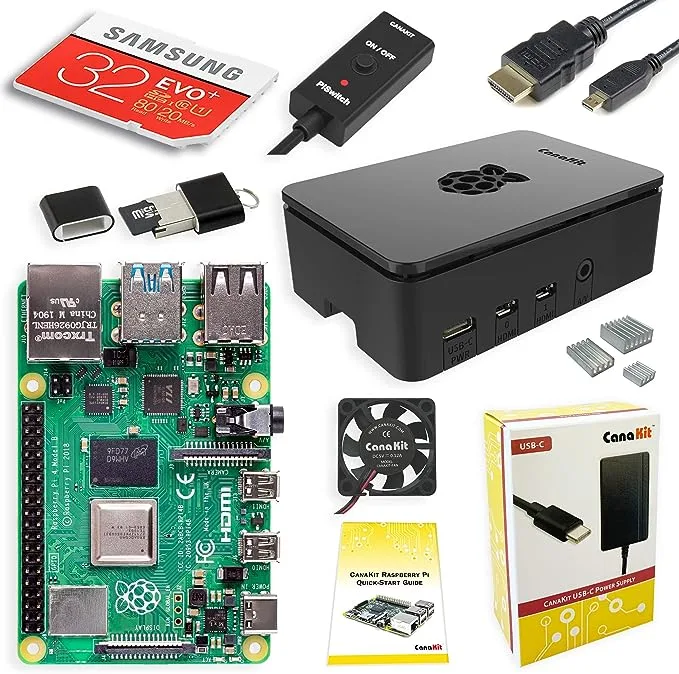
If you’re new to Raspberry Pi, then you’ll likely want to get a kit like the Canakit for the Raspberry Pi 4 that I’m using for this guide.
CLI vs GUI
As we get started, please note that I prefer command-line tools to graphical tools, especially for a project like this. So throughout this guide, you’ll be exposed to commands that need to be executed in the Terminal application running a Unix-based shell. The reason for choosing CLI (command-line interface) over GUI (graphical user interface) is that graphical tools require peripherals (monitor, keyboard, mouse).
If you prefer graphical tools, you can still follow along with this guide, and I will point out which steps will need to be modified.
1 – Install Raspberry Pi OS
Before we begin, we need to install Raspberry Pi OS on the Raspberry Pi. Follow the link in this step for detailed instructions on the process.

How to Install Raspberry Pi OS on Your Raspberry Pi
Get the new official Raspberry Pi OS on your Pi.
While you’ve got your SD card mounted on your laptop, now is a good time to configure WiFi and enable SSH.
2 – Connect the external hard drive
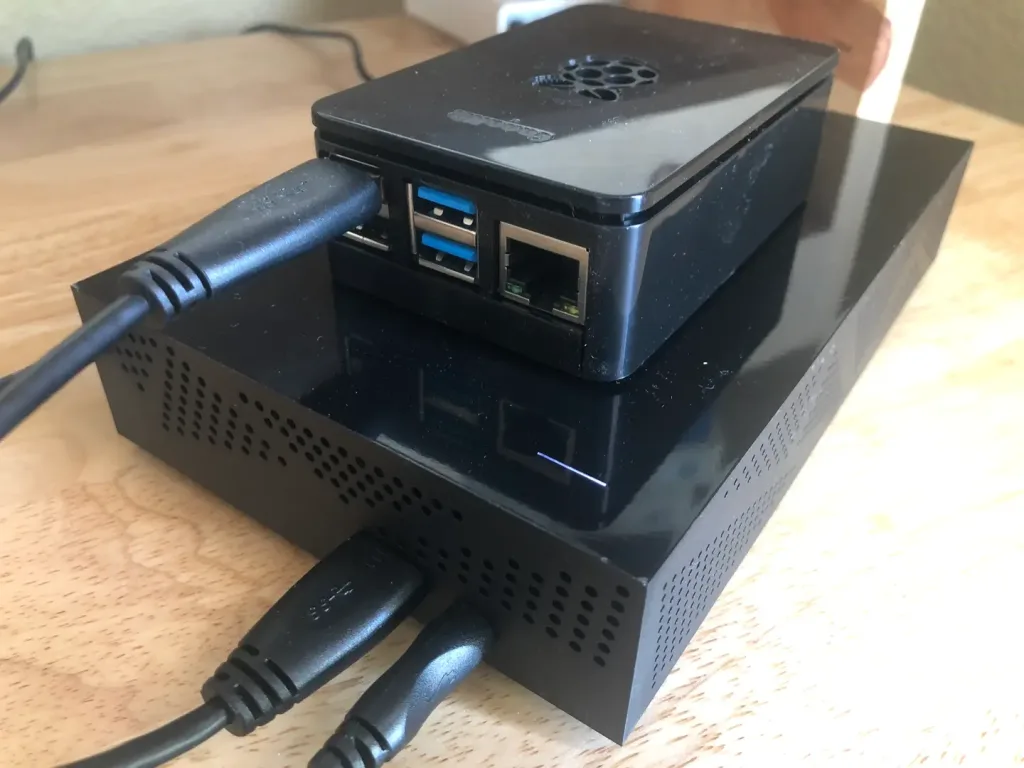
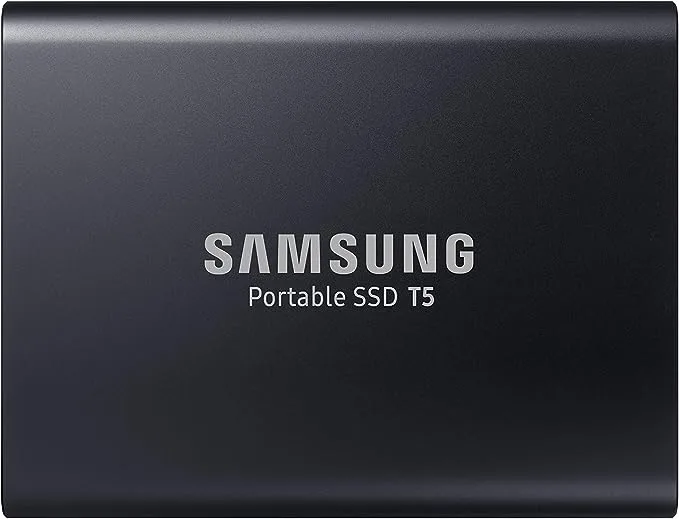
Because the entire blockchain is a few hundred gigabytes, you’ll need to either get a massive SD card or use an external hard drive. I recommend using an external hard drive as long as the read/write speeds are sufficient. The bitcoin.org documentation recommends a storage device with at least 100 MB/s. I’m using a hard drive with 160 MB/s, but I after having gone through this process, I highly recommend using a 1TB+ SSD (solid-state drive). The initial block download (that we’ll cover in more depth later) will take quite a bit of time and using an SSD will make your life easier.
With the hard drive connected, you can now boot the Raspberry Pi.
3 – Connect to the Raspberry Pi
If you’re using the Raspberry Pi desktop and have a monitor, keyboard, and mouse available, you can go ahead and boot the operating system and log in.
Otherwise, you’ll need to connect to the Pi via SSH. We’ve written a detailed guide on how to connect to your Raspberry Pi via SSH, so please refer to that guide if you need additional help.
In summary, you need to get the IP address of your Raspberry Pi and run the following in a Terminal application:
ssh pi@<ip_address>Unless you’ve changed it, the password is “raspberry”.
4 – Configure the external hard drive
In order to use the hard drive to store blockchain data, you’ll need to configure the Pi and mount the drive.
Install the necessary storage drivers
Depending on the hard drive you purchase, you’ll need to install the necessary storage driver for the Pi. The storage driver depends on the file system type used on the hard drive.
You can also reformat the hard drive using a different file system type, but that’s beyond the scope of this guide.
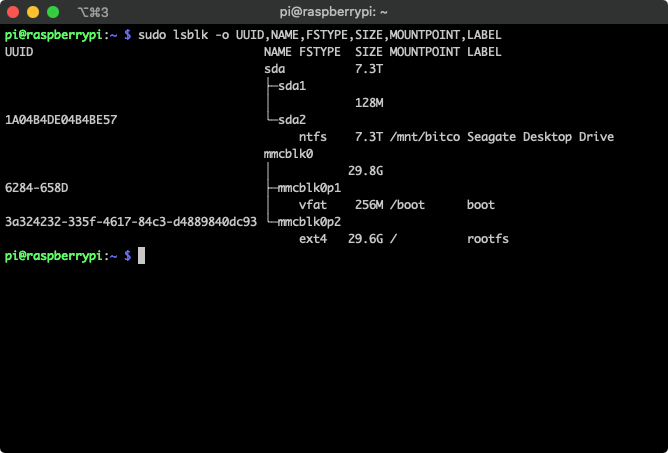
To find the file system type of your hard drive, you can type:
sudo lsblk -o UUID,NAME,FSTYPE,SIZE,MOUNTPOINT,LABELUse the LABEL column to identify your storage device and the FSTYPE column to find the file system type.
ntfs
For ntfs devices, use:
sudo apt-get update
sudo apt install ntfs-3g
exFAT
For exFAT, use:
sudo apt-get update
sudo apt install exfat-fuse
Mount the drive
Get the disk partition location
Next, you’ll need to mount the storage device onto your Raspberry Pi. First, get the location of the disk partition we want to mount using:
sudo blkidAgain, look for the label and copy the first column. It’s often something like /dev/sda1 or /dev/sda2. Mine is /dev/sda2.
Create the mount point and mount the disk
It’s customary (but not required) to put disk mounts in /mnt. Because the device will hold Bitcoin data, we’ll name the mount point “bitcoin”.
sudo mkdir /mnt/bitcoin
sudo mount /dev/sda2 /mnt/bitcoin
Verify the disk was mounted properly
To verify that the disk was mounted correctly, run:
df -hYou should see something like the following:
Filesystem      Size  Used Avail Use% Mounted on
/dev/root        30G  3.0G   25G  11% /
...
/dev/sda2       7.3T  320M  7.3T   1% /mnt/bitcoin
Set up automatic mounts
So far, you’ve mounted the external hard drive manually, but the next time you boot the machine you’ll have to do it again. Fortunately, we can automatically mount the device each time we boot using fstab.
To do this, we’ll need to get the PARTUUID. To get this value, run:
sudo blkidAgain, find the device by the LABEL and take note of the PARTUUID.
Now open /etc/fstab to edit, and append the following line:
PARTUUID=<part uuid> <mount point> <fs type> defaults,auto,users,rw,nofail 0 0Replace <part uuid>, <mount point>, and <fs type> with the correct values. If the fstype is ntfs or fat, add ,umask=000 immediately after nofail.
For example, mine is:
PARTUUID=31324ddc-391f-488f-97db-48a108edfe04 /mnt/bitcoin ntfs defaults,auto,users,rw,nofail,umask=000 0 05 – Install bitcoind
Now it’s time to download and install bitcoind. To do so, go to the bitcoin downloads page and find the option to download Bitcoin Core for ARM Linux. Right click, and copy the link URL.
Back in your shell session on your Raspberry Pi, type:
wget https://bitcoin.org/bin/bitcoin-core-0.20.1/bitcoin-0.20.1-arm-linux-gnueabihf.tar.gzUse the URL you just copied.
Now install bitcoind.
tar xvf bitcoin-0.20.1-arm-linux-gnueabihf.tar.gz
sudo install -m 0755 -o root -g root -t /usr/local/bin bitcoin-0.20.1/bin/*
That’s it! You should be able to see output with the following commands:
bitcoind --help
bitcoin-cli --help
6 – Run the bitcoind daemon
At this point, if you’re using the Raspberry Pi OS Desktop and would prefer to use a GUI, you can skip this step and follow the instructions found here.
With the external hard drive configured and bitcoind installed, you can now run the bitcoind daemon. Using the following command will start the bitcoind daemon specifying our external hard drive as the data directory.
bitcoind -daemon --datadir=/mnt/bitcoinIf everything is successful, you should see the following output:
Bitcoin Core startingA note on the data directory
Since we’re starting the daemon with a non-standard data directory, we’ll need to specify the datadir every time we use the bitcoin-cli command, like this:
bitcoin-cli -datadir=/mnt/bitcoinHowever, if you want to avoid this, you can simply add an alias in your bashrc file. Open ~/.bashrc and append the following:
alias bitcoin-cli='bitcoin-cli -datadir=/mnt/bitcoin'Save the file, then run:
source ~/.bashrcWhat is happening?
The daemon will take some time to start up, but once it does your node will begin to download the entire Bitcoin blockchain.
The entire blockchain is just under 300GB at the moment, so you can imagine that this will take some time. If you need to pause for whatever reason, you can simply run:
bitcoin-cli stopThis will pause everything. When you start up the daemon again, it will pick up where it left off.
7 – Starting the daemon on startup
In the previous step, you manually started the daemon. But if you’re using the Raspberry Pi as a dedicated Bitcoin full node, you’ll likely want the daemon to start whenever the machine boots.
To do so, edit your crontab by running the following command:
crontab -eAnd append the following:
@reboot /usr/local/bin/bitcoind -daemon --datadir=/mnt/bitcoinSave the file and exit. Now the bitcoin daemon will start whenever your system boots.
8 – Test your connection
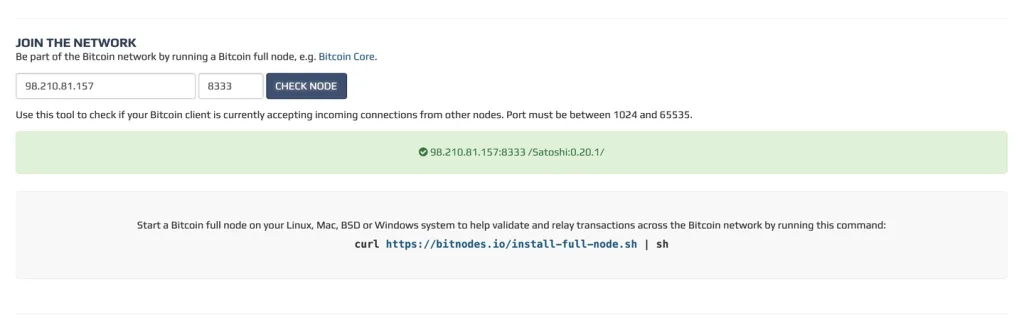
Assuming you’re using your full node to support the Bitcoin network, you’ll need to make sure your node accepts inbound connections.
You can test inbound connections by visiting https://bitnodes.io/#join-the-network. Enter your IP address and the port, if you happened to modify it (the default port is 8333).
9 – Forward port 8333 to your Raspberry Pi, if necessary
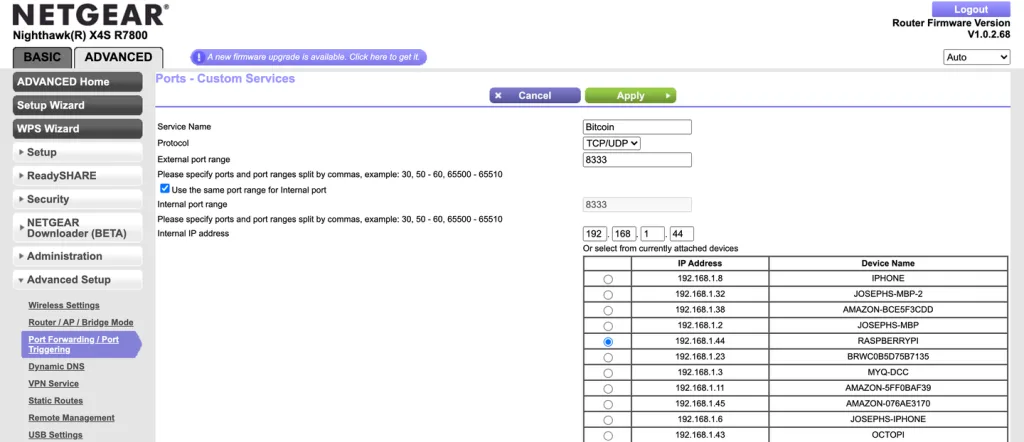
Chances are you’re running your full node on your home network, which means you likely saw an error in the previous step. To resolve this, you’ll need to forward port 8333 from your WiFi router to your Raspberry Pi.
Every router is different, so you may have to do some digging around. Fortunately, we’ve written a guide on how to open a port on your router that should give you some direction.
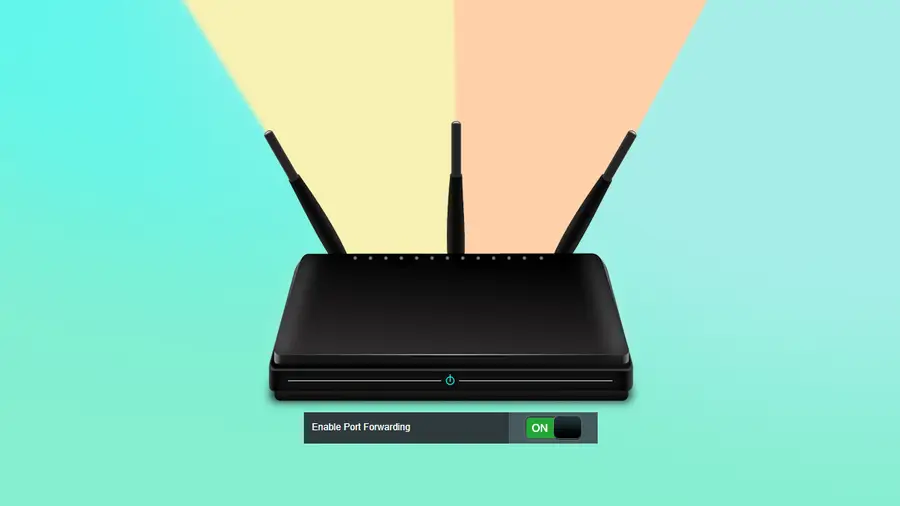
How to Open a Port on a Router
Manually configure the port settings on your router.
After you’ve set up port forwarding, test your connection again using the instructions from the previous step.
10 – Tips for speeding up the IBD (initial block download)
When you spin up your full node for the first time, your node will have no knowledge of the existing blockchain history. So the very first thing it needs to do is sync with the rest of the network by downloading and verifying all blocks. This is a very time and resource consuming operation because it needs to download and verify over 340Gb of data (at the time I’m writing this).
So in this step I’ll provide a few optional suggestions for speeding up the initial block download.
Use an SSD
As I mentioned previously, I opted for an 8TB HDD but should’ve gone with a 1TB SSD at a similar price. Read/write speeds are much faster on the SSD, so this is the best way to eliminate a potential bottleneck on disk IO.
Use a more powerful computer to do the initial download
While doing the initial block download on my Raspberry Pi, I noticed that it was CPU constrained the entire time. So to speed things up, I opted to spin up a powerful, compute-optimized virtual machine on GCE. If you’re curious, I used a c2-standard-8, which comes with 8 CPUs and 32GB of memory. I attached a 500GB SSD and a 500GB HDD (I would’ve just used a 1TB SSD, but I needed to get a quota lifted first). The entire blockchain was downloaded and verified within 12 hours.
If you’d like to use this method, be warned that you’ll still need to transfer the entire blocks and chainstate directories from the virtual machine to your Pi, replacing the existing directories.
If using a high-power virtual machine on GCP or AWS isn’t an option, you can try any other more powerful desktop or laptop you have available.
11 – What’s next?
Downloading the blockchain will take a LONG time. Check your ISP account and make sure you have enough data available on your plan; otherwise, you might get throttled or shut down. Once the blockchain downloads, you’ll be in business.
bitcoin-cli
Take some time to learn the bitcoin-cli. You can start by listing all of the commands:
bitcoin-cli helpUse your wallet
If you’d like, you can use the wallet on your full node to store Bitcoin. In reality, this isn’t the most convenient or safe way to store Bitcoin, as it’s hard to use and connected to the Internet at all times.


