How to Set Up Quick Connect on a Synology NAS
Share
Interests
Posted in these interests:


Synology is one of the most popular creators of Network Attached Storage devices on the market today, and for great reason — they’re really good at what they do. They consistently make devices that stand the test of time and feature top-notch software that makes the process of running a home server as easy as eating a slice of pie.
Still, if this is your first time setting up a Synology NAS, you probably have a few questions, and the most pressing is probably “How do I log into the darned thing?”
Luckily, Synology has made it really easy to log in securely. You can connect using the Internet Protocol (IP) address of your NAS, use the handy companion desktop application developed by Synology, or follow this guide to set up Synology QuickConnect, the absolute best method for securely signing in to your NAS dashboard.
1 – First navigate to your Synology NAS home screen
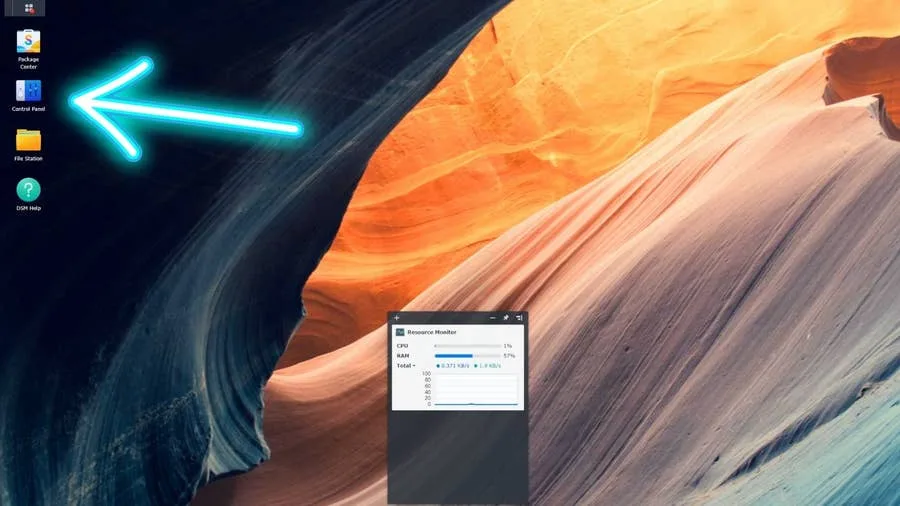
The easiest way to get access to your new Synology NAS is to look it up by its IP address. You can also use the Synology companion app to look up any Synology products connected to your local network as well.
Once on your Synology desktop, open your Control Panel.
2 – Open Synology Account
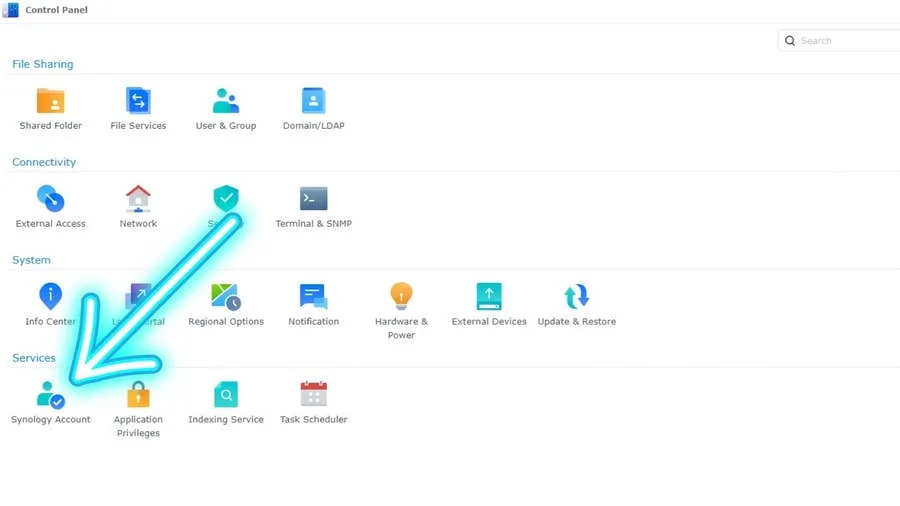
From the control panel screen, open the Synology Account tab by clicking on “Synology Account” under “Services”.
3 – Sign into your Synology account
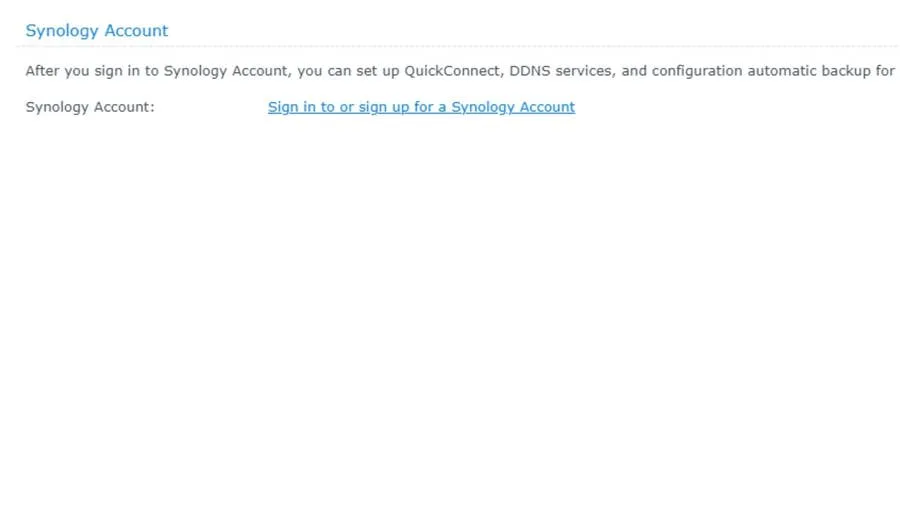
If you have a Synology account already created, you can use it to sign in here. Or simply create a new Synology account.
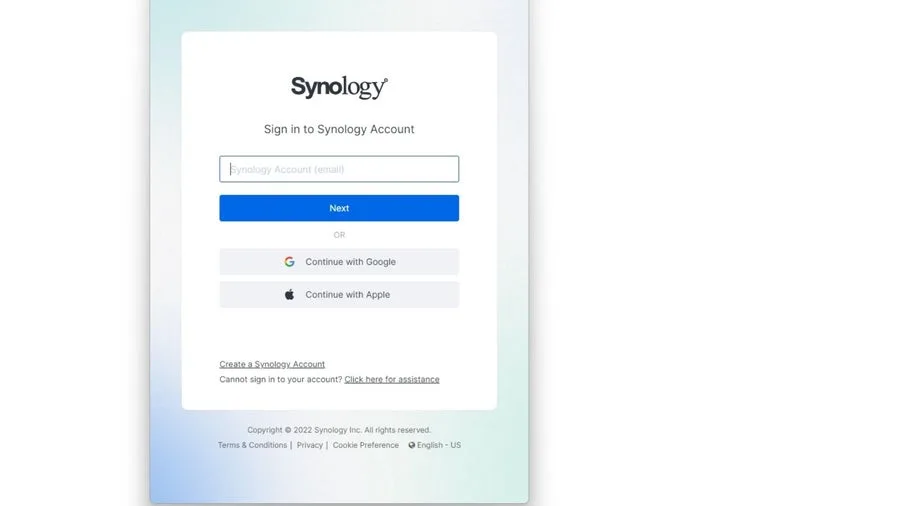
4 – Confirm linked Synology account
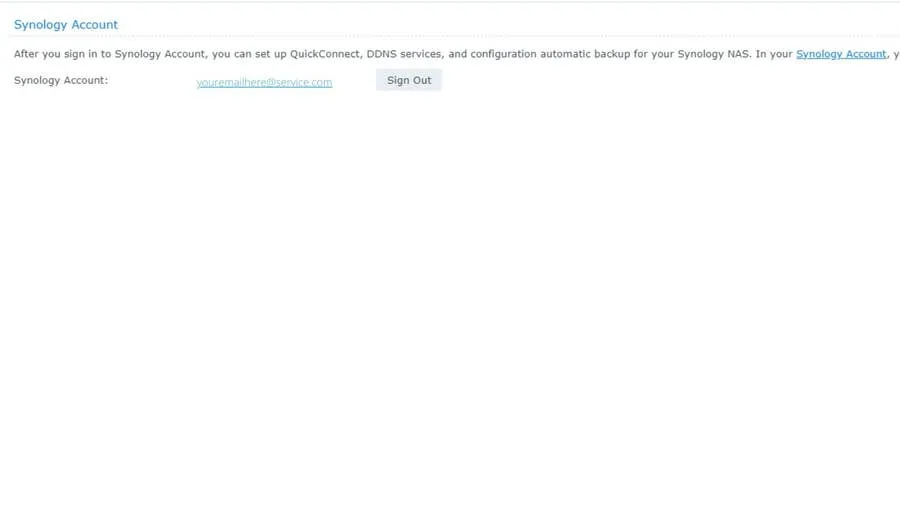
Once your account has been linked, your email address will be displayed, and you’ll see the “Sign Out” button.
5 – Navigate to External Access on your Synology control panel
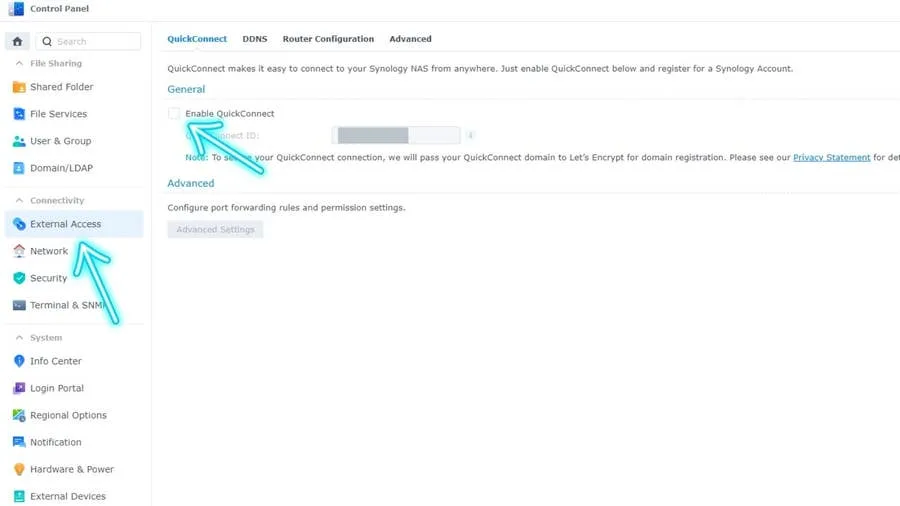
In your Synology control panel, the external access feature is located in the Connectivity section.
6 – Create your Synology NAS QuickConnect ID
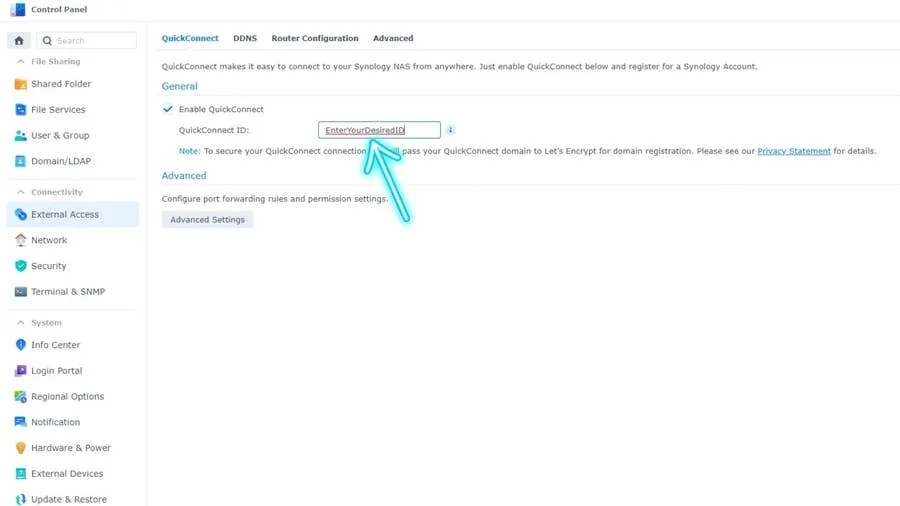
- Click the checkmark for “Enable QuickConnect”
- Enter your unique QuickConnect ID. This should be a unique ID but something you’ll be able to remember and type easily. *Click “Apply” at the bottom-right corner of the window.
Once you create your new ID, the system will take a few moments to verify it and set it up. Then you’ll be able to use your QuickConnect ID to sign in to mobile services like Synology Photos, as well as your Synology NAS desktop, securely!

