How to Change the Windows 11 Start Menu and Button
Share
Interests
Posted in these interests:

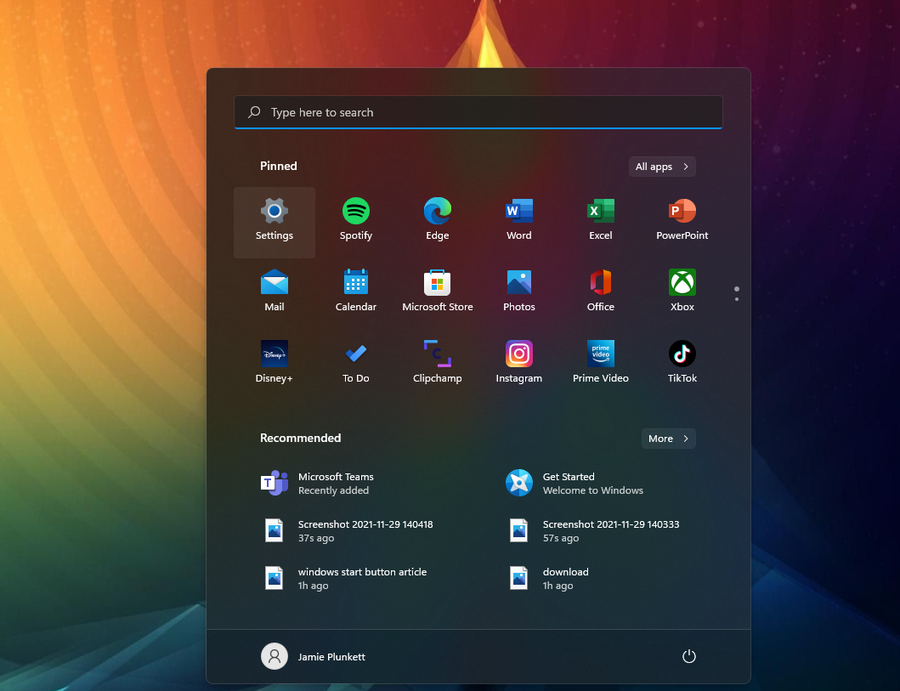
As with every update, Microsoft has changed Windows 11 to look different than its predecessors, and while the update looks modern and clean there are some interesting changes. Arguably the most jarring of all the changes is the one made to the Windows 11 Start Menu, which looks completely different.
Instead of a clean, easy-to-navigate series of sections, the Windows 11 Start Menu offers you a variety of “Pinned” apps and a list of “Recommended” items that vary from recent documents, to downloaded images, to recently added apps. Personally, I spent two full minutes looking for my Settings app before discovering it neatly wedged between the Calendar app I never use and Photos.
If you share this frustration with the unorganized new look of the Windows 11 Start Menu, fret not. While not completely customizable, there are a handful of things you can do to personalize the Windows 11 Start Menu and make it more functional for your every day use.
1 – Change Your Pinned Apps
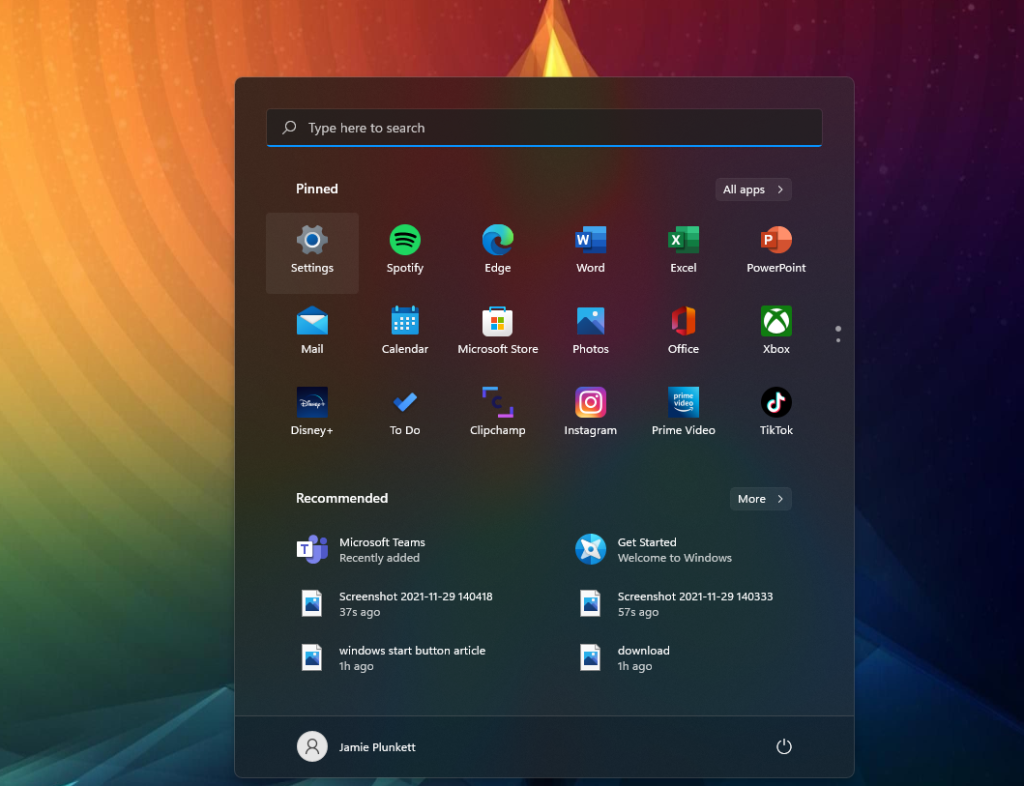
Note: Nothing you do to the start menu page will impact your full list of apps. To see all of your apps, simply click the “All Apps” tab at the top right of the start menu.
You can modify what appears on your Windows 11 Start Menu by moving, pinning, and removing specific apps under this section.
Moving a Pinned App
You can simply click and drag any app on your Pinned list into the position of your choice. As you can see, I opted to have my settings app in the top right hand corner for easy access. Instead of dragging, you can also right-click on an app and select ‘Move to Top’ to have an app moved to the top of the pinned list.
Remove a Pinned App
Simply right-click an app and select ‘Unpin from Start’ to remove an app from the Start Menu.
Pinning an App
If you have an unpinned app that you want to pin, start by clicking ‘All Apps’ on the top right of the Start Menu. Then, find the app you’d like to pin and right-click, then select ‘Pin to Start.’ You’ll see the app on your pinned list when you go back to your Start Menu, and from there you can drag the app wherever you please.
2 – Change Recommended Files
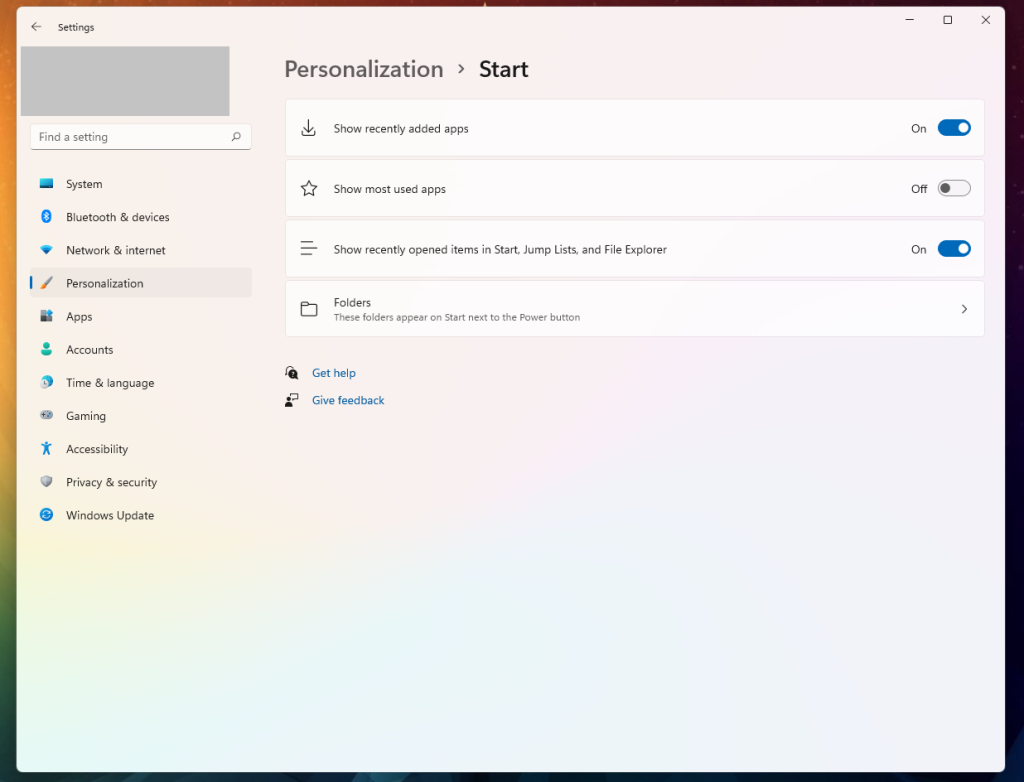
For this step, you’ll need to navigate to Settings -> Personalization -> Start, and you can turn off or on several options including ‘show recently added apps.’
If you turn off all the options, the Recommended section will appear empty.
3 – Add Folders
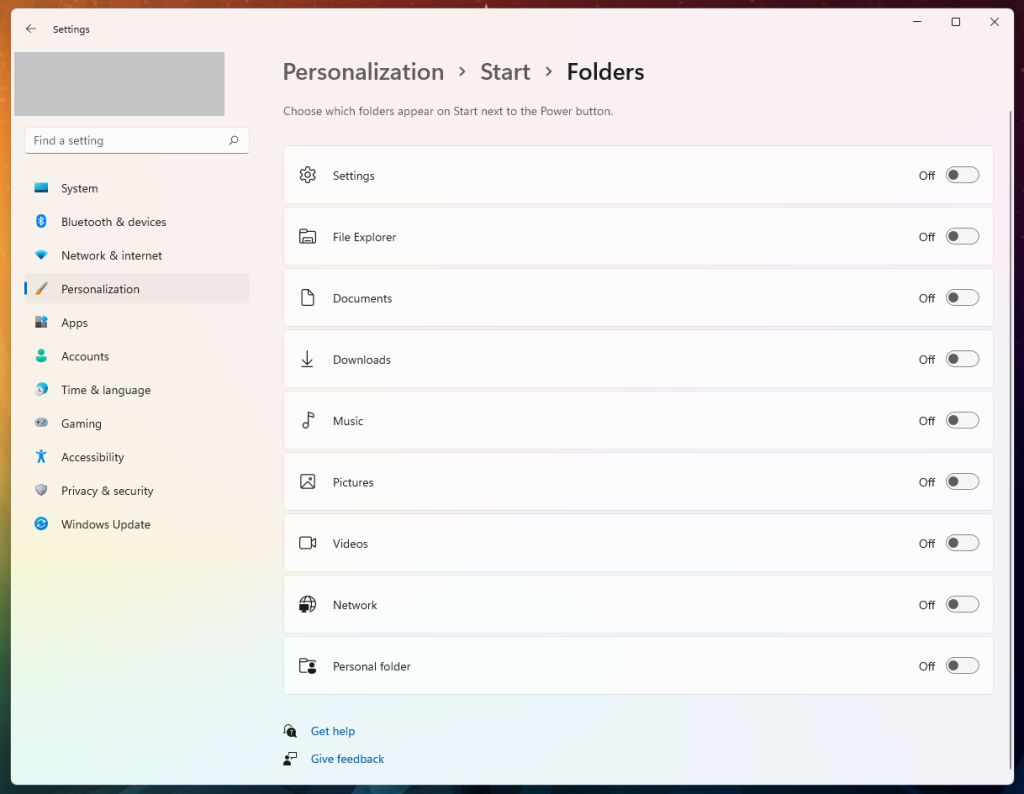
Adding folders to the bottom of the Start Menu is another way to organize and personalize your Start Menu experience.
To do so, go to Settings -> Personalization -> Start -> Folders.
There, you’ll see a list of folders you can access from the Start Menu. Simply check any of the folders you want to ‘On’ and they’ll appear for easy access at the bottom of the Start Menu.
4 – Move the Start Button
You probably also noticed that the Windows 11 taskbar is centered at the bottom of your screen, a departure from the normal bottom-left corner. Check out our quick two-step guide on how to move the Windows 11 start button back to its rightful (or left-ful) place.

